This article provides guidance for NHSmail Phone System Administrators on how to assign and unassign numbers to users within their organisation via individual and bulk assignment.
There are two ways to assign a number to an individual user via the NHSmail Teams Phone System Power App:
- Locate the user and assign or unassign the user a number
- Locate the number and assign or unassign to a user
This article will cover:
Individual Number Assignment
Locate a User and Assign / Unassign a Number
The first method to assign numbers to individual users is to locate a user and then assign / unassign them a number. Please follow the steps outlined below to do this.
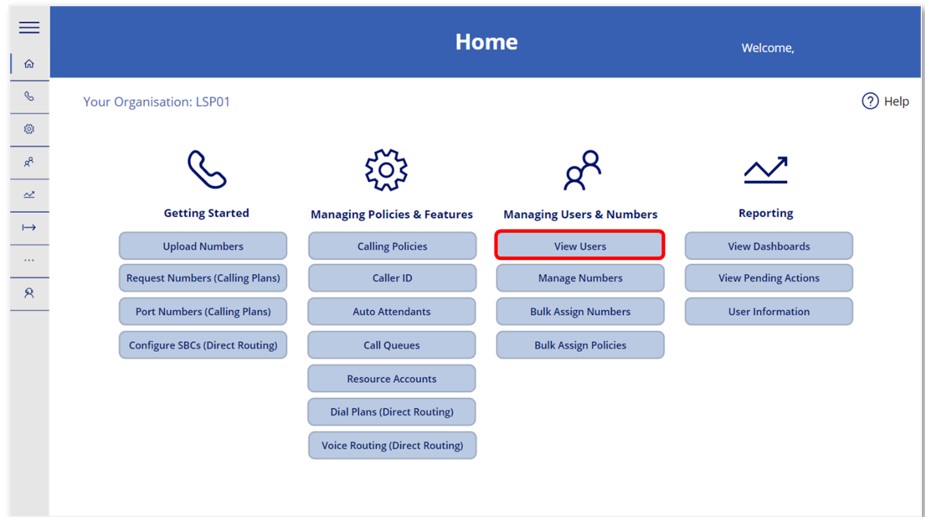
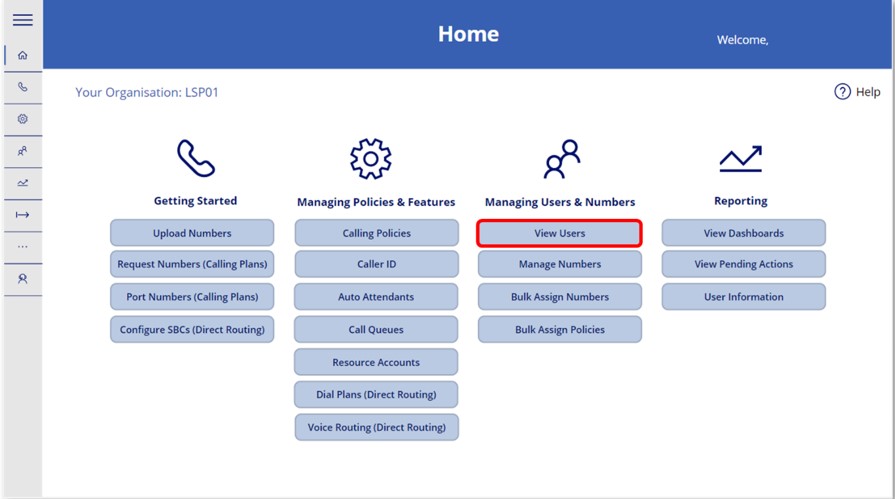 1. Log in to the Phone System Power App and select the ‘View Users’ option from the Home screen.
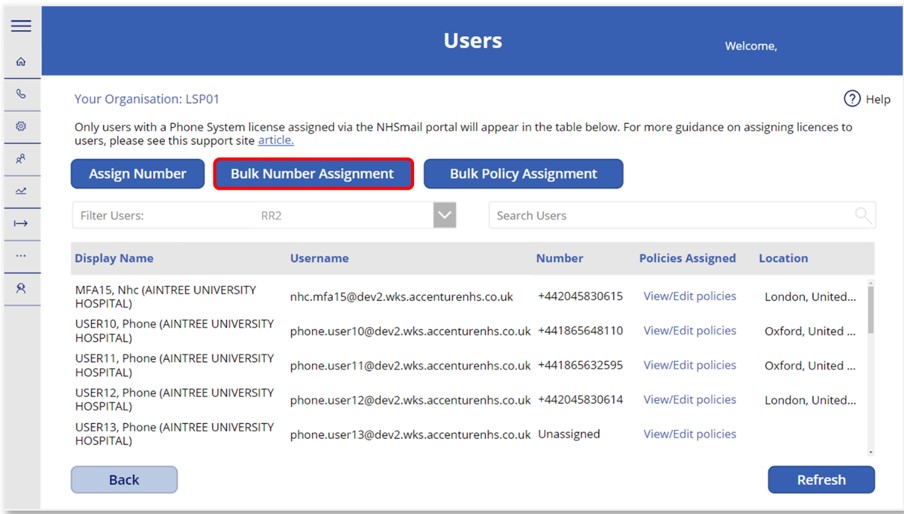
 2. On the Users screen landing screen, select a user and then select ‘Assign Number’, which can be found above the summary box of users. View the ‘Number’ column to check if the user already has a number assigned.
If the user has an existing number assigned, this will be shown in the current number box. If the user has no number assigned, this field will be blank.
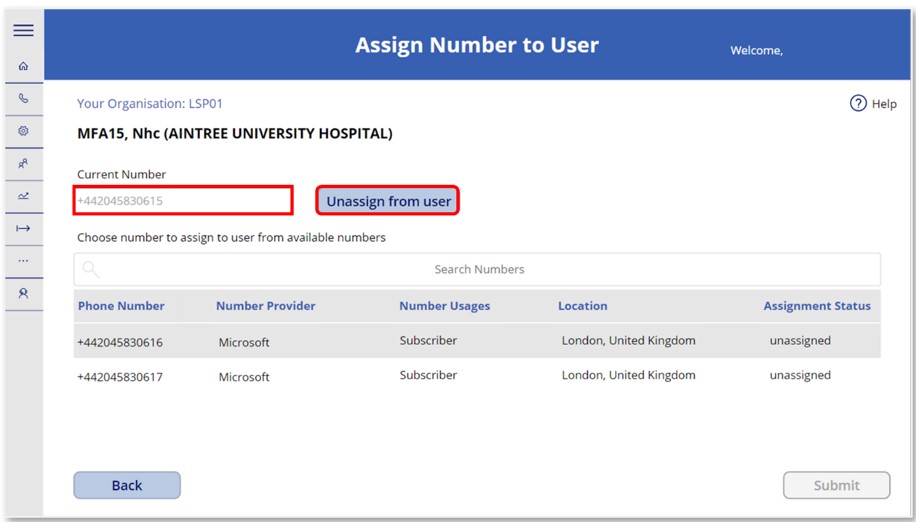 3. To unassign a number select the ‘Unassign from user’ If the user already has a number be assigned, you will need to unassign the current number before assigning a new number.
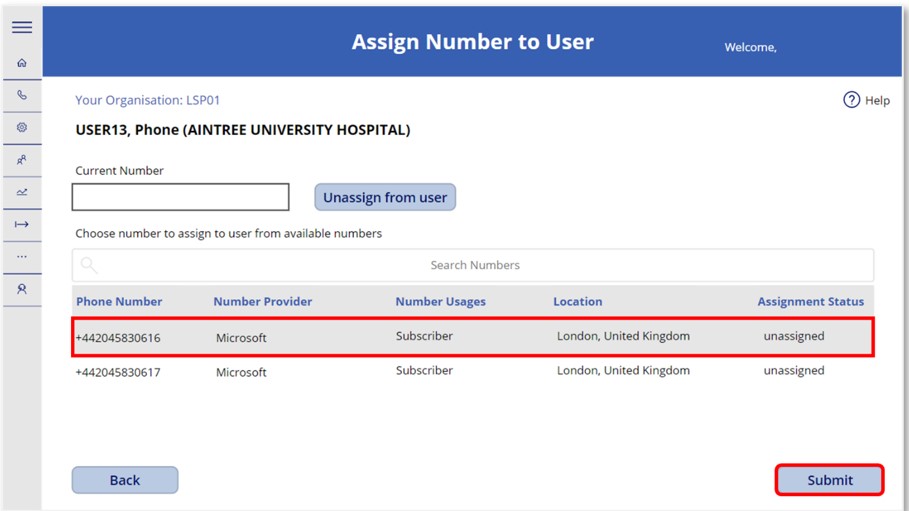 4. To assign a new number to the user, select the preferred number from the list of available numbers and then click ‘Submit’.
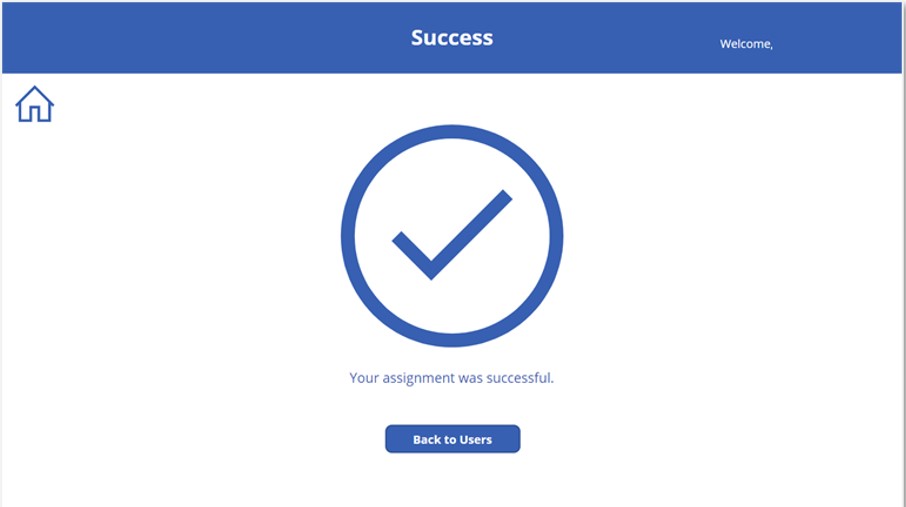 5. After selecting ‘Submit’ you will be directed to a success screen confirming that the number has been assigned successfully to the user.
Locate a Number and Assign / Unassign from a User
The second method to individually assign numbers, is to first locate the number and then to assign it to a user.
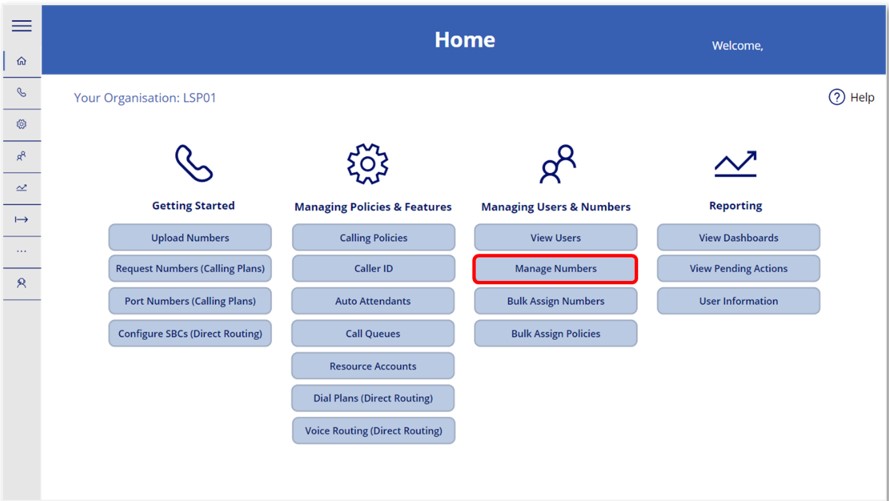 1. On the Home screen, select the ‘Manage Numbers’.
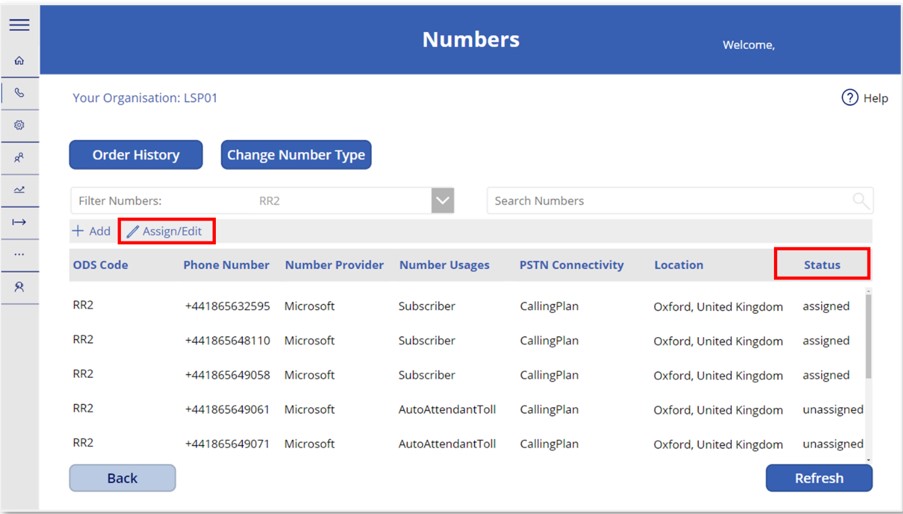 2. To assign a number to a user, select the number and then click the ‘Assign/Edit’ button. View the ‘Status’ column to check whether your chosen number is already assigned.
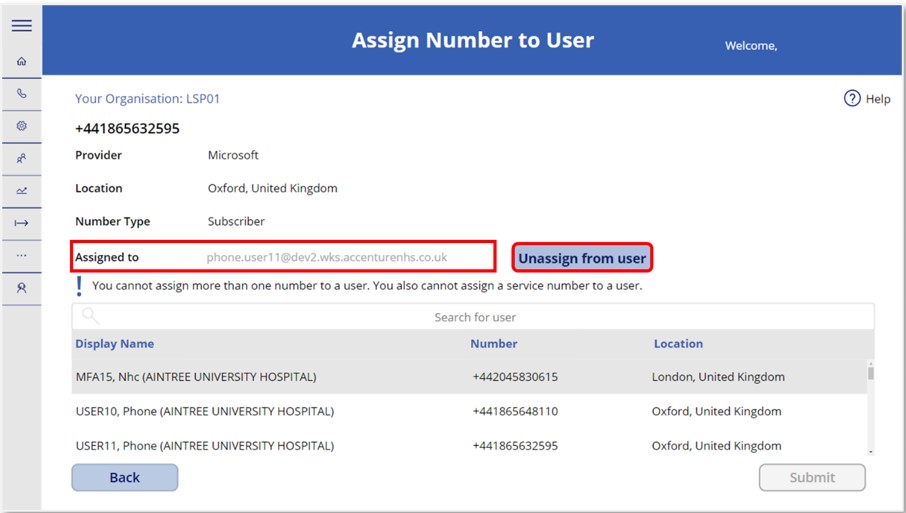 3. If the number is already assigned to a user, you can unassign number from the user by selecting the ‘Unassign from user’.
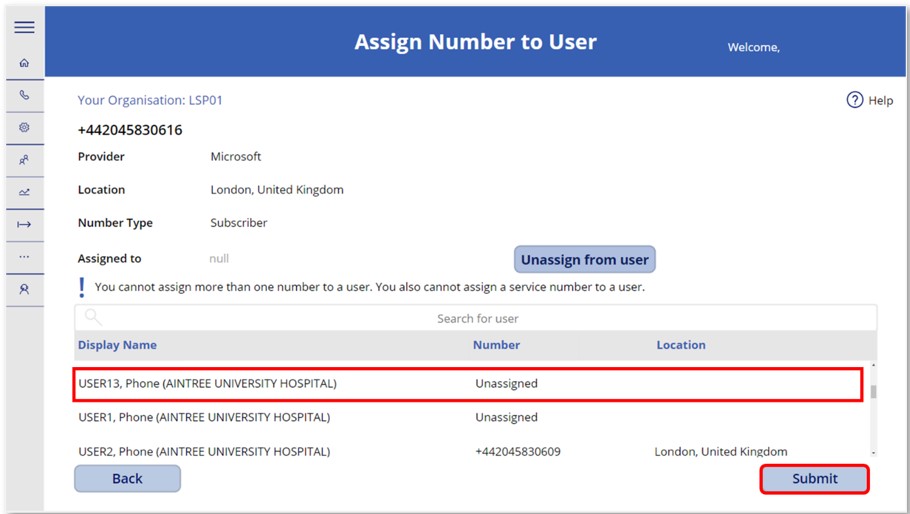 4. To assign the number to a new user, scroll or search from the list of users without a number assigned. Select the user you wish to assign the number to and then select ‘Submit’ to process all changes.
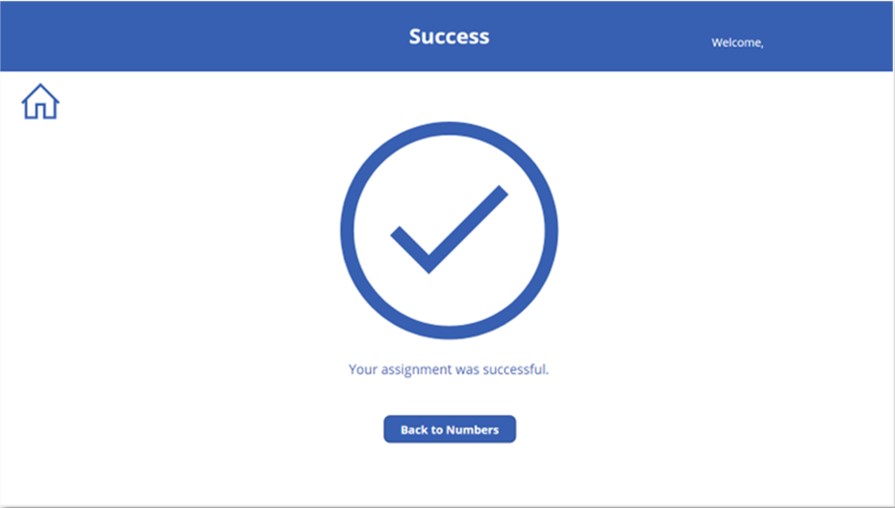 5. You will be directed to a success screen confirming that your assignment was successful.
Bulk Number Assignment
NHSmail Teams Phone System Administrators can also assign numbers to users in bulk. We recommend that bulk assignment of numbers is processed in batches of 500 or less at a time. Should you try and process more than this, you may run into issues.
Follow the steps detailed below to complete this action.
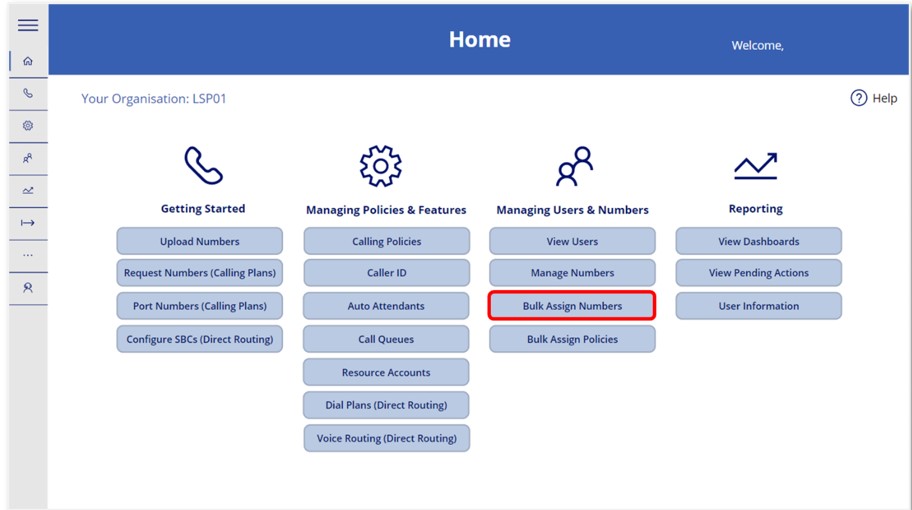 1. From the Home screen, select ‘Bulk Assign Numbers’. Alternatively, from the ‘View Users’ screen select the ‘Bulk Number Assignment’ option.
 2. You will then be directed to the Assign Numbers in Bulk screen, where you will be able to upload a file containing the numbers you wish to bulk upload. Select ‘Download Template’.
 3. In the downloaded template, add in the UPN of the users you wish to assign numbers to and then the numbers, save the file (as a.csv file) and then attach the file in the Attachments box. Select ‘Submit’ to process the bulk upload.
4. The next screen will be a success screen, confirming that the bulk upload request has been sent successfully.
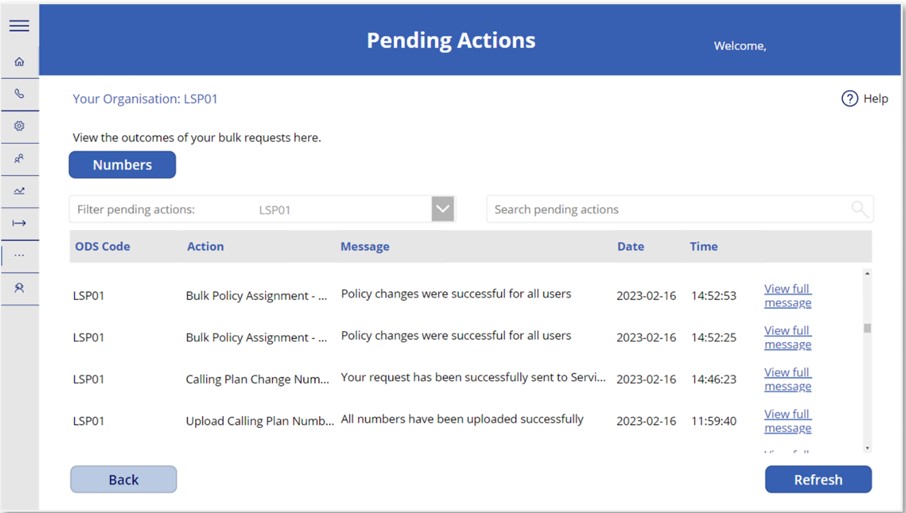
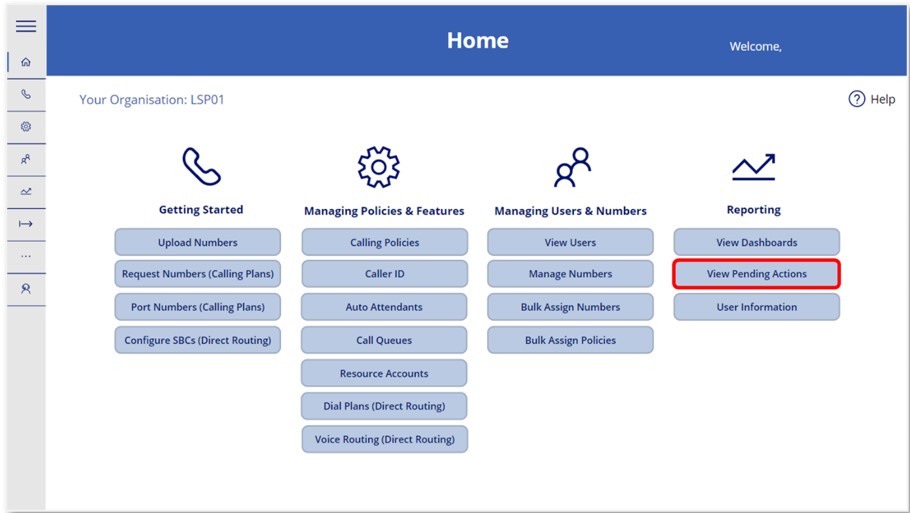 5. You can view the progress of your bulk assignment request by navigating to the ‘Pending Actions’ screen from the Home screen. Here you can view and address any unsuccessful processes.
| Last Reviewed Date | 17/04/2023 |