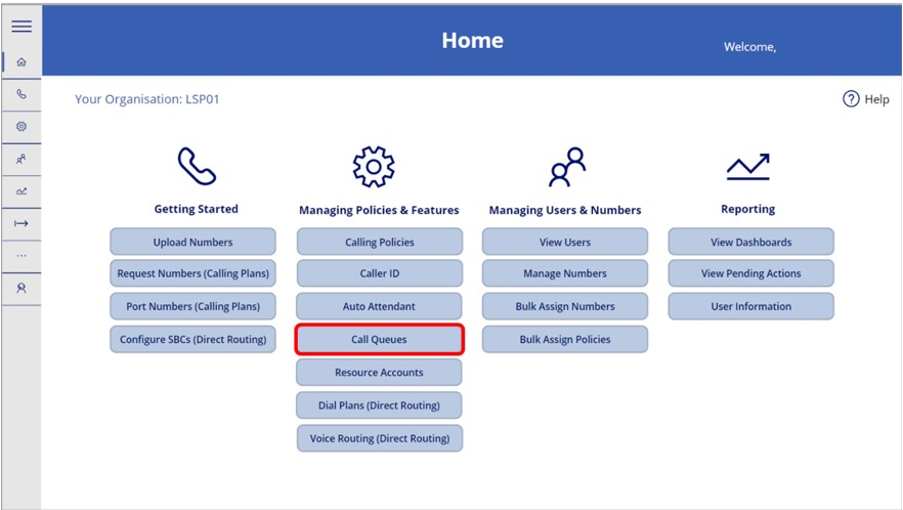
 1. Log in to the Phone System Power App and select ‘Call Queues’ from the Home screen.
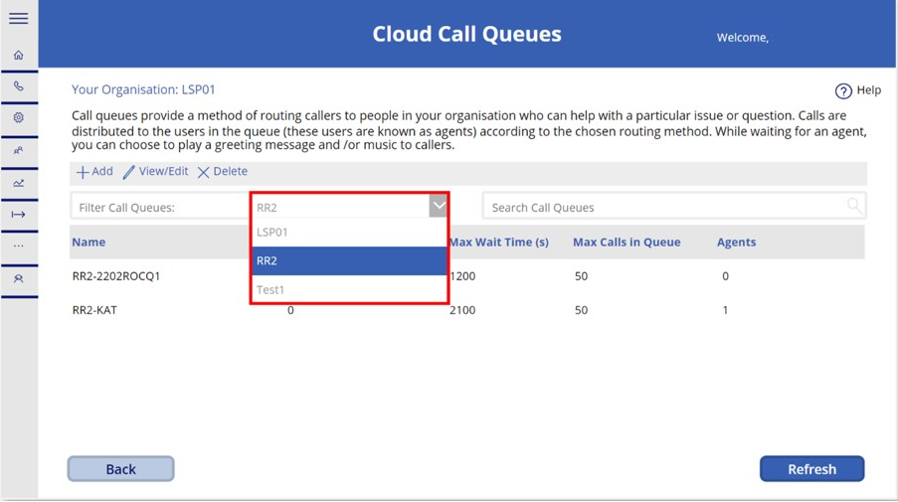 2. Select the ODS code of the organisation you wish to add a Call Queue for.
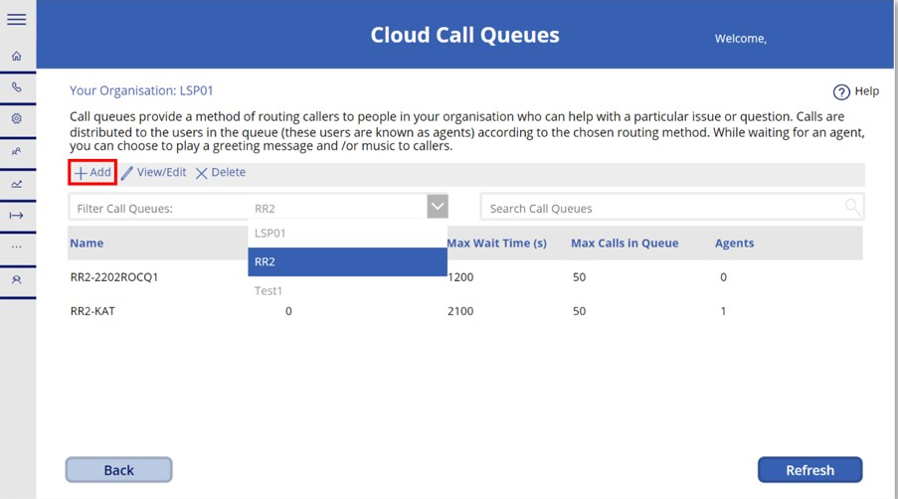 3. To add a new Call Queue, select the ‘+ Add’ option from the toolbar. You will be directed to the Add Cloud Call Queue landing screen.
4. On the Cloud Call Queues screen, you will be able to confirm the following information and policy settings:
- Name
- Resource Account
- ODS code
- Assign calling ID
- Greeting
- Music on hold
- Call answering agents
- Routing method
- Conference mode
- Presence-based routing
- Call agents can opt out of taking calls
- Call agent alert time (Optional)
- Maximum calls in queue (Optional)
- Action of where to redirect to when maximum calls are reached (Optional)
- Maximum wait time (Optional)
- Action when call times out (Optional)
See the below steps for further guidance on how to complete all options on this screen.
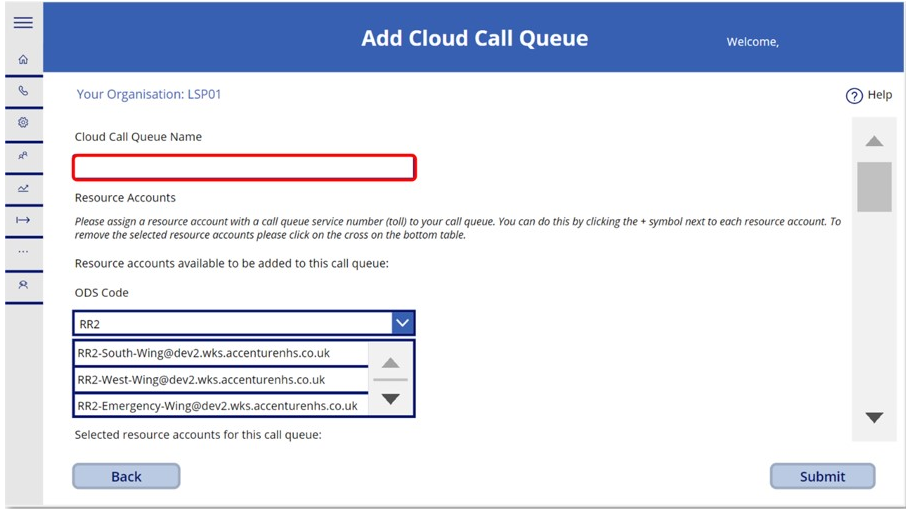 5. Please provide a name for the Call Queue. There are no specific naming conventions to follow, but the name you choose will be prefixed with your organization’s ODS code. For example, if you choose “Call Queue 1,” it will be prefixed with your organization’s ODS code as “xxx-Call Queue 1,” where “xxx” represents your organization code. Please ensure that the name you select does not include any special characters, this will cause issues when attempting to view your call queue
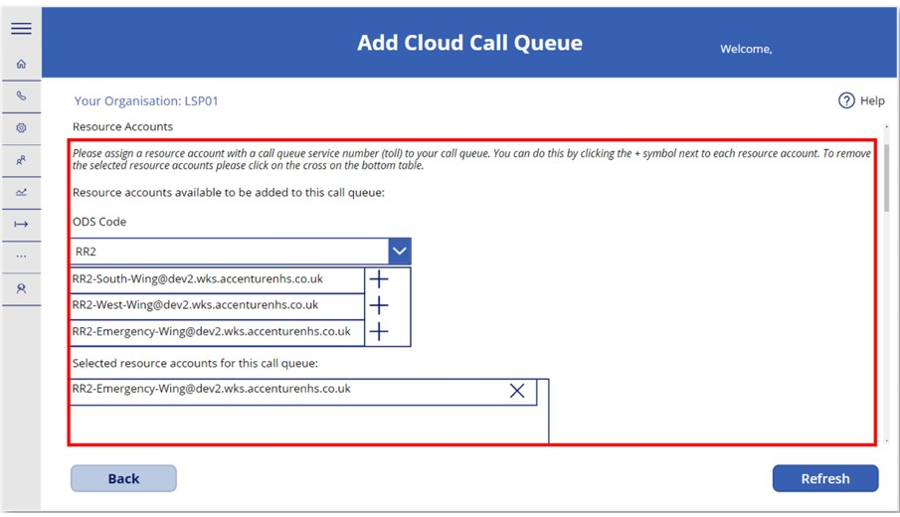 6. Next, you will need to add at least one resource account.
If you have permissions to manage policies for multiple organisations, you can use the ODS search functionality to find the correct Resource Account. Once you have found the Resource Account/s you wish to add, select the ‘+’ next to the selected Resource Accounts. Select ‘X’ if you need to remove.
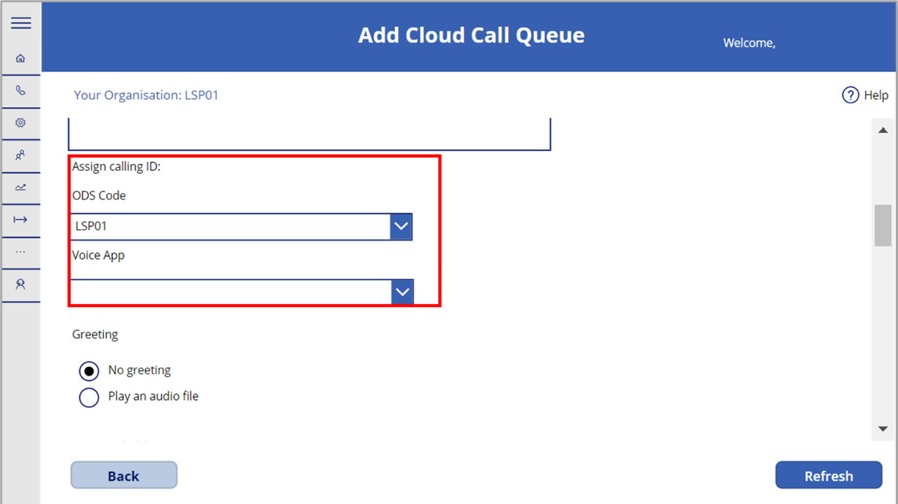 7. The next policy setting on the Add Cloud Call Queue screen is assigning the Calling ID. Select your ODS code and Voice App from the drop-down lists.
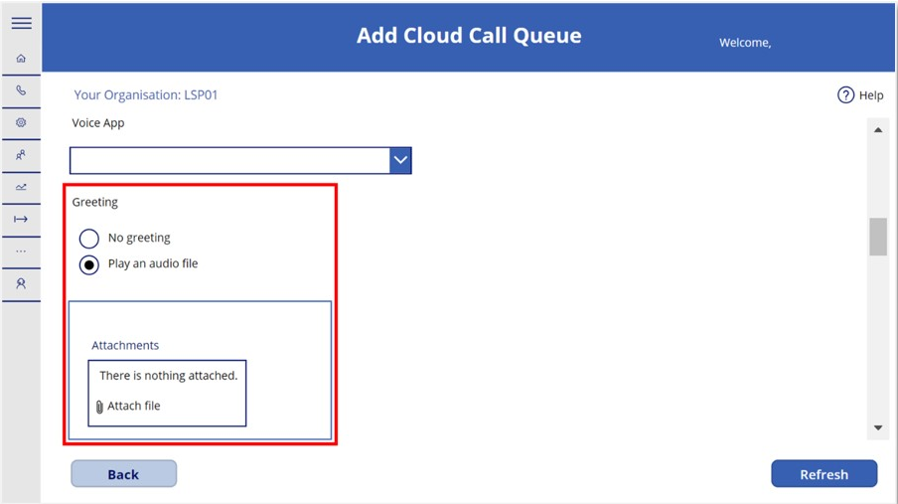 8. Next, select whether to add a greeting message. If ‘Play an audio file’ is selected, there will be an option to upload an audio file as an attachment.
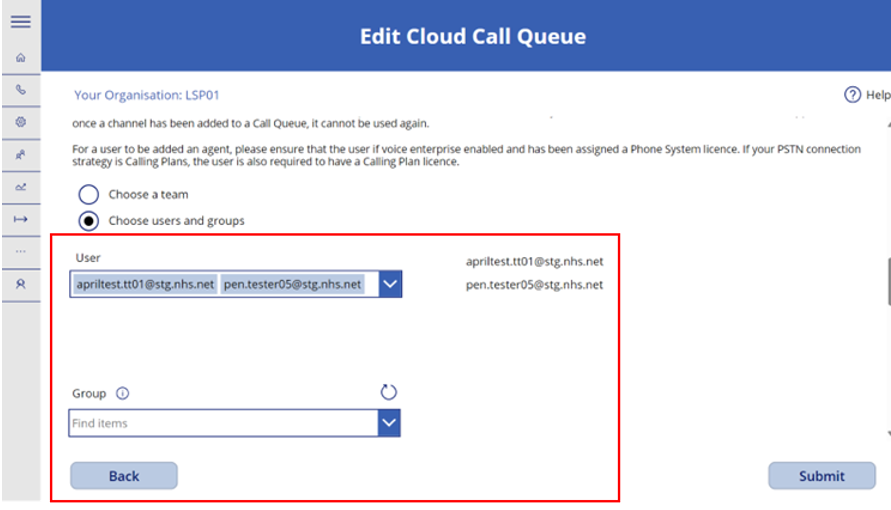 9. Scrolling further down the options on the Add Cloud Call Queue screen, you’ll next need to configure the call answering process for the Call Queue. You can add agents, either choosing a Microsoft Team or choosing multiple users and groups (i.e., Distribution lists/ Distribution groups). Selecting multiple users will allow you to dictate ordering when using serial routing. The order of users can be altered when creating or editing a call queue by deselecting and reselecting the users in your preferred order.
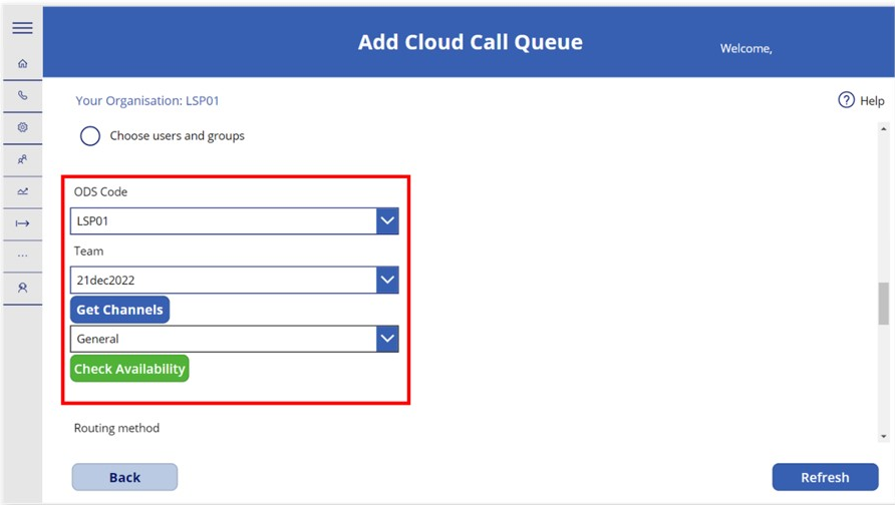 10. To check if a Teams channel is available to use, select the intended Team, click ‘Get Channels’, then select the desired channel, click ‘Check Availability’. If the Team and Channel are available, the ‘Check Availability’ button will turn green. If unavailable, it will turn red. You will be unable to proceed if this Team is a used by another Call Queue.
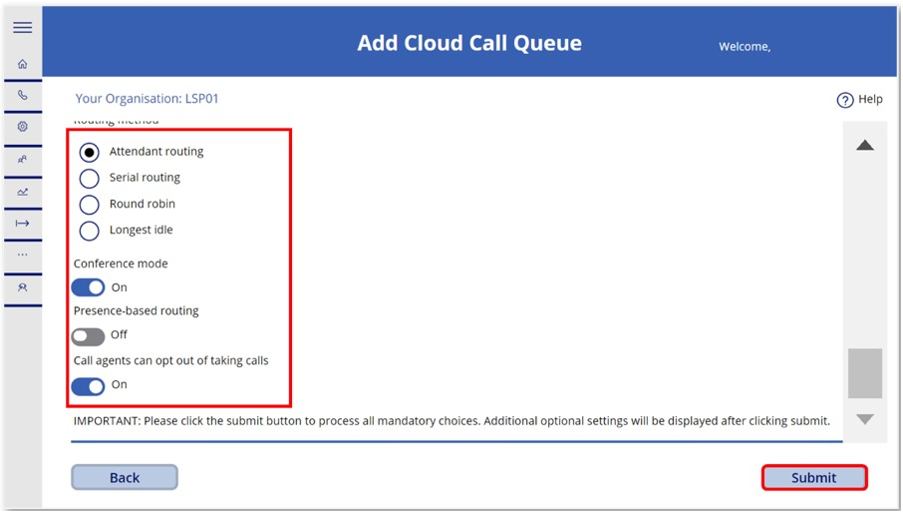 11. Next, configure the settings for ‘Conference Mode’, ‘Presence-based Routing’ and ‘Call agents can opt out of taking calls’ options. Select ‘Submit’ to create the Call Queue.
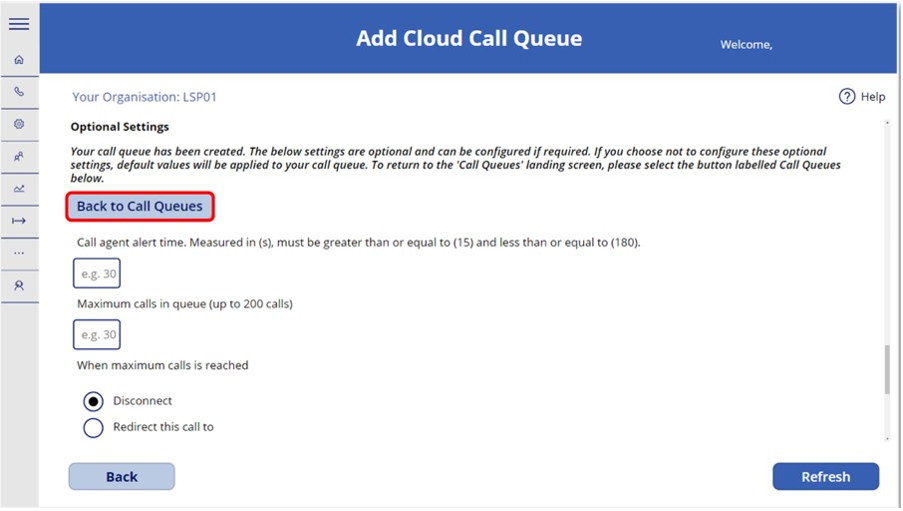 12. The same Add Cloud Call Queue screen will load again confirming that your Call Queue has been created. Beneath the confirmation message, you will be able to configure several optional settings. To do this, follow the steps laid out in the Configuring Additional Optional Settings section of this article.
If you do not wish to configure any additional optional settings for the Call Queue you have just created, select the ‘Call Queues’ button to be directed back to the Call Queues Home screen.
| Last Reviewed Date | 21/03/2025 |