This article provides guidance for NHSmail Teams Phone System Administrators who wish to create, edit, update, and delete Auto Attendant policies for their organisation/s.
Auto Attendants are policies which direct people who call in to a menu system so that they can be connected to the right department, person, or the operator within your organisation. When creating an Auto Attendant, you can choose greetings, set-up menus, and choose how to redirect calls.
Auto Attendant policies can be created and configured through the Phone System Power App as per your organisation’s requirements. This article will outline how to complete the following actions:
Adding a new Auto Attendant
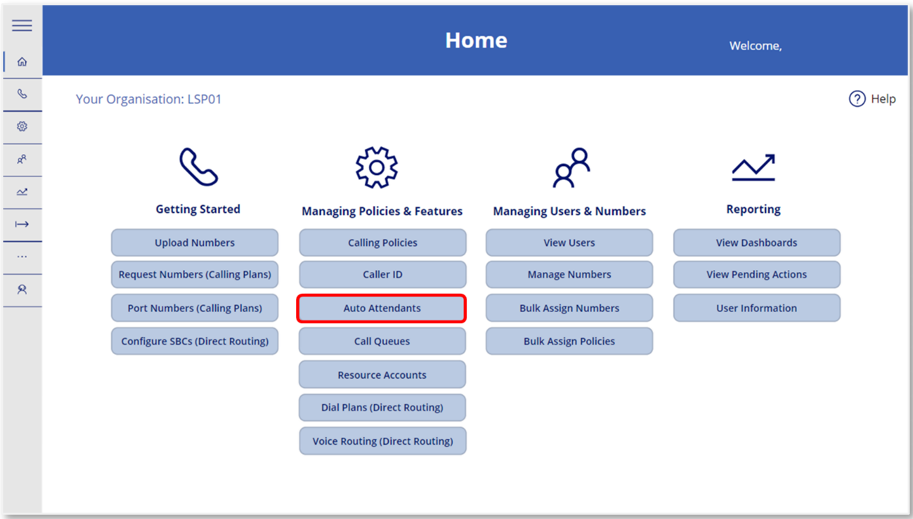 1. Log in to the Phone System Power App and select ‘Auto Attendants’ from the Home screen.
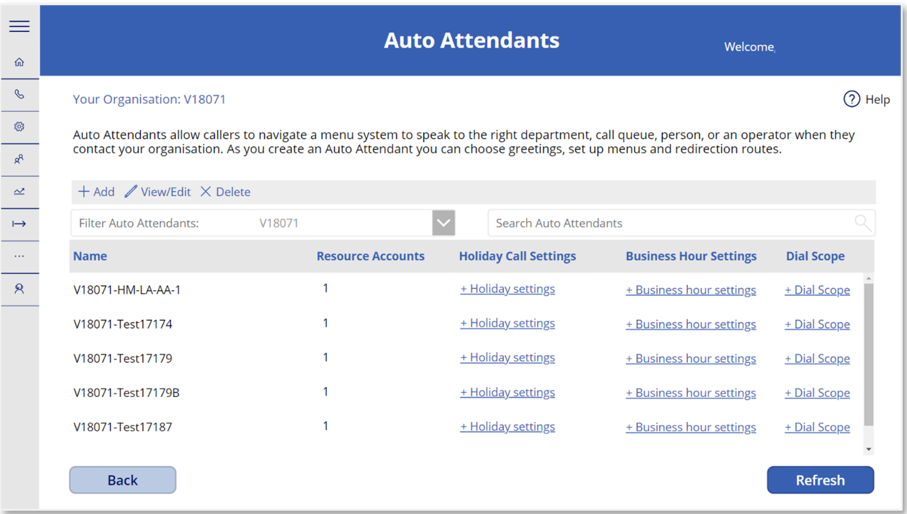 2. You will be directed to the Auto Attendants landing screen where you will have the option to Add, View/Edit and Delete Auto Attendants.
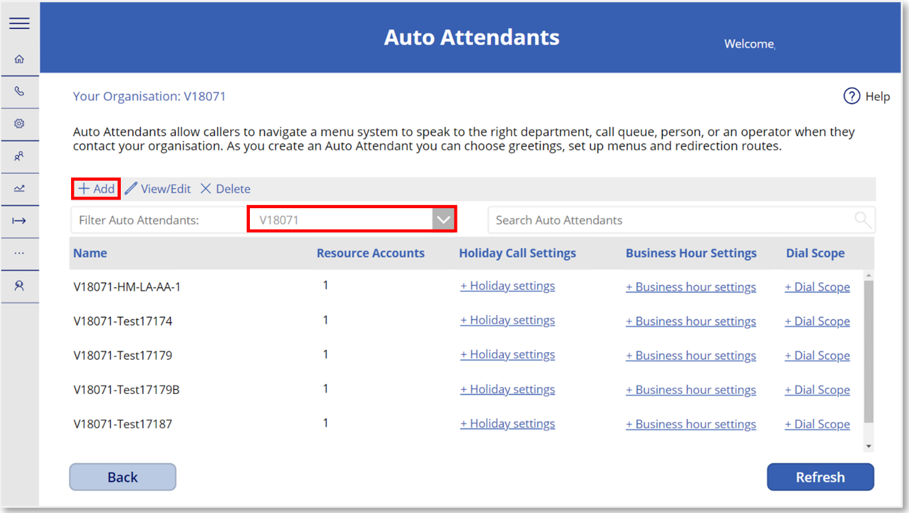 3. To add a new Auto Attendant, select the ‘+ Add’ from the toolbar. You will be directed to the Add Auto Attendant screen.
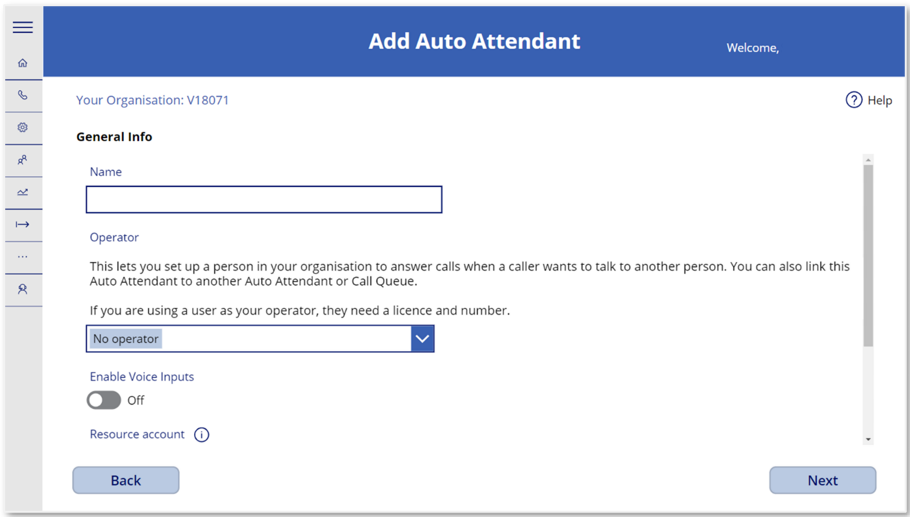 4. On the Add Auto Attendant screen, you will need to provide the following information and set parameters which suit your organisation’s requirements:
- Name – Enter a name for the new Auto Attendant. There are no naming conventions which you need to follow for this, however all Auto Attendant policies will be prefixed with your organisation’s ODS code once created
- Choose an Operator. There can only be one Operator per Auto Attendant. If you select an Operator here, the value configured will be reflected in the Menu Options.
- Enable or disable Voice Inputs
Choose a Resource Account to associate to the new Auto Attendant. A drop-down list will provide a list of the Resource Accounts available.
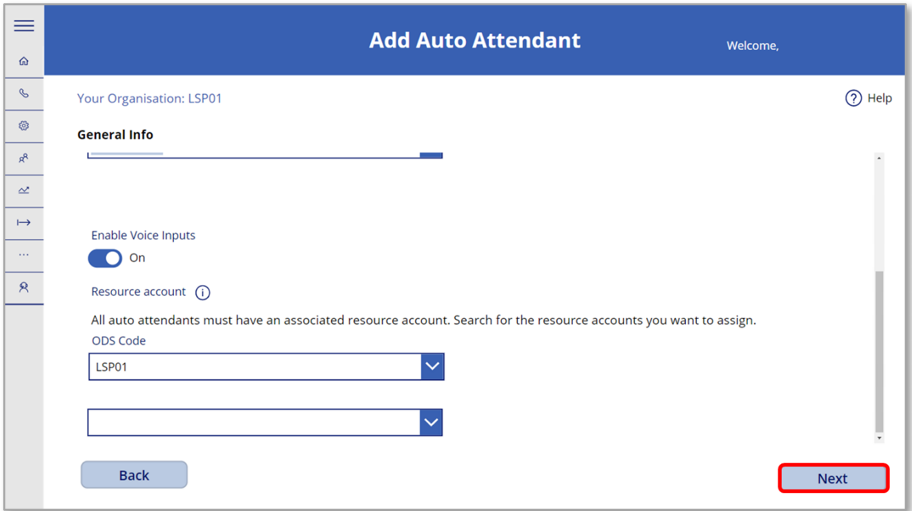 5. Once you have completed the Add Auto Attendant screen as per your requirements, select ‘Next’ to be directed to the next screen.
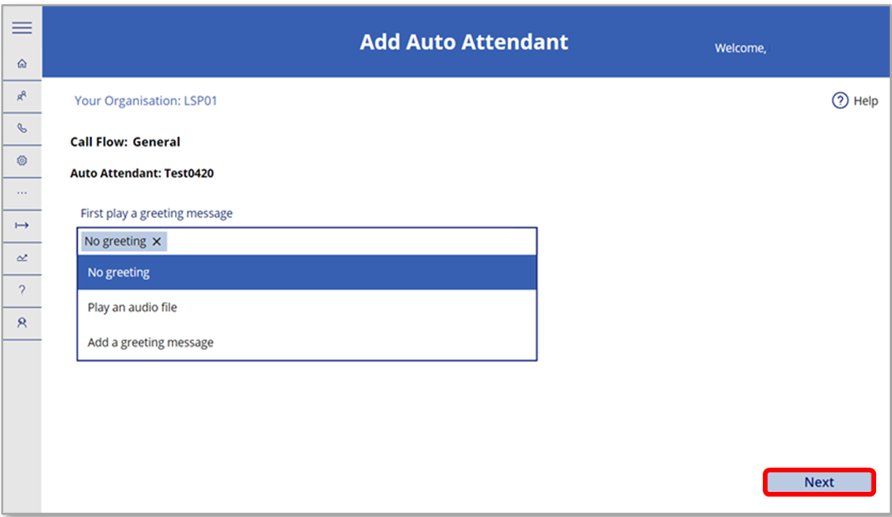 6. On the following screen, you will be able to set the Call Flow by selecting the greeting message type suitable for your organisation. Click ‘Next’ once complete.
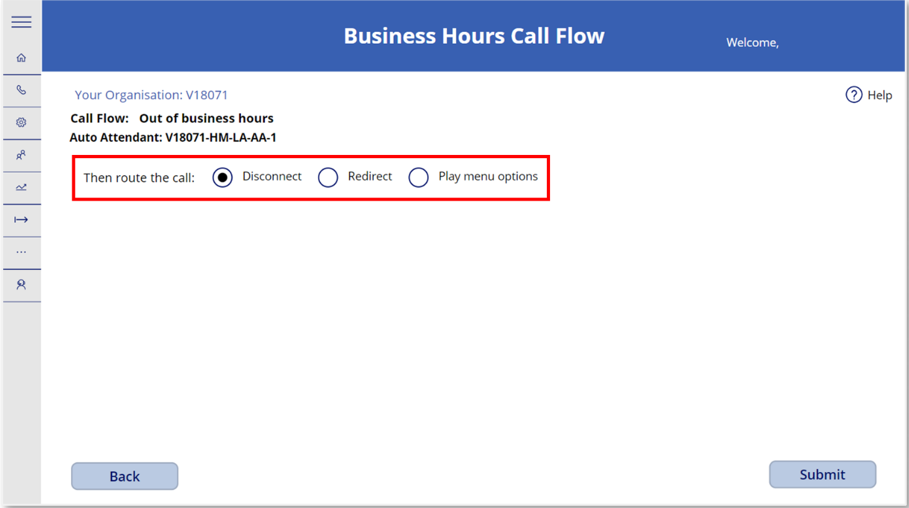
7. The next screen will show several options of how the call can be routed. Subsequent options will be different depending on the routing issue you choose.
 8. If ‘Disconnect’ is chosen, select ‘Submit’ to create the Auto Attendant.
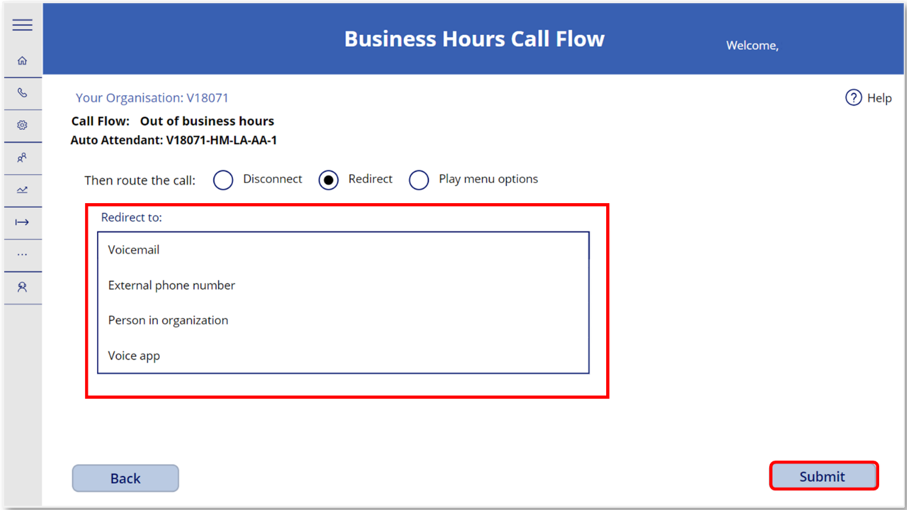
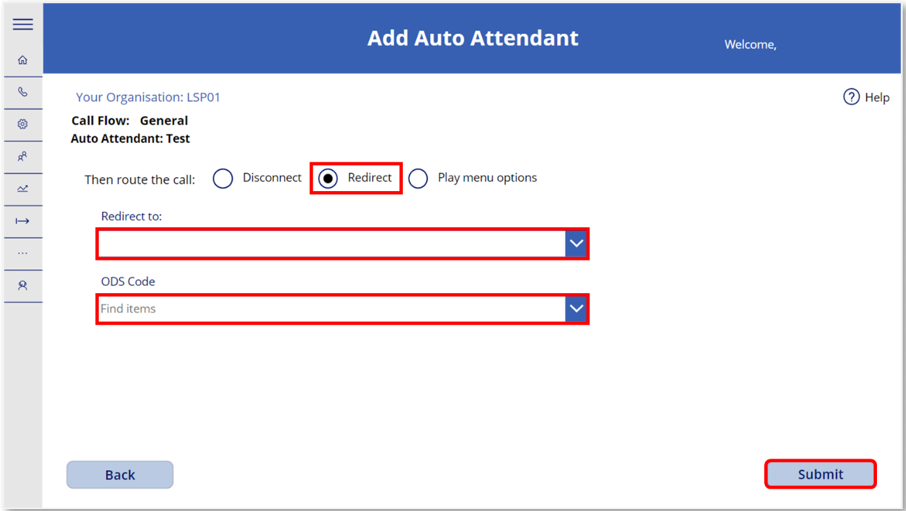 9. If ‘Redirect’ is chosen, select where you would like the call to be redirected to and the ODS code from the drop-down lists and then click ‘Submit’ to process changes.
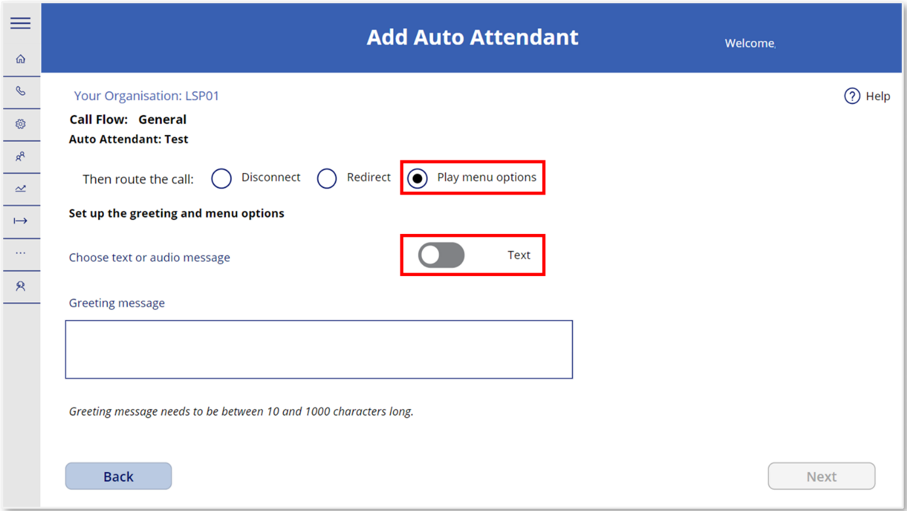
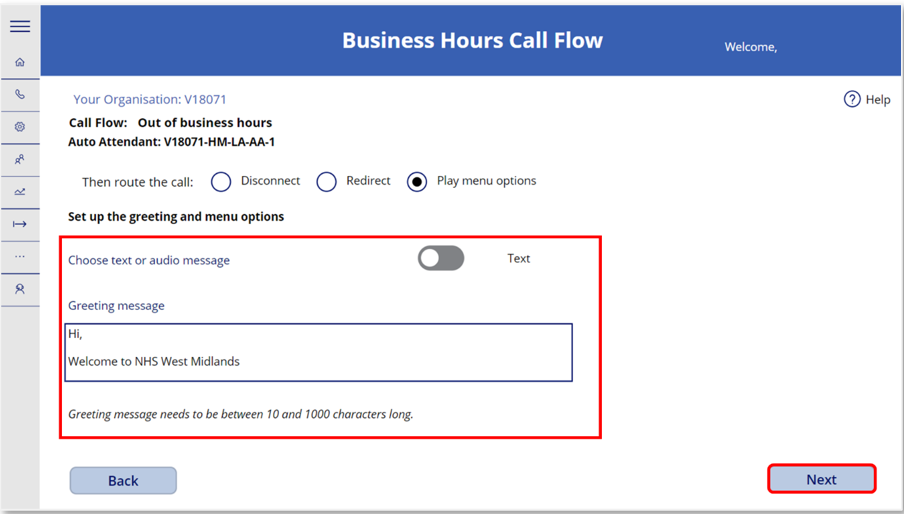
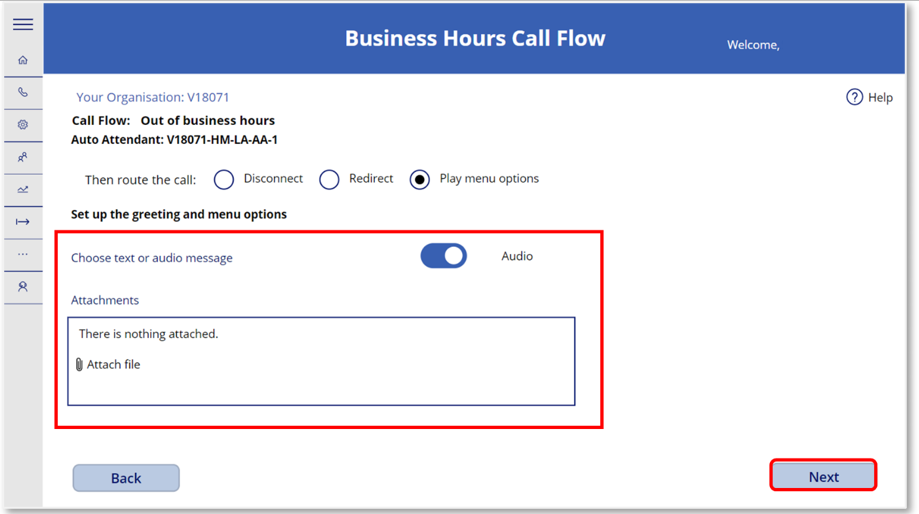
10. If ‘Play menu options’ is chosen, toggle to choose either text greeting message or an audio message.
If you select a text greeting message, you will need to type in the message in the Greeting message box.
If you select an audio message, you will need to attach and upload an audio file.
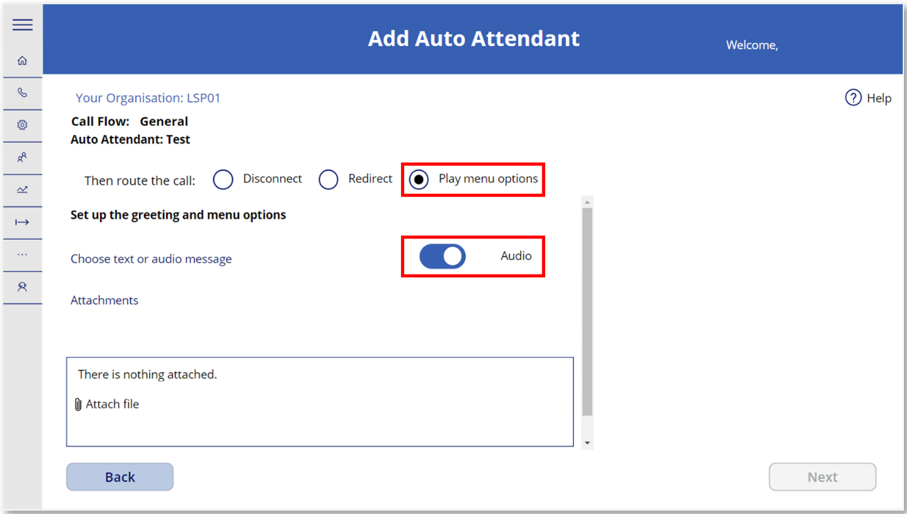 Once this screen has been completed, select ‘Next’.
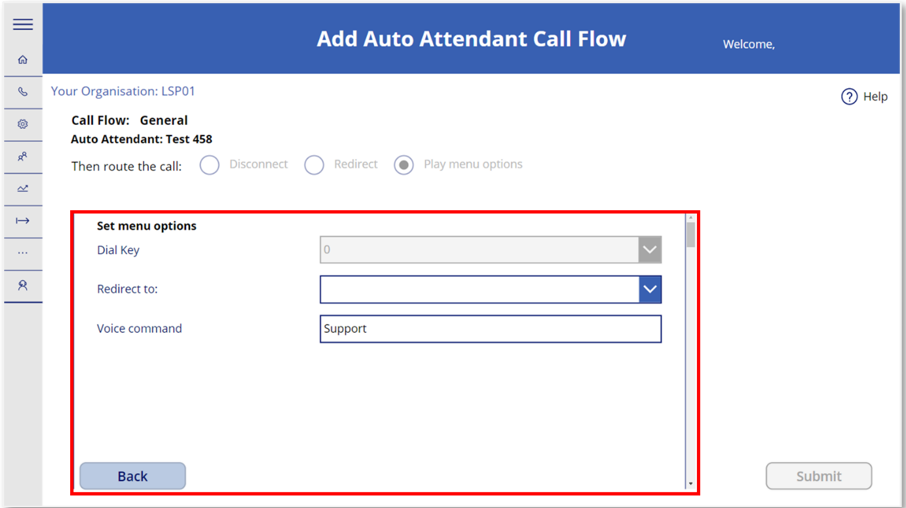 11. You will then be required to set up dial keys for your menu options. You can set up dial keys for the numbers 0-9. For example, ‘for sales, press or say 1’, ‘for services, press or say 2.’
At least one dial key needs to be configured. Select ‘Submit’ once you have set up all required dial keys.
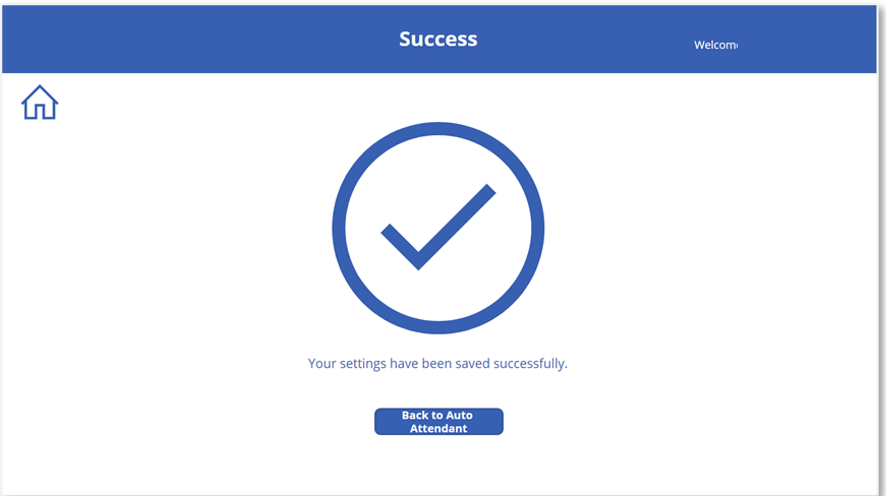
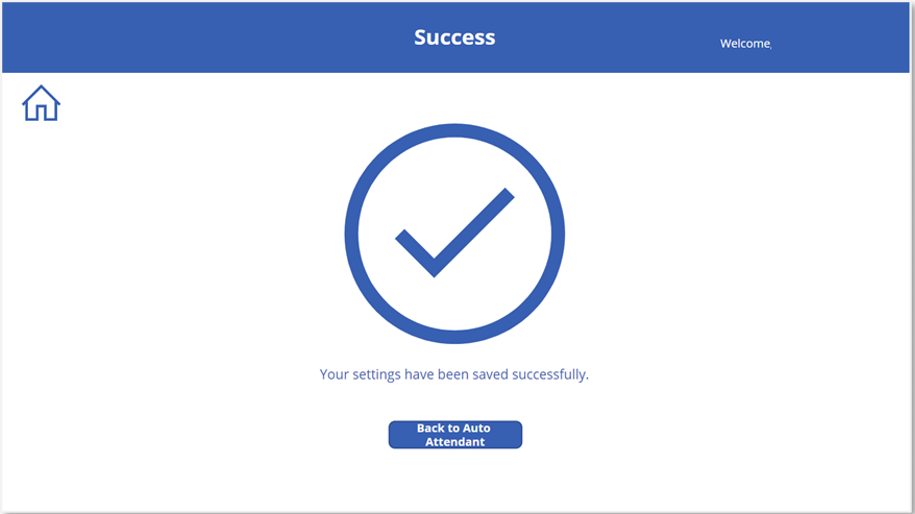 12. Upon clicking ‘Submit’, you will be directed to a success screen confirming your Auto Attendant has been successfully added.
Advanced Settings (Optional)
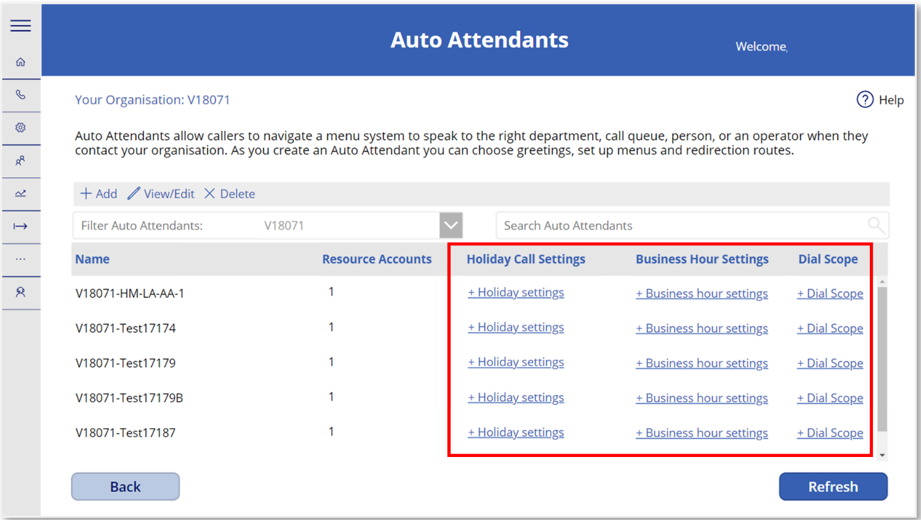
After creating an Auto Attendant, Phone System Administrators can also choose to configure advanced optional settings such as Holiday Call Settings, Business Hours Settings, and Dial Scope Settings.
These optional settings can be found at the right of the Auto Attendants summary box.
Add Holidays
By adding holidays, you can set up your Auto Attendants to play greetings and messages for specific holiday dates, and you can also configure how to redirect the calls if required.
Please follow the steps below to add holiday settings to an Auto Attendant.
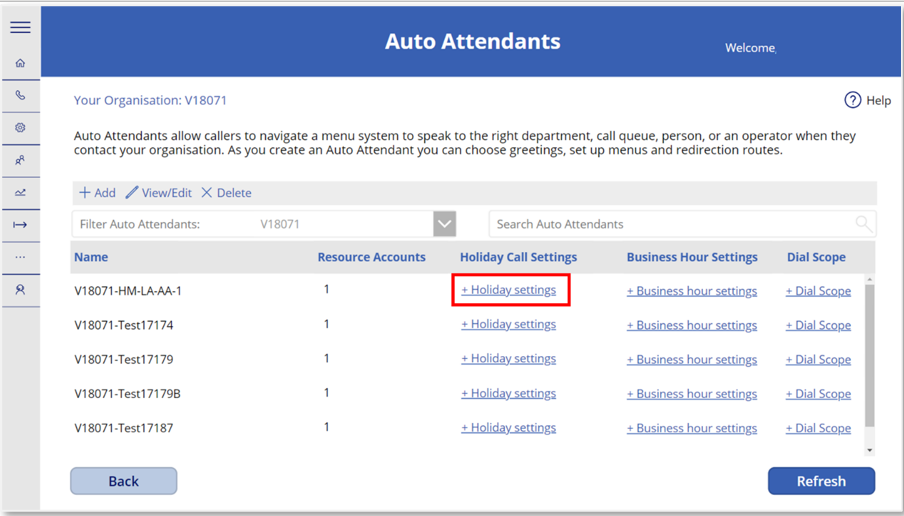 1. Navigate to the Auto Attendants landing screen and select ‘+ Holiday settings’ for the Auto Attendant that you wish to add holiday settings for.
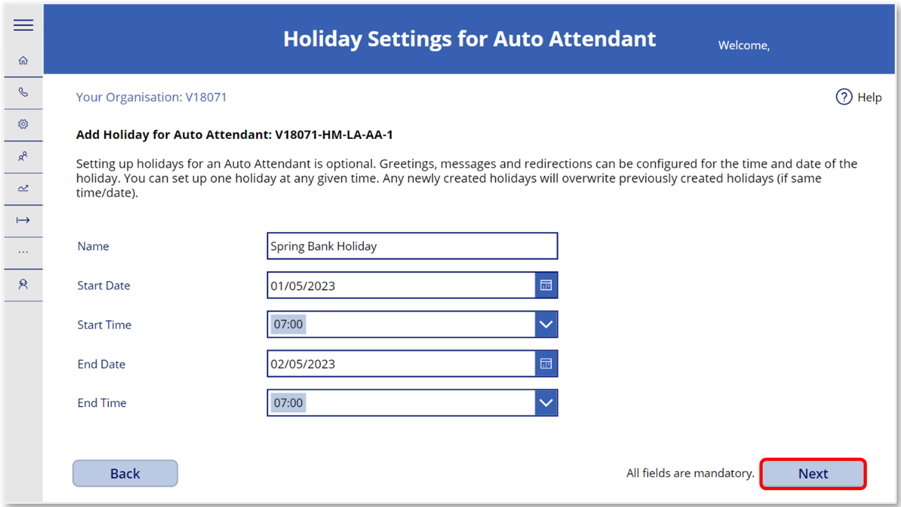
2. On the next screen, you will be required to provide the following information:
- Name – Please provide a name for this holiday (for example, Spring Bank Holiday).
- Start Date
- Start Time
- End Date
- End Time
Select ‘Next’ once you have completed the fields to continue.
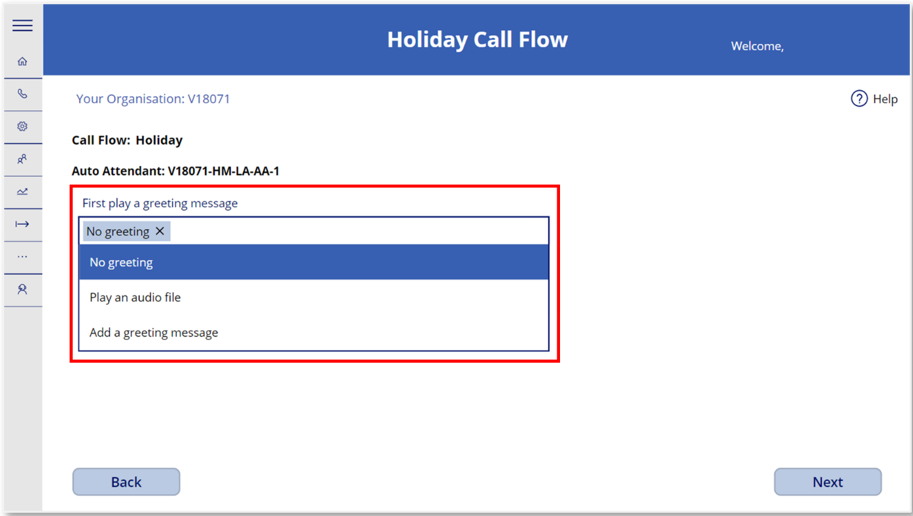 3. Next, on the Holiday Call Flow screen choose what type of greeting message should play to callers during this holiday period.
 4. Once you have chosen your greeting message, select ‘Next’ to proceed to the next screen.
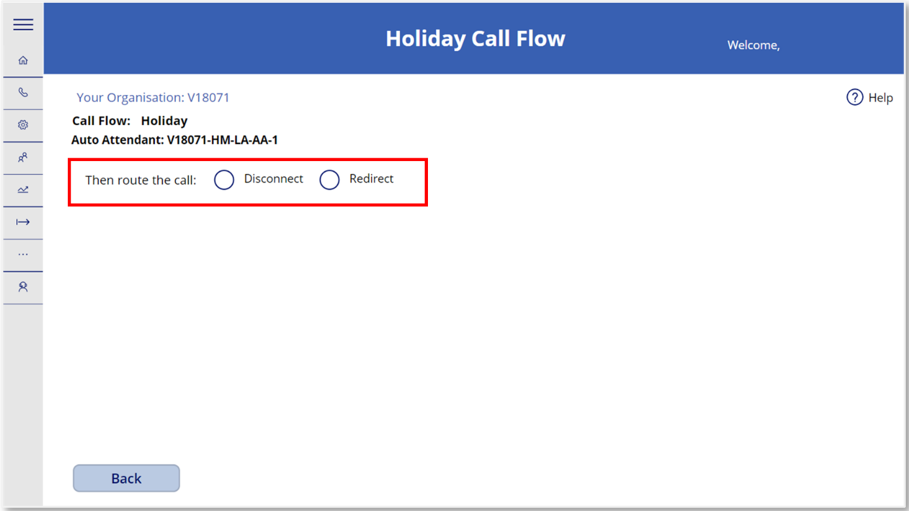
Regardless of your greeting message choice, you will be directed to the Edit Auto Attendant screen, where you will need to choose how to route incoming calls during the holiday period.
5. If you select ‘Disconnect’ and then ‘Submit’, calls will not be routed, and you will be directed to a success screen confirming that your Holiday settings have been saved.
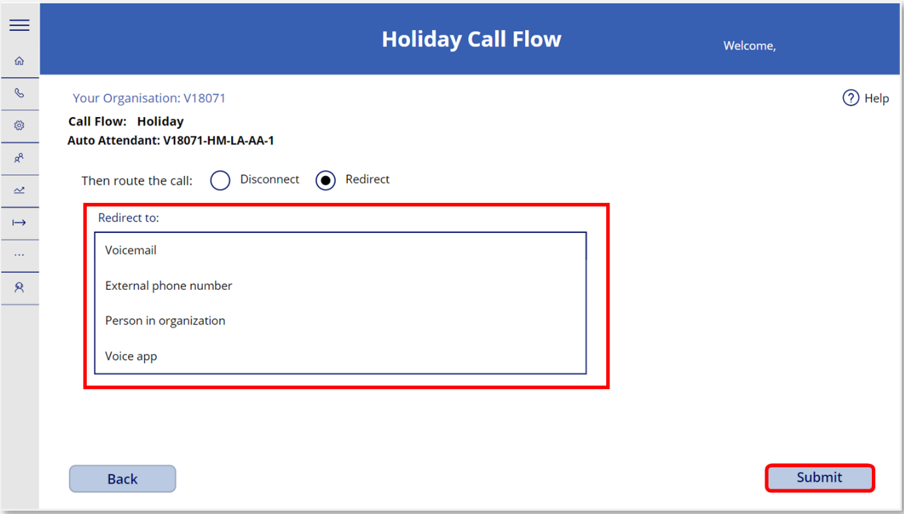
If you select ‘Redirect’, you will be able to choose from a drop-down list whether to redirect the call to an external phone number, voicemail, person in organisation or voice app.
 6. Upon clicking ‘Submit’, you will be directed to a success screen confirming that your Holiday settings for your Auto Attendant have been successfully saved.
Business Hours Settings
Business hours can be set for each Auto Attendant. If business hours aren’t set, all days and all hours in the day are considered business hours because a 24/7 schedule is set by default. Business hours can be set with breaks in time during the day. All hours that are not set as business hours are considered after-hours.
You can set different incoming call-handling options and greetings for after-hours. Although this is not required, by setting up after-hour settings, you can set up a person in your organisation to answer calls when a caller wants to talk to another person, or you can direct callers via Voice app to another linked Auto Attendant or Call Queue.
Please follow the steps below to configure business hours for an Auto Attendant.
 1. Navigate to the Auto Attendants landing screen and select ‘+ Business hour settings’ for the Auto Attendant you wish to configure business hours for.
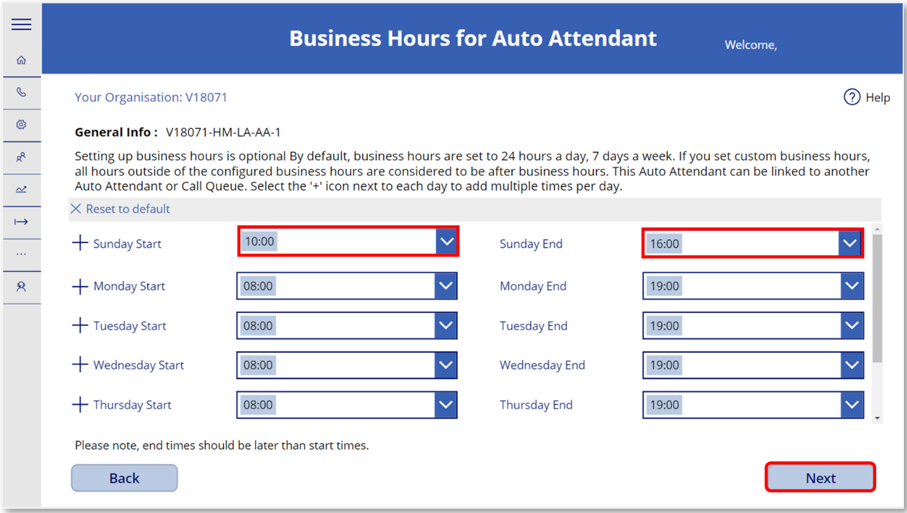 2. You will be taken to the screen to set up the business hours for each day of the week. Select from the drop-down lists to add start and end times.
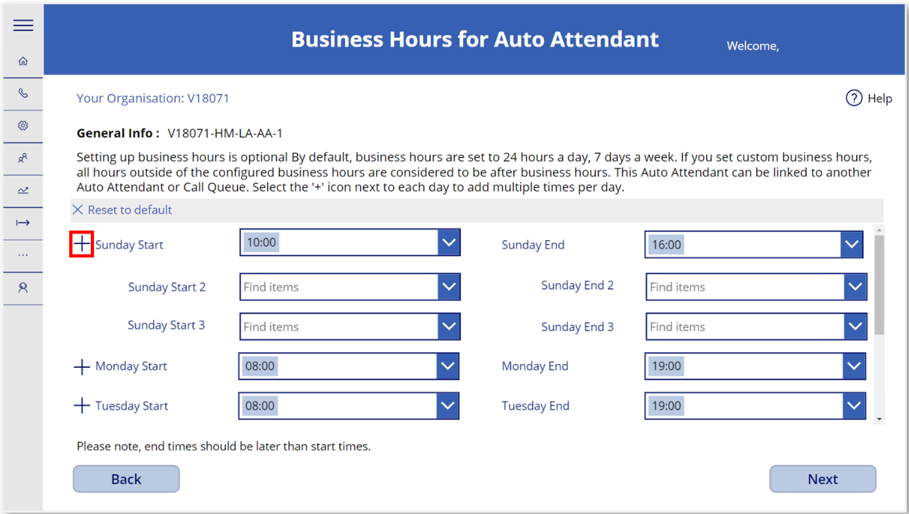
Multiple time slots can be added per day by selecting the ‘+’ icon. Select ‘Next’ to continue.
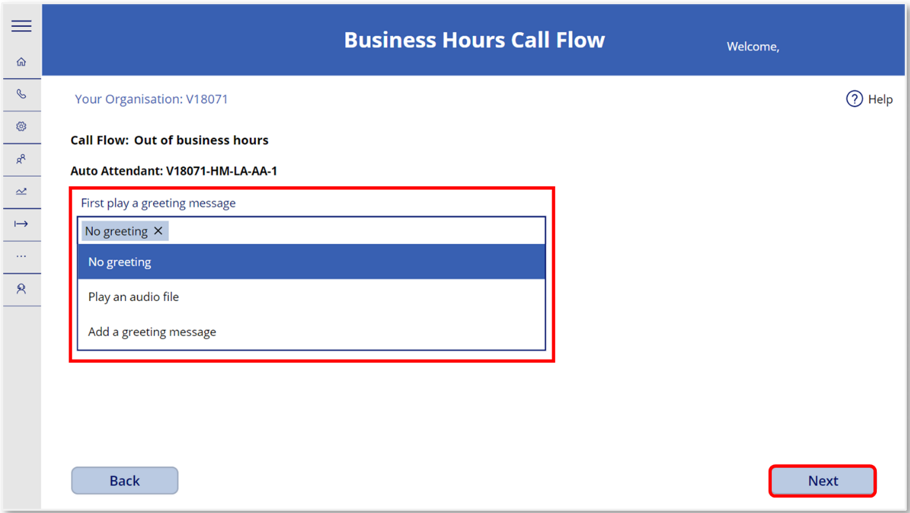 3. On the Business Hours Call Flow screen, you will be able to choose the greeting message callers hear if they call outside of business hours. Choose a greeting message and then select ‘Next’.
 4. On the next screen, you will be able to choose how the call will be routed outside of the business hours you have selected.
If you select ‘Disconnect’ and then ‘Submit’, calls will not be routed, and you will be directed to a success screen confirming that your settings have been saved.
If you select ‘Redirect’, you will be able to select where you would like the call to be redirected to. Select one of the options and then configure the require fields. Select ‘Submit’ to save your choices. You will then see a success screen confirming that your choices have been saved successfully.
 5. If you select ‘Play menu options’, toggle to select whether the greeting message should be text (if so, you will then need to insert text message) or an audio message (you will need to upload and attach file).
Select ‘Next’ to continue.
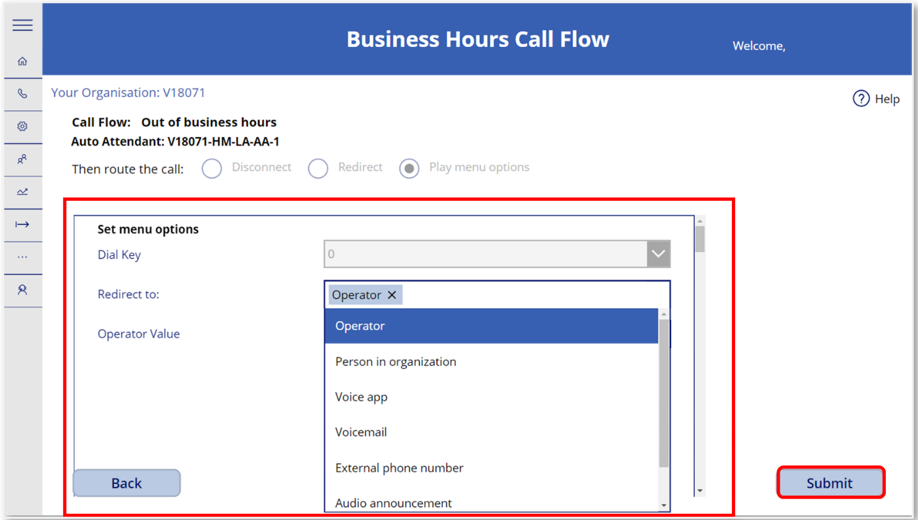 6. You will then be directed to the Business Hours Call Flow screen where you will need to set up dial keys for the play menu options If you selected an Operator when you created the Auto Attendant, then that choice will be available to select in the ‘Redirect to’ field. If you did not select an Operator when you created the Auto Attendant, then you can select one here.
At least one dial key needs to be configured before you will be able to proceed. For example, ‘for sales, press or say 1, for services, press or say 2’.
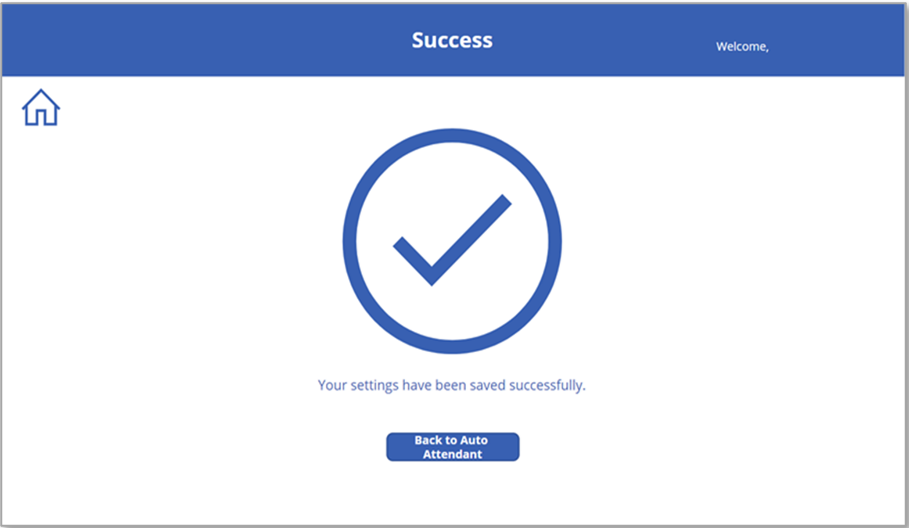 7. Upon clicking ‘Submit’, you will be directed to a success screen confirming that your Business Hours settings have been saved successfully.
Dial Scope
You can configure Dial Scopes for Auto Attendants via the NHSmail Teams Phone System Power App.
A dial scope defines which users are available in the directory when a caller uses dial-by-name or dial-by-extension. You can set up the users or groups that will be listed and available in your organisation’s directory. When callers use Dial-by-name and search for a person by their name using their voice or keypad, they will then be transferred to the users that have the Teams app installed.
Please follow the steps below to configure a Dial Scope for an Auto Attendant.
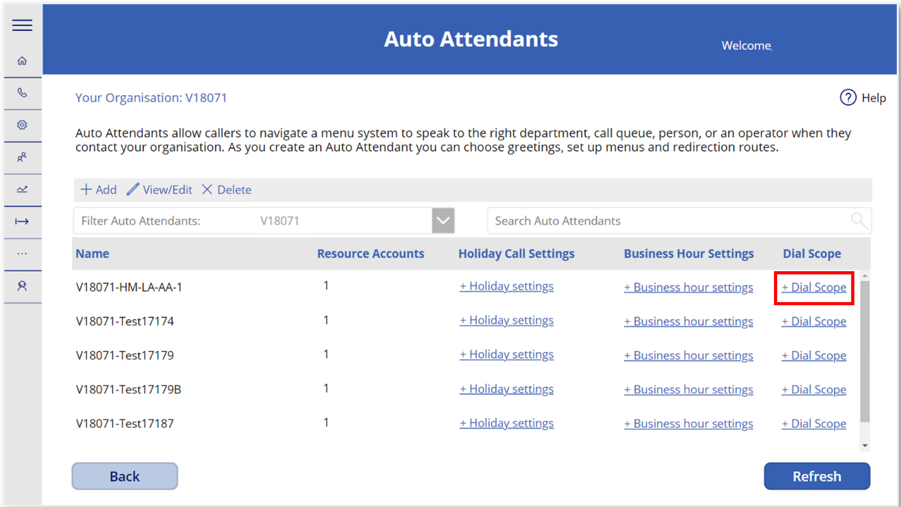 1. Navigate to the Auto Attendant landing screen and select ‘+ Dial Scope’ for the Auto Attendant that you wish to configure the dial scope for.
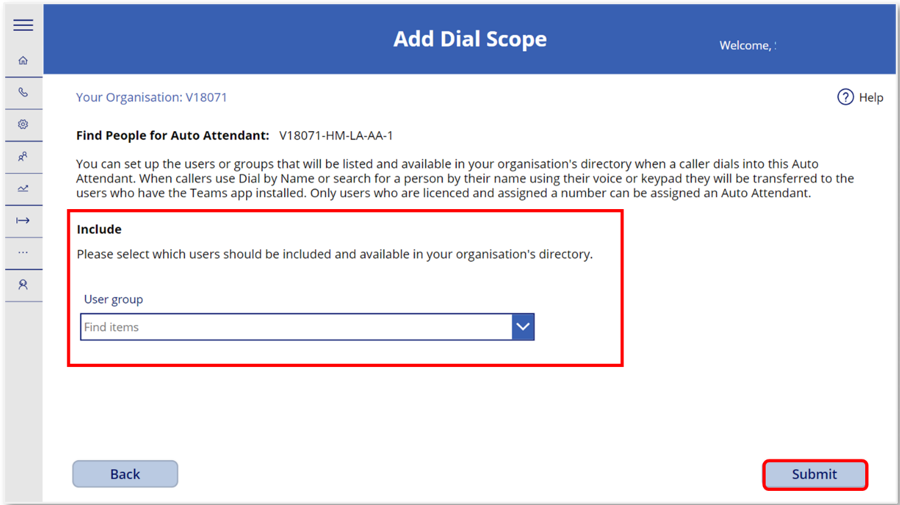 2. Select the ODS code of the organisation to which the user group you would like to be included in the organisation directory belongs to, and then select the user group from the second drop-down list. Select ‘Submit’ to continue.
 3. Next, you will see a success screen confirming that your settings have been saved successfully.
Editing an Auto Attendant
To edit an existing Auto Attendant you will need to update the settings that were configured when it was created.
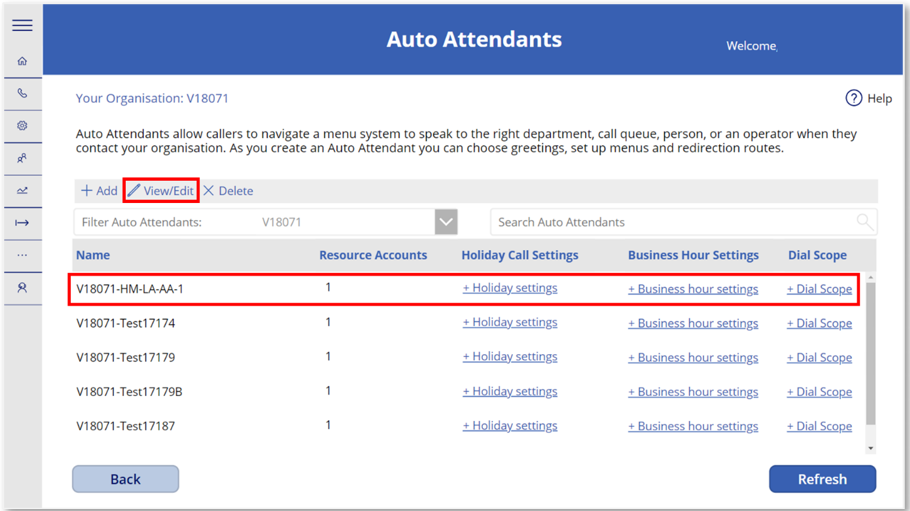 1. Navigate to the Auto Attendants landing screen and select from the list the Auto Attendant you wish to edit. You can use the ODS code search to help find the Auto Attendant you are looking for. Select ‘View/Edit’ from the toolbar.
2. You will then be taken to a screen to edit the configured settings for that Auto Attendant. Scroll down the screen to review and edit all settings. Select ‘Next’ once this is complete.
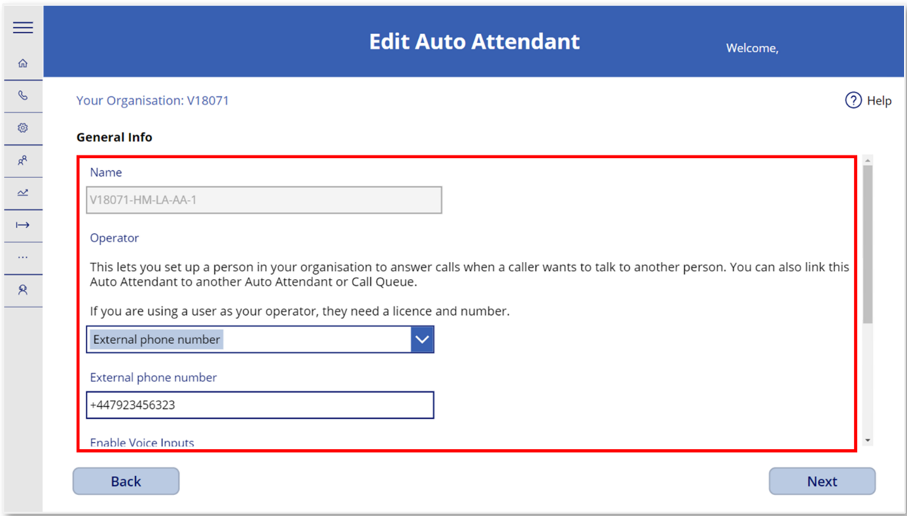 3. Continue through further screens to edit any of the other settings of the Auto Attendant which were configured when it was first created.
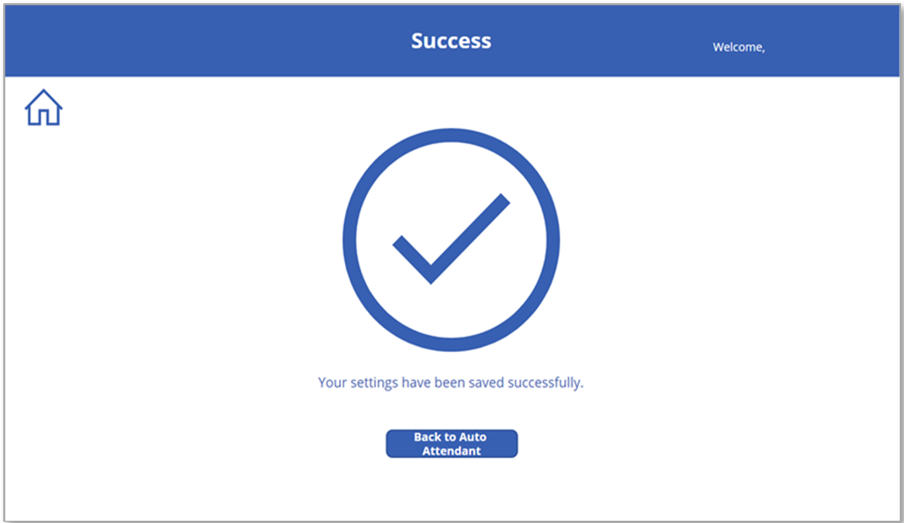 4. Once you have edited all options as required for the Auto Attendant and have selected ‘Submit’ on the final Edit Auto Attendant Flow screen, you will see a success screen confirming that your settings were saved successfully.
Deleting an Auto Attendant
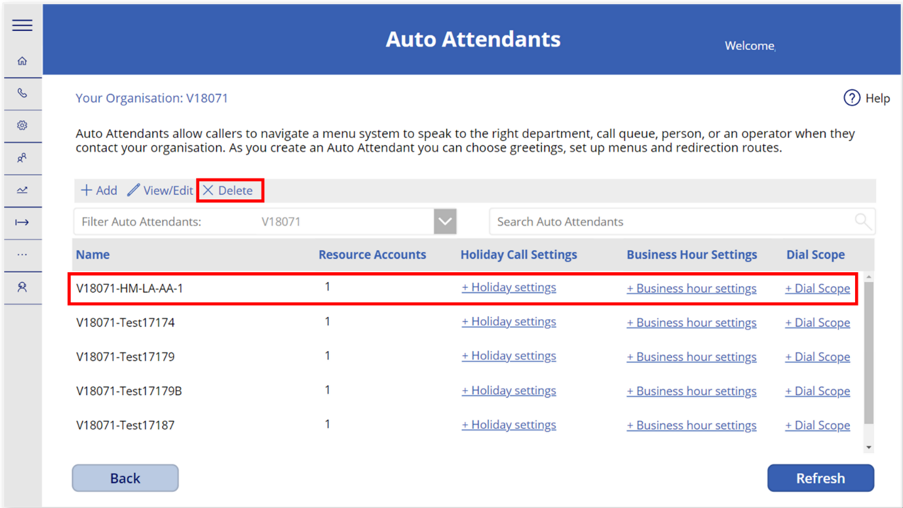 1. Navigate to the Auto Attendants landing screen and select the Auto Attendant you wish to delete. You can use the ODS code search function to help with this is required. Select the ‘Delete’ option from the toolbar.
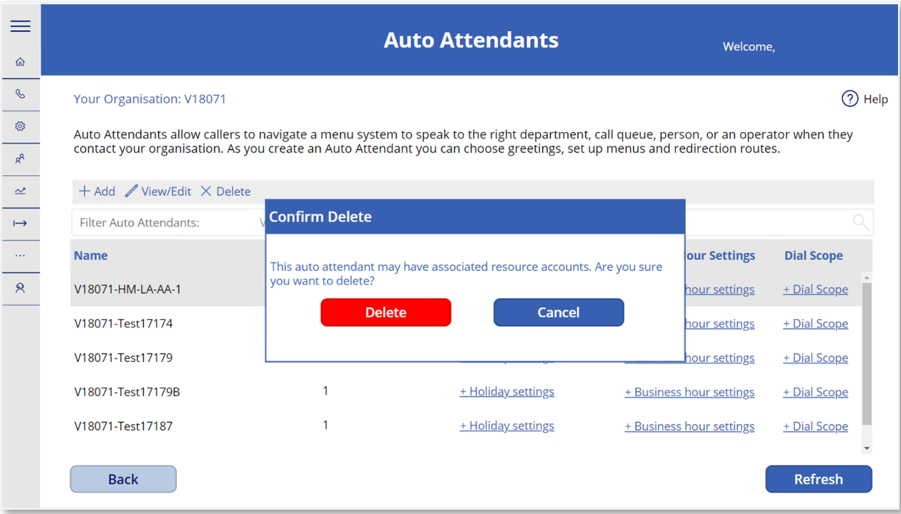 2. A pop-up screen will appear asking you to confirm that you wish to delete the selected Auto Attendant. Select ‘Delete’ to confirm.
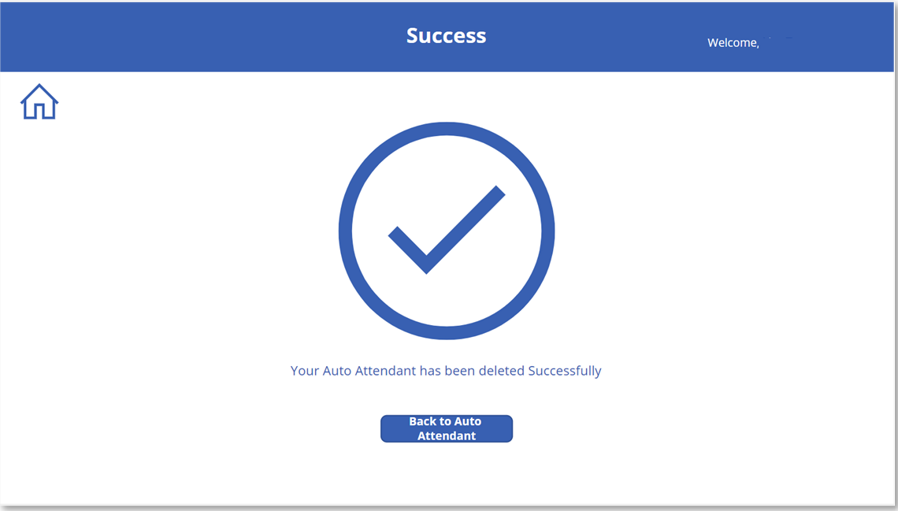 3. A success screen will appear confirming that the Auto Attendant was deleted.
| Last Reviewed Date | 04/04/2023 |