Create a new User Policy

1. Log in to the NHSmail Portal using your nhs.net credentials (the Admin toolbar will only show for LAs)
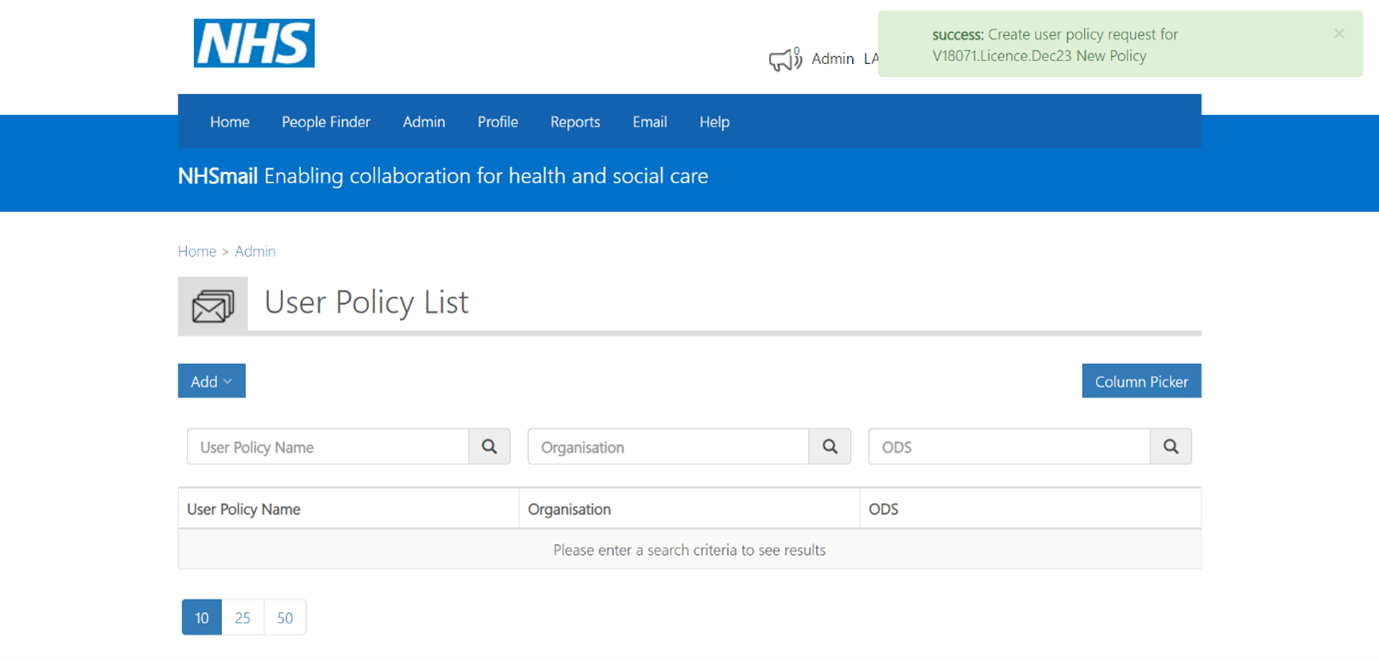
2. Navigate to Admin > User Policy Management
 3. In the User Policy List page, click on Add > Create User Policy
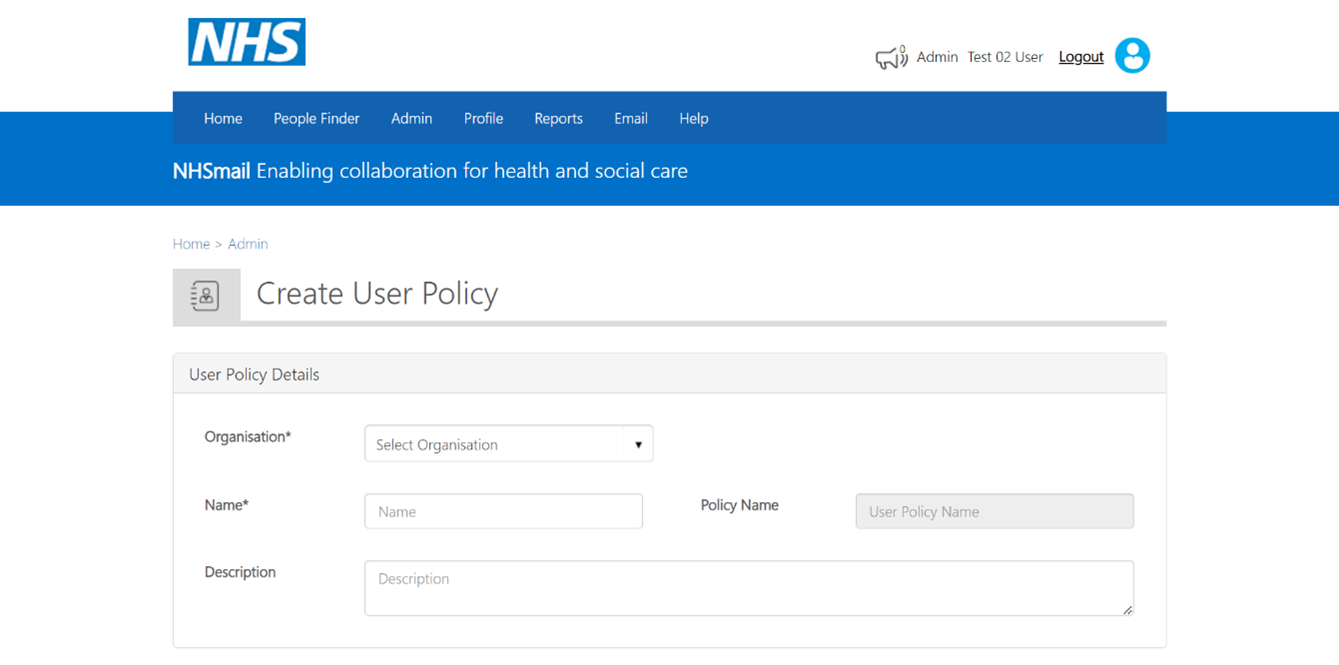 4. Select the organisation you want to create the policy for, name the new policy and add a description to it if required
Note: Only the organisations you are a LA for will appear in the drop-down menu
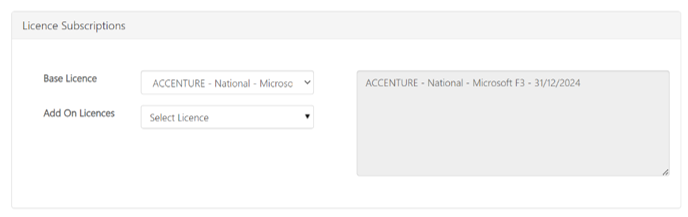 5. Select a base licence from the drop-down menu and an add on licence if required.
Note: The base licence will correspond to what is provisioned to your organisation. For NHSmail Standard Service organisations, this will be the M365 F3 licence and for NHSmail Enhanced Service organisations, this will be the M365 E3 licence. If your organisation has also procured other licences and onboarded them to the NHSmail central tenant – e.g. E3 or E5, these will also appear in the drop-down menu. Examples of add on licence types include functionality like Dial-In Conferencing, Visio or Project. Again, these will only appear if directly procured by an organisation and onboarded.
6. You can then toggle on or off any applications as required for the new policy you are creating. Please refer to the NHSmail Feature Overview article for more information on what each of the M365 applications does.
Visit this guide to find out about managing mailbox size quotas.
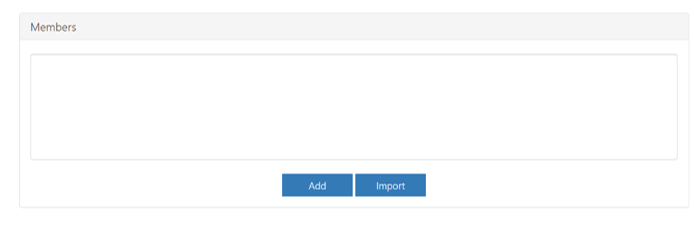
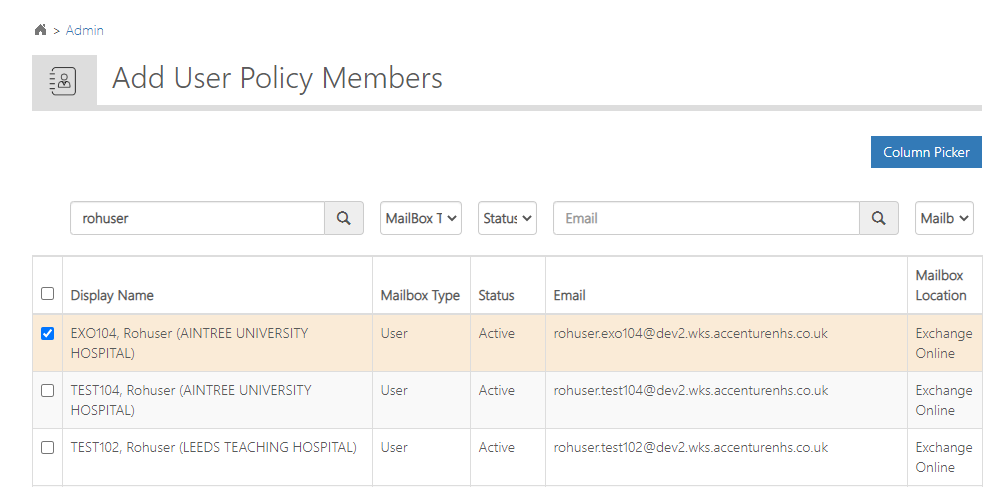
7. You can add members to the policy by selecting the Add button and searching for the user(s)
 Note: Alternatively, the Import button can be utilised to add users in bulk if required. For full instructions on the import process, please see the User Policy Management: Adding Members guidance.
8. Once selected, click Update and a green success pop up will appear at the top right corner of the screen to confirm the user has been added.
Handy Tips:
- All user policy names are automatically prefixed with the ODS code of the organisation that the user policy belongs to and the licence assigned (i.e. ‘ODS.Licence.PolicyName’).
- Duplicate names: A single organisation cannot have 2 user policies with the same name. However, 2 or more different organisations can use the same name for their policies.
- The name must not be more than 64 characters and may contain letters, numbers and spaces. Special characters are not allowed.
- The description must not be more than 250 characters and may contain letters, numbers and any special characters.
- LAs can add a maximum of 500 mailboxes at a time to a policy through the add or bulk update import process. If the policy is larger than 500, the add or bulk import process can be repeated.
- The Teams Call Recording toggle will be enabled by default on all newly created User Policies. It can be turned off in the Applications Settings box.
- If an LA disables all the User Policy application toggles, but applies the Apps for Enterprise add-on – the users within the policy will still have access to all the applications provided through Apps for Enterprise, including OneDrive.
- Microsoft provide a grace period for SharePoint/OneDrive access. If LA’s disable the toggle for these applications in a user policy, there will be a period where users can continue to access the applications. LA’s can delete a user’s OneDrive content where appropriate and SharePoint Site Owners can actively remove access from Site Collections if needed.
| Last Reviewed Date | 29/01/2024 |