This article provides information to support organisations who are using / intend to use Direct Routing as their chosen PSTN (Public Switched Telephone Network) connection strategy. Phone System Administrators will find a list of the necessary prerequisites and steps for setting up and configuring their Session Border Controllers (SBCs) for Direct Routing outlined below.
This article will cover:
SBC Prerequisites
SBCs must be configured before external calls can be made by Direct Routing and Microsoft Teams Phone System. SBCs can be configured (added, managed, edited, assigned, and deleted) in the NHSmail Phone System Power App. For more information on how to access the Phone System Power App, please visit this article.
NHSmail Teams Phone System can only be supported by Microsoft if a certified SBC(s) is connected through Direct Routing. For a list of Certified SBC vendors, please see this guidance.
It is the responsibility of organisations to install their SBCs in line with Certified SBC vendor setup guidance for Teams Direct Routing and to ensure that their SIP suppliers are hosted in the UK and all their calls will be routed via the UK route instead of any overseas route. Any firewall rules or specific network configurations that an organisation wishes to set up in addition to their SBC are the responsibility of the organisation and organisations should ensure the configuration can support phone system traffic.
Once an SBC has been successfully installed with Public IP addresses for Teams Direct Routing and for Service Provider interfaces, organisations are required to make a note of the SBC assigned Public Interface IP Address for Teams Direct Routing.
For a full list of organisations’ responsibilities when completing Direct Routing prerequisites, please see this article.
SBC Configuration in the NHSmail Teams Phone System Power App
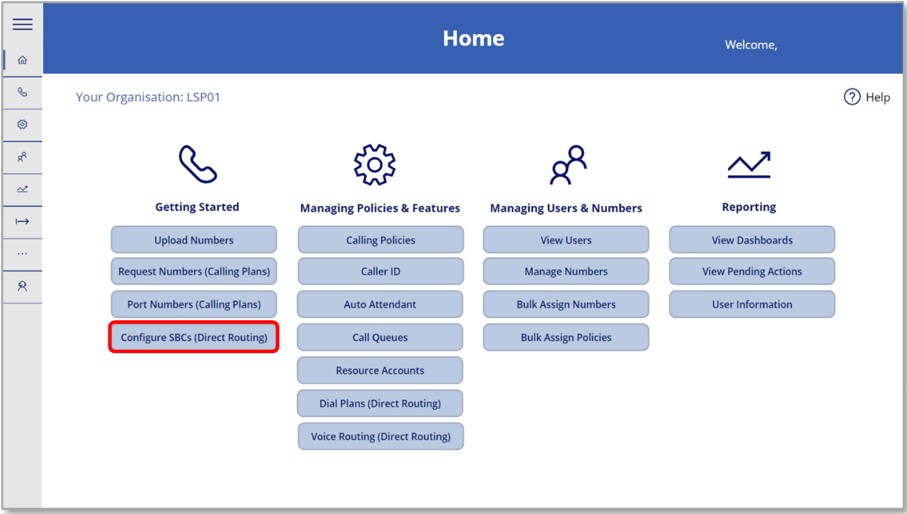 1. Once you have logged into the Phone System Application, navigate to the Home screen and select ‘Configure SBCs (Direct Routing)’ under the ‘Getting Started’ category
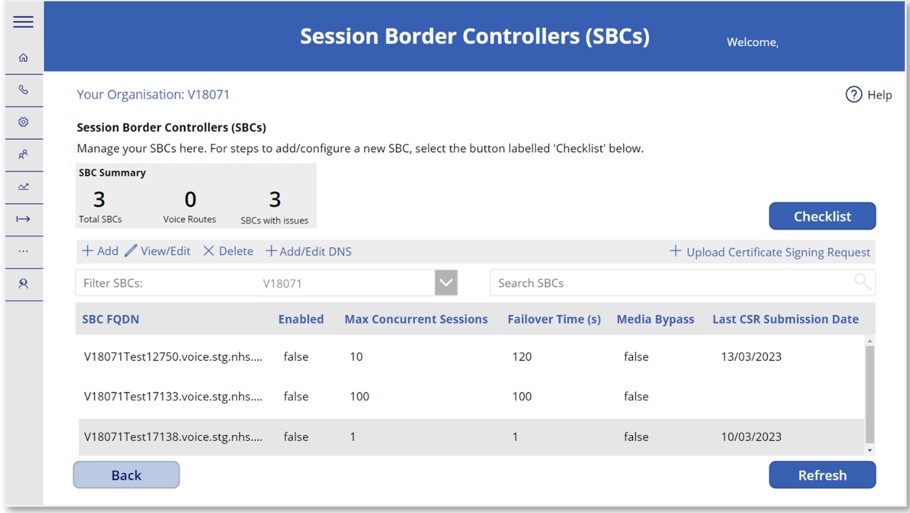 2. You will be directed to the SBCs landing screen. This screen will display a list of any SBCs which have already been created for your organisation, with the functionality to add new SBCs, or edit / delete existing ones.
An SBC summary box will be featured, detailing the total numbers of SBCs, voice routes and number of SBCs with issues (i.e., SBCs which are not enabled).
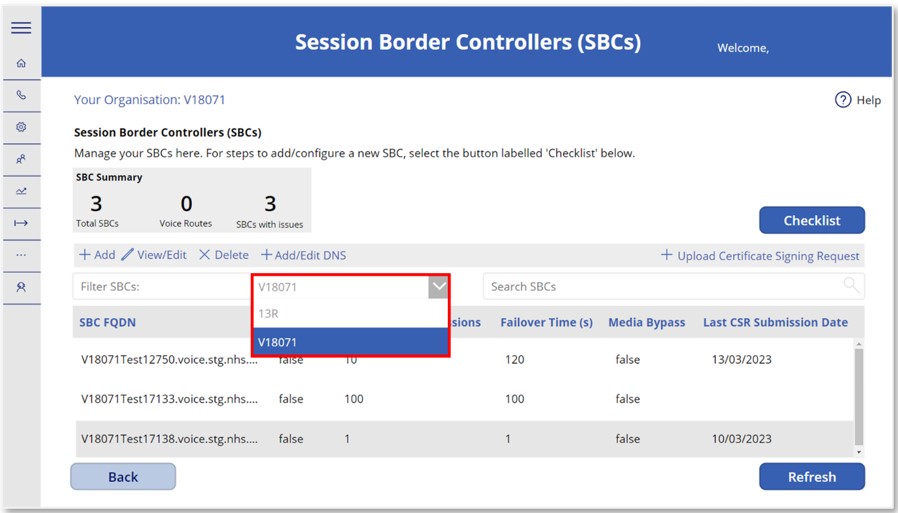 3. Select the organisation ODS code to filter the list of SBCs by organisation.
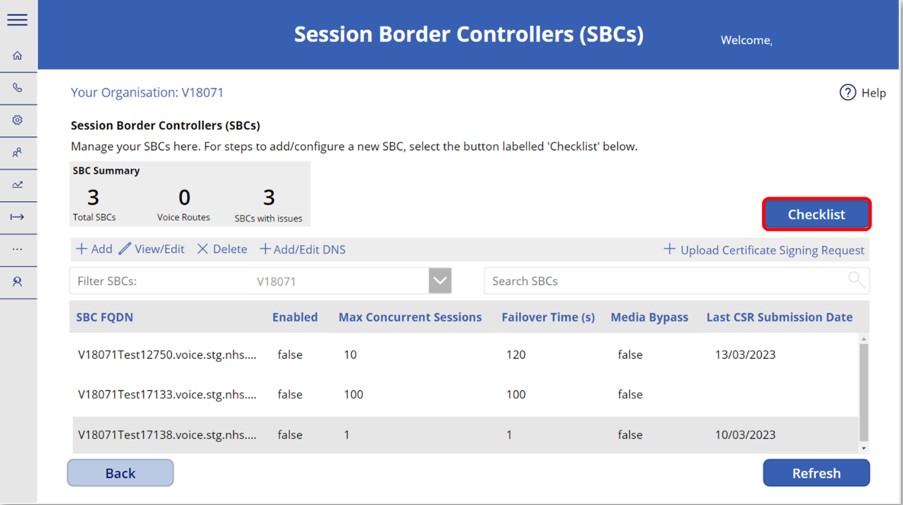 4. To help you to successful configure SBCs, a checklist screen has been added with step-by-step guidance. Click on the ‘Checklist’ button from the SBC landing screen to view details.
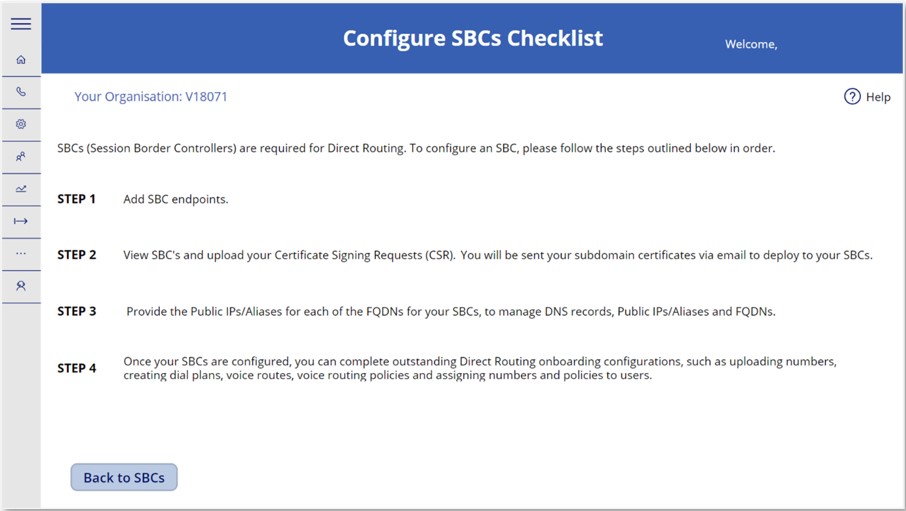 5. You will be directed to a screen with a checklist of 4 essential steps to follow when configuring SBCs. The 4 steps should be followed in chronological order for a successful SBC configuration:
- Step 1: Add your SBC endpoints
- Step 2: View the added SBCs and upload your Certificate Signing Requests (CSR) to obtain your subdomain certificates. You will be notified via email to deploy to your SBCs
- Step 3: Provide the Public IPs / Aliases for each of the FQDNs for your SBCs, to manage DNS records
- Step 4: Once your SBCs are configured, you can proceed with outstanding Direct Routing onboarding configuration, such as, Creating Dial Plans, Voice Routes, Voice Routing Policies and Assigning Numbers and Policies to Users.
Step 1 | Add your SBC endpoints
The first step in the checklist for successful SBC configuration is to add your SBC endpoints. Complete the following steps to do this.
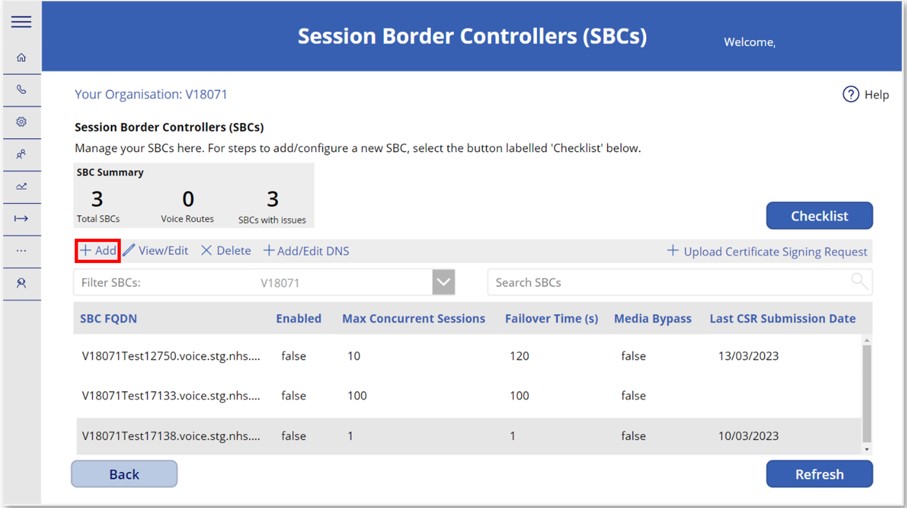 1. Navigate to the SBCs landing screen and select ‘Add’ from the toolbar.
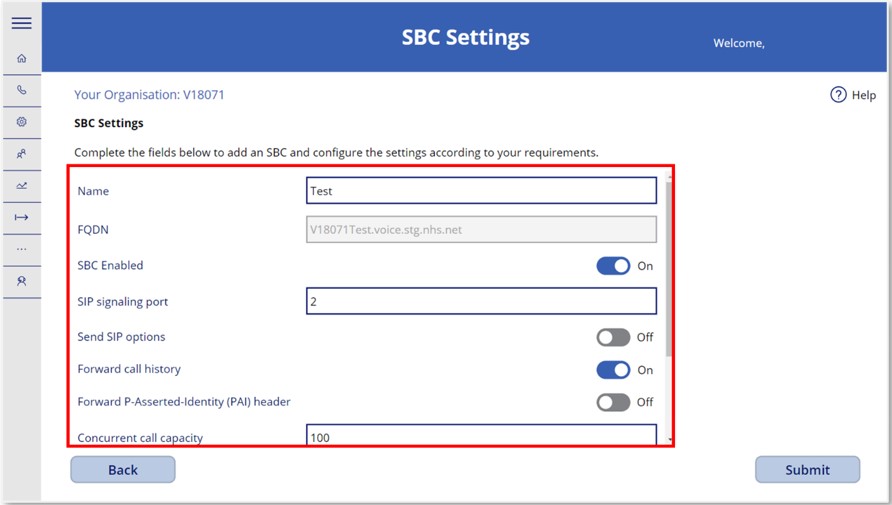 2. You will be directed to the SBC Settings screen where you will be able to add a new SBC. Please provide the following information:
- A Name for the SBC (There are no required naming conventions to follow for this but only characters A-Z and 0-9 can be used).
- Enable or disable SBC
- The Fully Qualified Domain Name (FQDN) for the SBC. This will be automatically generated, following the naming convention ‘ODSCodeSBCNAME’ as a prefix to the subdomain (voice.nhs.net).
- SIP signalling port
- Enable or disable Send SIP options
- Enable or disable Forward call history
- Enable or disable Forward P-Asserted-Identity (PAI) header
- Concurrent call capacity
- Failover time in seconds
- Enable or disable Media Bypass
For more information and guidance on these settings and possible values, please see this Microsoft guidance.
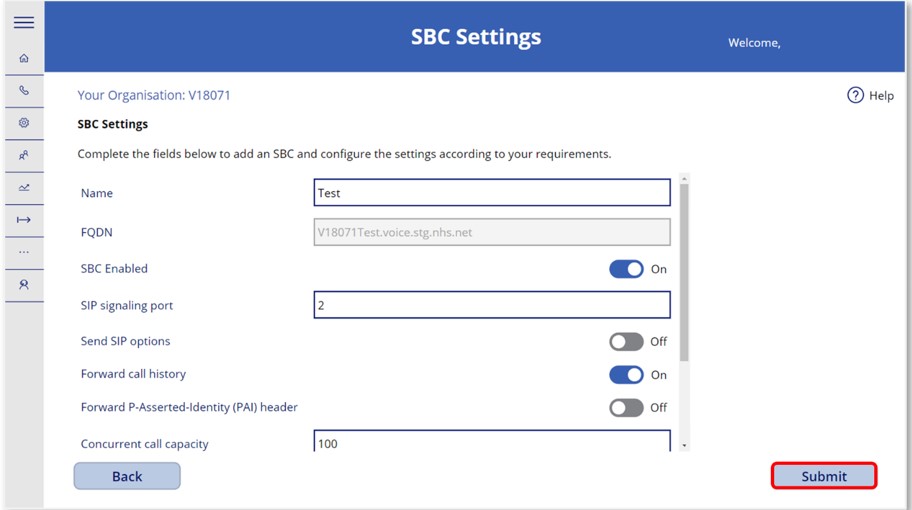 3. After tailoring the settings to your requirements, click ‘Submit’ to process all options. Following submission, you will be directed to a success screen.
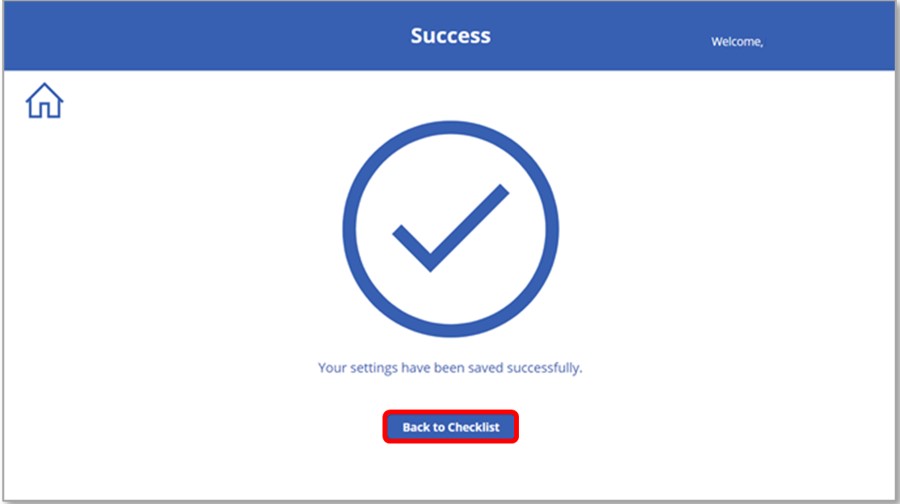 4. On the success screen, you will have the option to click ‘Back to checklist’ to view the 4 steps to successfully configure SBCs.
Step 2 | View SBCs and upload Certificate Signing Requests (CSR) to obtain subdomain certificates
The second step in the checklist for successful SBC configuration is to view the SBCs endpoints that were added in Step 1 and upload your Certificate Signing Requests (CSR) to obtain subdomain (SSL) certificates.
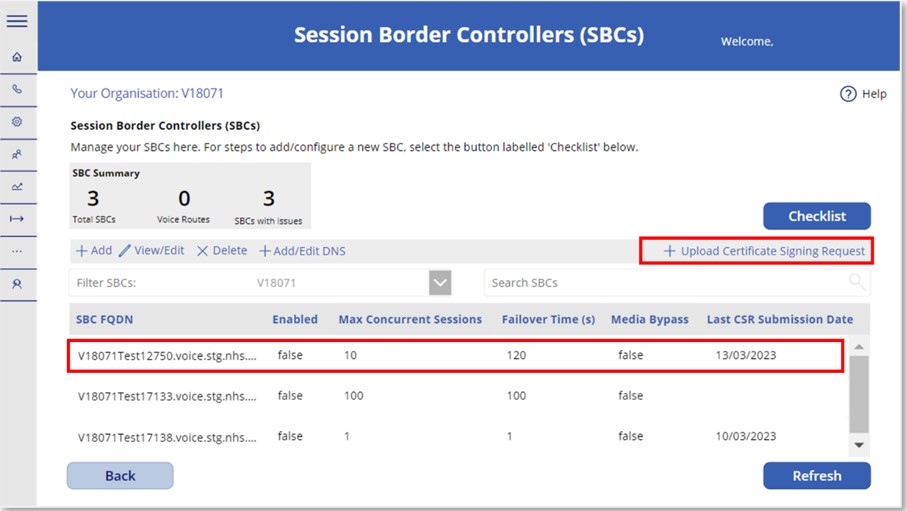 1. Navigate back to the SBC landing screen and select the identified SBC (e.g., the SBC endpoint you created in Step 1) and then select the ‘+ Upload Certificate Signing Request’ to be directed to a Certificate request screen.
 2. On ‘Certificate Request’ screen, the ‘Title’ field will be pre-populated with the FQDN for the SBC, and there will be an option to upload the CSR by clicking on ‘Add Attachment’. Attach the certificate CSR and select ‘Submit’.
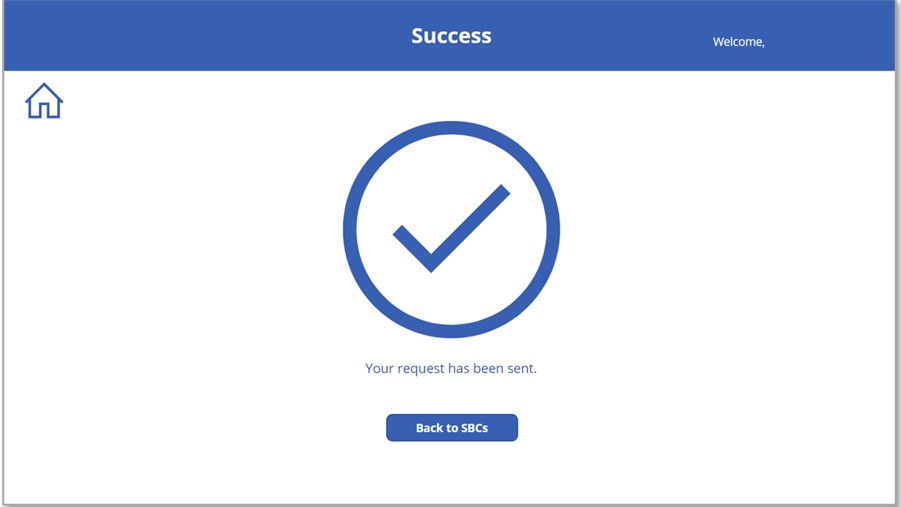 3. After submitting the certificate request, you will be directed to a screen informing you that ‘Your request has been sent’. You will receive a confirmation email that your request has been received along with a reference number for the request.
4. You will receive an email from the NHSmail Service Team with the certificate attached once the certificate has been generated.
5. Once your certificate request has been fulfilled, your request will be closed, and you will receive an email confirmation.
6. You will then need to deploy the certificate to your SBC, as per your SBC provider instructions.

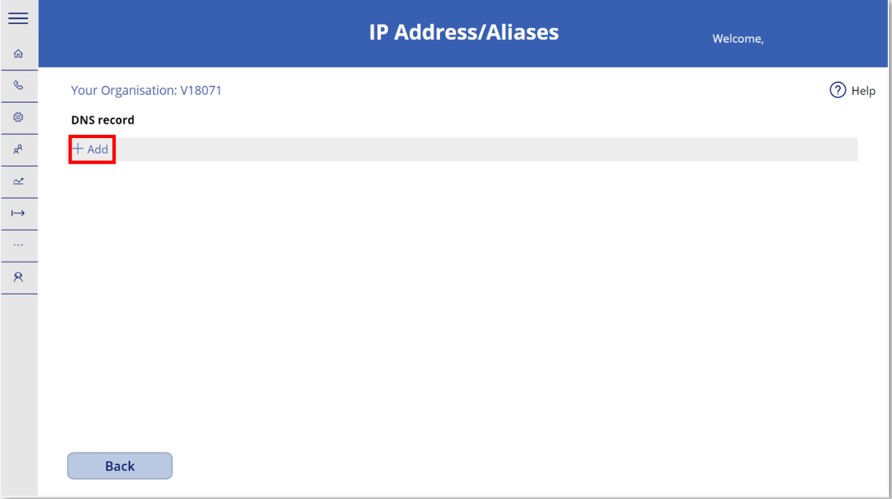
Step 3 | Public IPs / Aliases and FQDNs to manage Domain Name System (DNS) records
The third step in the checklist for successful SBC configuration is to provide the Public IPs / Aliases to manage the DNS records.
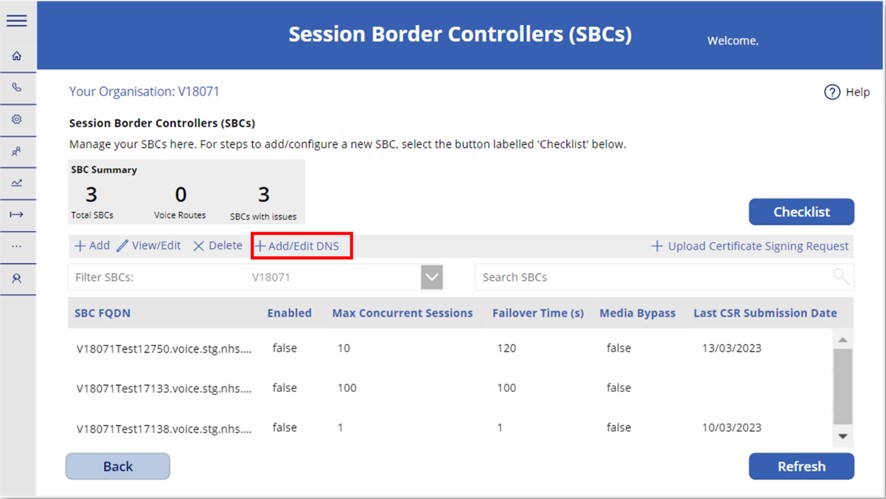 1. Navigate back to the SBC landing screen and select the identified SBC (e.g., the SBC endpoint you created in Step 1). Select ‘Add/Edit DNS’ to be directed to an IP Address/Aliases screen.
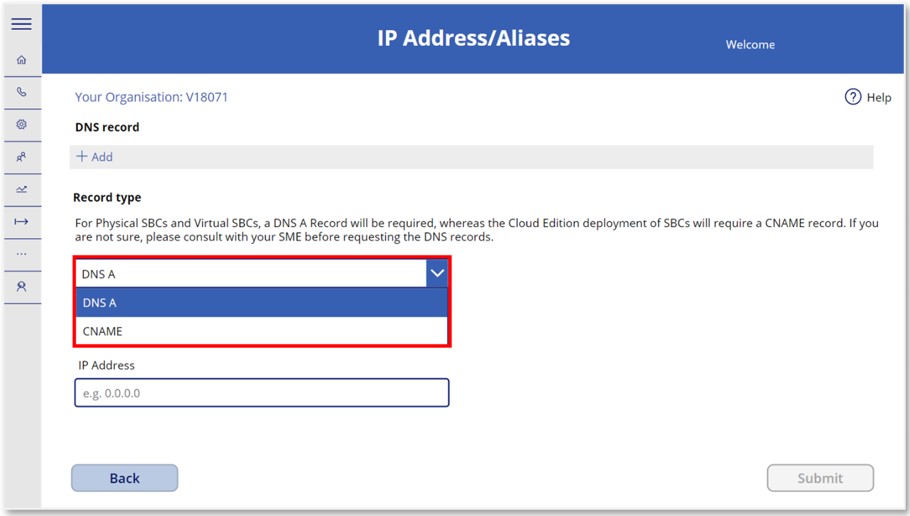
 2. You will have the option to add a DNS A (or CNAME) record that maps the SBC FQDN (i.e., ODSSBC.voice.nhs.net) to the Public IP Address (or Alias) assigned to the SBC interface for Microsoft Teams Direct Routing depending on the DNS type of the SBC.
3. Select ‘+ Add’.
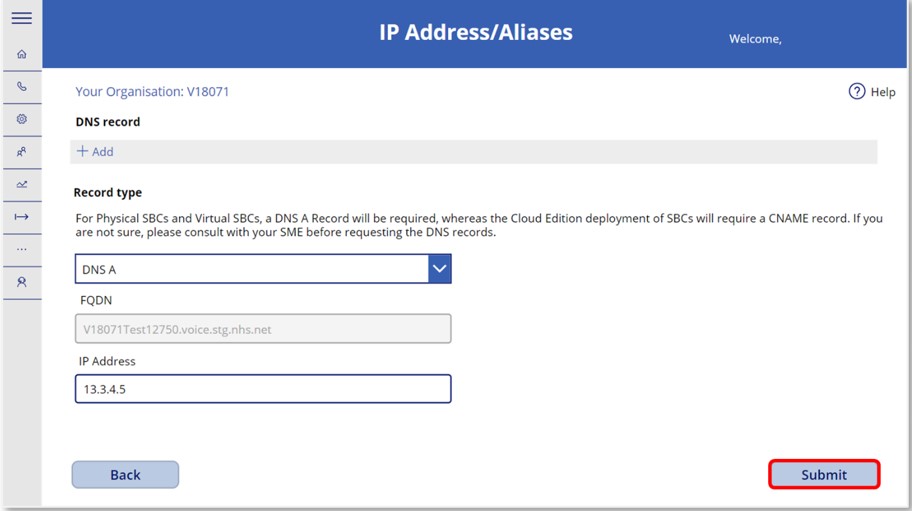 4. Once you have completed these fields, click ‘Submit’ to process all options you have selected. You will be directed to a screen informing you that the Public IPs / Aliases for the FQDN have been updated and DNS records have been automatically configured.
5. To validate if the DNS record changes have taken place, organisations can perform a DNS status check (i.e., Via Command prompt, run command <nslookup “Fqdn of the SBC”>).
6. Configure SBC connectivity to SIP provider for PSTN access (this will vary depending on your organisation requirements and your chosen provider).
Step 4 | Proceed with Direct Routing onboarding configuration
The fourth and final step in the checklist for successful SBC configuration is to complete the outstanding Direct Routing onboarding configuration actions, such as Uploading Numbers, Creating Dial Plans, Voice Routes, Voice Routing Policies and Assigning Numbers and Policies to Users. Please review the linked articles to complete these actions.
Further Use Cases
The below table provides some additional guidance on scenarios relating to SIP provider and SBC changes and actions which Phone System Admins may need to complete.
| Scenario | Activities / Actions to complete |
| Changing SIP provider (but using existing/same SBC) | · Engage with SIP provider
· Reconfigure SBC connection (SIP provider side) to connect with new SIP provider (recommendation is to test with spare SBC). This will vary slightly from provider to provider · Plan port of numbers – ensure numbers have been successfully ported over to new provider before making the change on SBC to point to new provider (i.e., switch SBC connection after porting date)
|
| Same SIP provider, but changing from an existing SBC to a new / different SBC (no change to voice routes / voice routing policies) | · Configure (new) SBC via Phone System Power App
· Successfully test and validate SBC · Add the new SBC to existing voice route and remove the old SBC from the voice route · No change in Voice Routing Policy |
| Changing SIP provider and changing SBC | · Engage with SIP provider and plan a port date (change in provider will require number porting)
· Configure SBC via Phone System Power App · Successfully test and validate SBC – connection to Teams and connection to provider · Update existing voice routes with the new SBC. (Remove SBC that’s been replaced / changed from the voice route) · No change to Voice Routing policy
|
| Last Reviewed Date | 17/04/2023 |