
Guest Organisation
After a domain has been successfully allow listed, external federated groups will allow Local Administrators to manage guest invitations for multiple external users in bulk, mitigating the need to invite them one by one. Once an External Federated Group is set up a monthly scheduled task will automate the process of sending guest invitation to all new members. If the Guest Organisation adds or removes users from the group, then these changes will be reflected when the scheduled task occurs.
If you are a Local Administrator, you can raise a request for a new external federated group via the NHSmail portal.
Creating a request for an External Federated Group
To create a request:
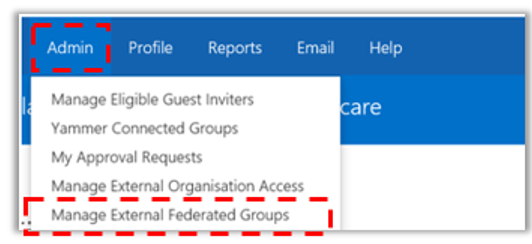
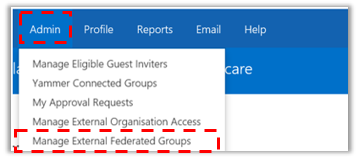 1. Click Admin in the navigation bar at the top of the screen and select Manage External Federated Groups from the drop-down menu
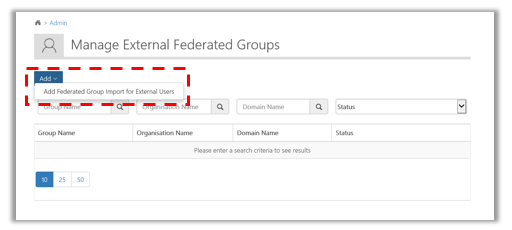 2. Click Add in the top left of the screen and select Add Federated Group Import for External Users
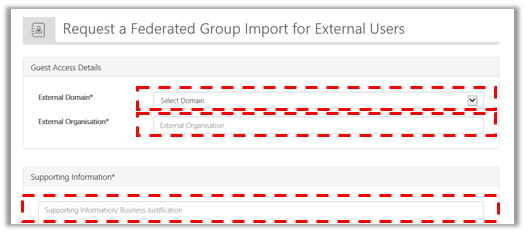 3. Select the External Domain from the drop down menu and then populate the Guest Organisation and Supporting Information fields
 4. Click on Submit
For completing the external federated group set up follow the steps mentioned in the Completing the External Federated Group Setup section.
External Azure Active Directory Group Replication
The purpose of this article is to guide NHSmail Local Administrators who are working with the technical administrators at their associated Guest Organisations in coordinating the setup of a Federated Group.
Azure Federated Group Import Solution
The Azure Federated Group Import solution is designed to replicate an external Azure Active Directory (AD) group into the NHSmail tenant, the membership of which is managed by the external organisation. This requires a one-time import of a group from an external organisation’s Azure AD tenant. As the group is managed by an external organisation, accounts are added / removed automatically
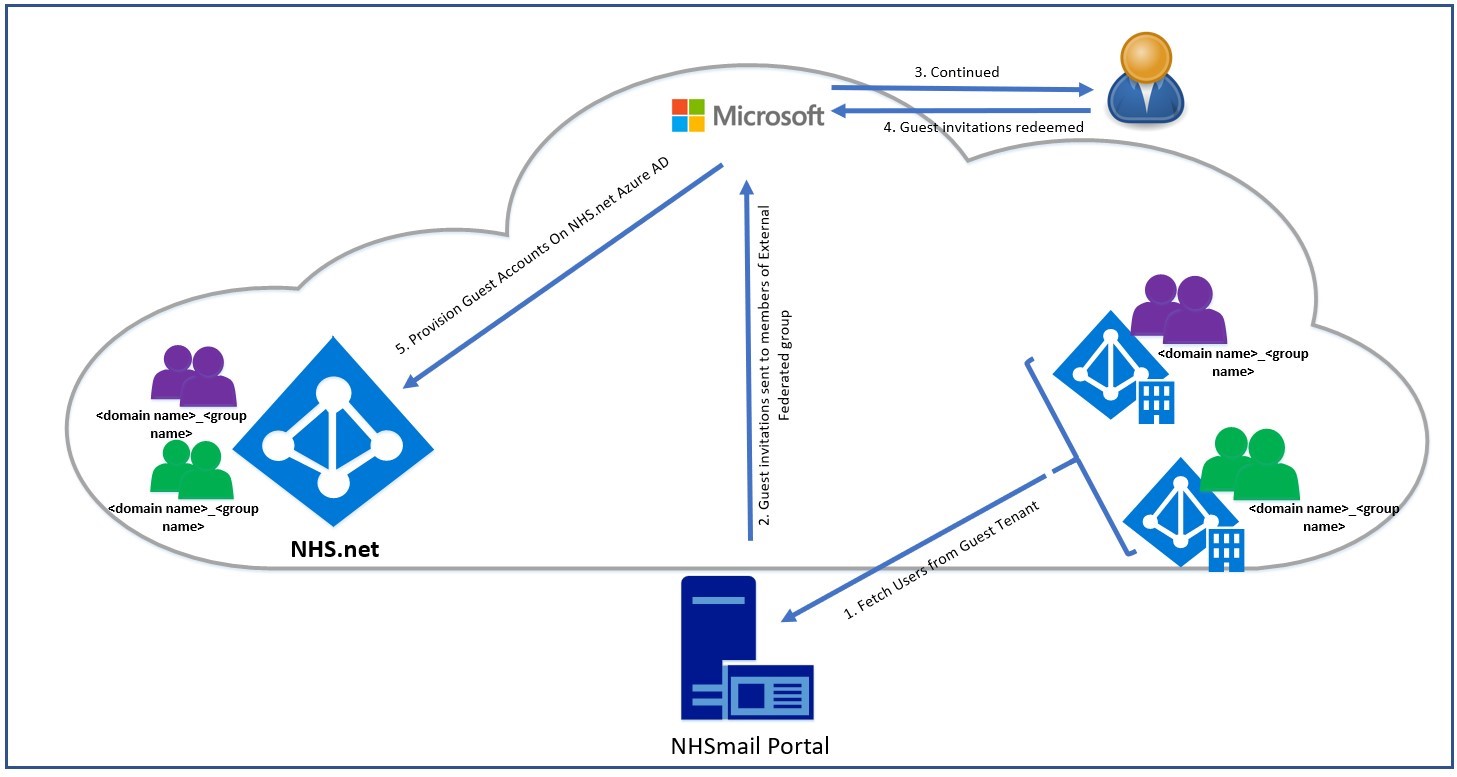
Once the group import has been configured, the NHSmail portal will automate the process of sending guest invitations and revoking access (where required). This is illustrated in the diagram below.
Setup Guide for NHSmail Local Admin
There are five phases to the Azure Federated Group Import set up processes as illustrated in the diagram below. As the NHSmail Admin you will be required to facilitate steps 1 and 3-4 whilst the guest organisation is accountable for Step 2.

1) NHSmail Local Administrators request a Federated Group Import on behalf of an external organisation via the NHSmail Portal
2) The guest organisation administrator will need to execute the tasks in the Tasks to be executed by Guest Organisations section
3) The required details for the import are the guest organisation’s:
- Azure AD tenant name
- Azure AD group name
- Azure AD group ID
These details are obtained from completing step 3
4) Once the group import has been configured, the NHSmail portal will automate the process of sending guest invitations and revoking access (where required)
Tasks to be executed by Guest Organisation
The guest organisation administrator will need to execute the following tasks.
|
# Task Description Task Justification |
||
| 1.01 | Invite the NHSmail Portal B2B service account
“b2bsvc.nhsmail@nhs.onmicrosoft.com” as a guest user of the guest organisation’s Azure AD tenant. |
A service account is required to read the users that are members of the Azure group within the guest organisation’s tenant and send guest invitations to these users, so they can collaborate with NHSmail users. |
| 1.02 | Assign the NHSmail Portal B2B service account the Security / Reporter Reader permissions within the guest organisation’s Azure AD tenant. | The service account requires the Security / Reporter Reader permissions to capture the user details from the group within the guest organisation’s Azure tenant. |
| 1.03 | Identify the external organisation’s Azure AD tenant name. | Azure AD tenant details are required for the service account to communicate with the external organisation’s Azure tenant. |
| 1.04 | Create a new Azure AD group within the external organisation’s Azure AD Security Group tenant and add users as members (optional). | Members of this group will be invited as guest users of the NHSmail O365 tenant.
If an existing group is being used, this step can be skipped. |
| 1.05 | Identify the external organisation’s Azure AD group name and ID. | An Azure AD group name and ID is required so that the service account can identify users and send them guest invitations. |
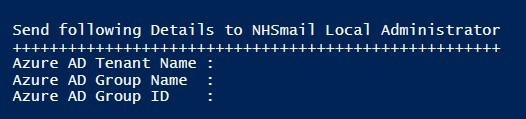
| 1.06 | Share the following information with the NHSmail Local Administrator:
|
These details need to be sent to the NHSmail Local Administrator so they can complete the Azure Federated Group Import set up via the NHSmail Portal before the user identification and guest invitation task can be executed. |
The above pre-requisite tasks can be met by either executing a PowerShell script or using the Azure AD Portal.
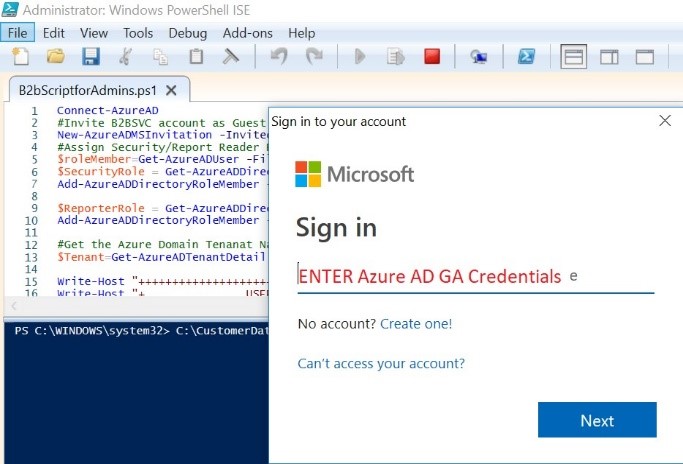
Option 1: Using PowerShell
Click here to download the PowerShell script to be executed.
|
# |
Screen Shot |
Task Description |
| 1.01 |
|
Enter your Azure AD Global Administrator credentials |
| 1.02 |
|
Enter the Azure AD group name |
| 1.03 |
|
Send the output to the NHSmail Local Administrator |
Option 2: Using the Azure AD Portal
Alternatively, the pre-requisite tasks can be met by completing the following steps within the external organisation’s Azure AD portal.
|
# |
Screen Shot |
Task Description |
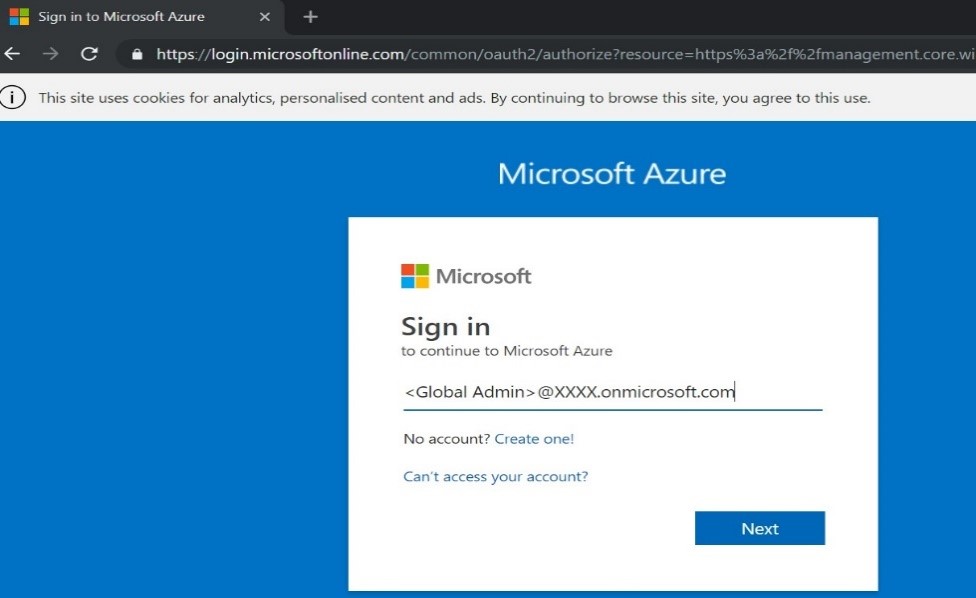
| 1.01 |
|
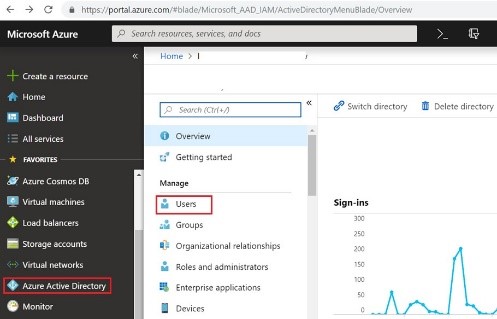
Login to https://portal.azure.com using your Azure AD Global Administrator credentials
|
| 1.02 |
|
Select Azure Active Directory > Users |
| 1.03 |
|
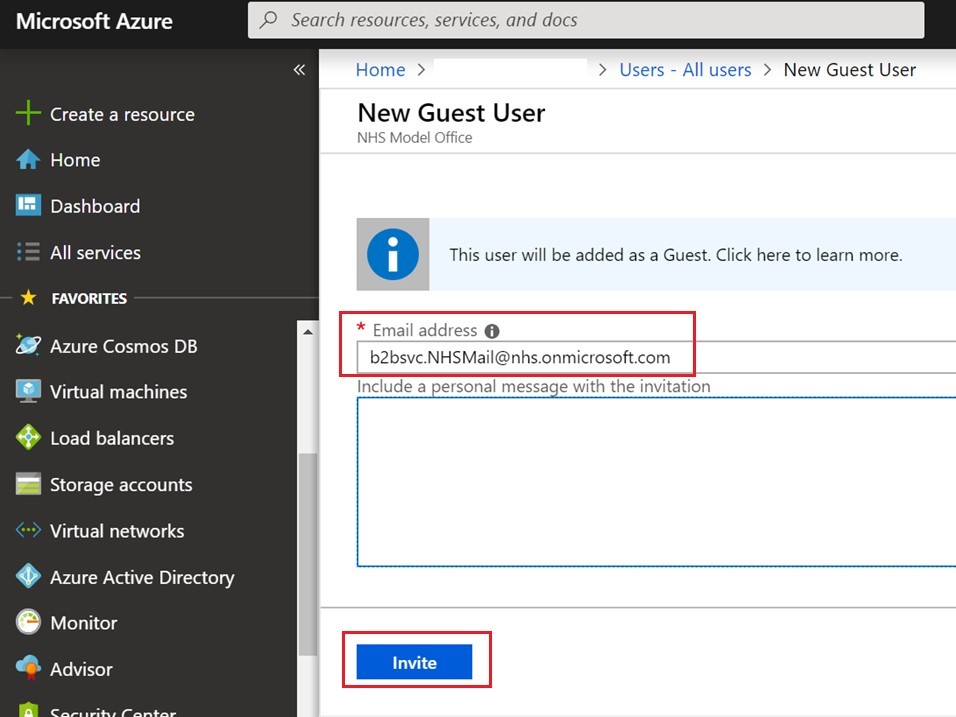
Select + New guest user |
| 1.04 |
|
Input the NHSmail Portal B2B service account name: |
| 1.05 |
|
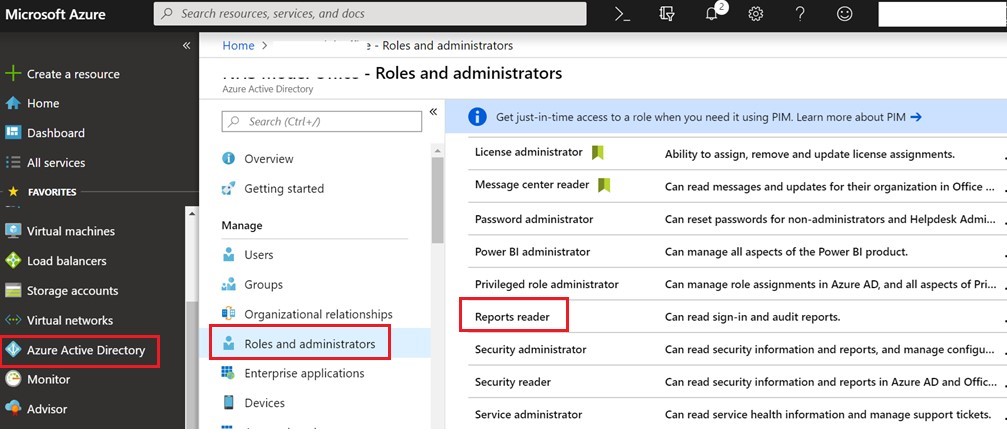
Select Azure Active Directory > Roles and administrators >Security reader |
| 1.06 |
|
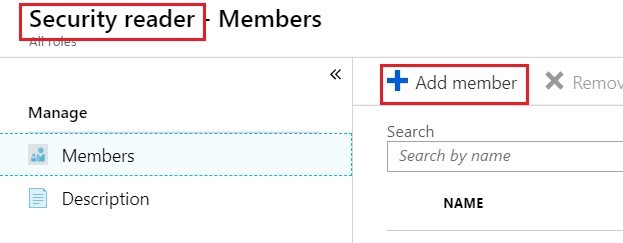
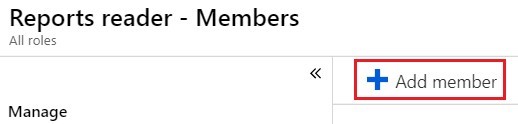
Select + Add member |
| 1.07 |
|
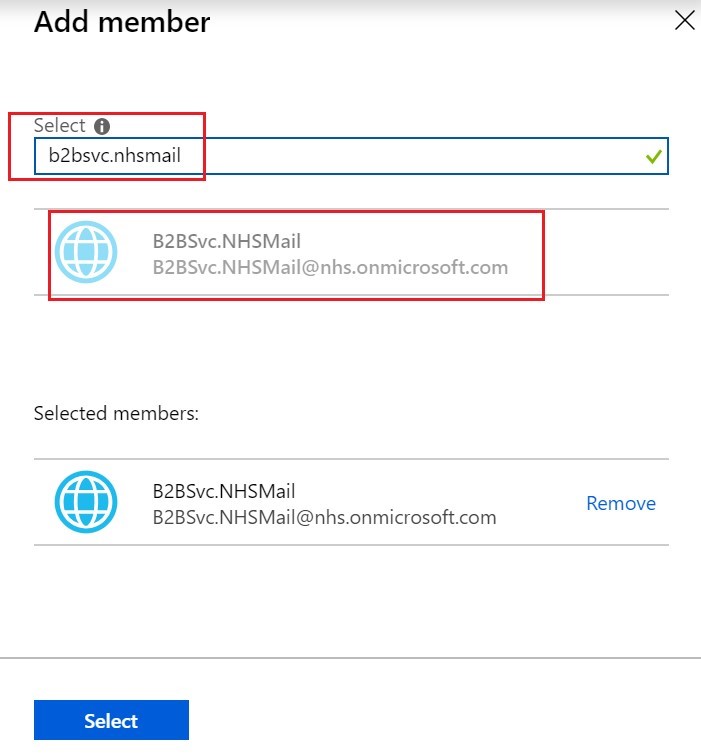
Select b2bsvc.nhsmail@nhs.onmicrosoft.com and confirm the selection by selecting Select |
| 1.08 |
|
Select Azure Active Directory > Roles and administrators >Reports reader |
| 1.09 |
|
Select + Add member |
| 1.10 |
|
Select b2bsvc.nhsmail@nhs.onmicrosoft.com and confirm by selecting Select |
| 1.11 | 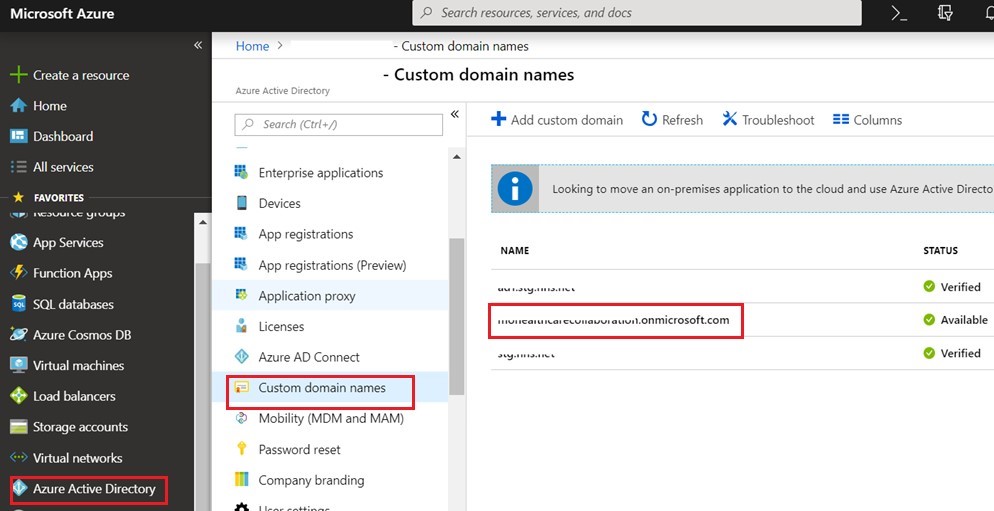 |
Select Azure Active Directory > Custom domain names
Select the domain name which ends with onmicrosoft.com Copy the domain name and paste on any document editor (e.g. notepad) This will need to be sent to the NHSMail Local Administrator |
| 1.12 |  |
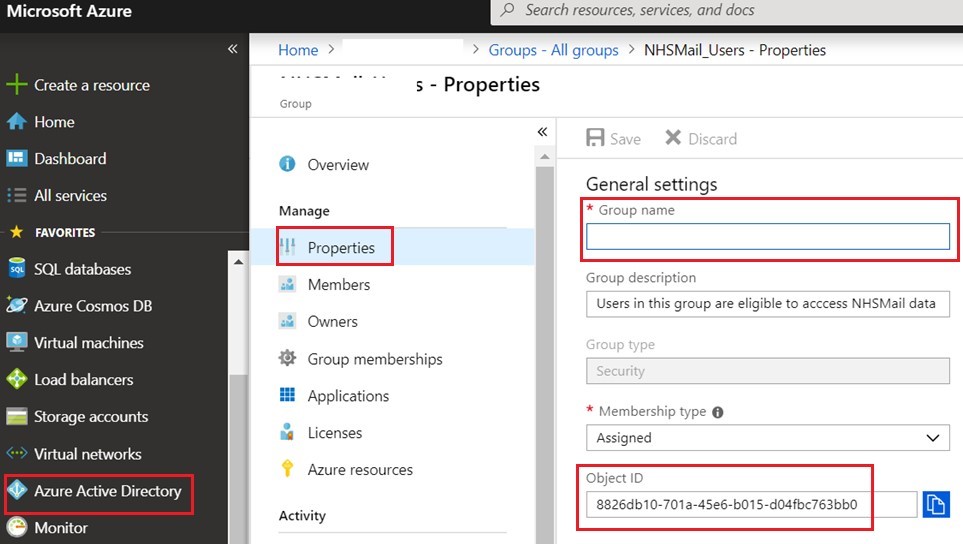
Select Azure Active Directory > Groups – All groups and search for the Azure AD Group, which contains the users which require the guest accounts in order to access NHSmail data.
Select the group name to open the properties. |
| 1.13 |
|
Copy the Group name and Object ID and paste on any document editor (e.g. notepad). This will need to be sent to the NHSmail Local Administrator. |
| 1.14 | Send the following information to the NHSmail Local Administrator:
|


Completing the External Federated Group Setup
 1. Once you have completed the steps detailed within B2B Azure AD Federated Group set up guide you will be able to update the details of an external federated group.
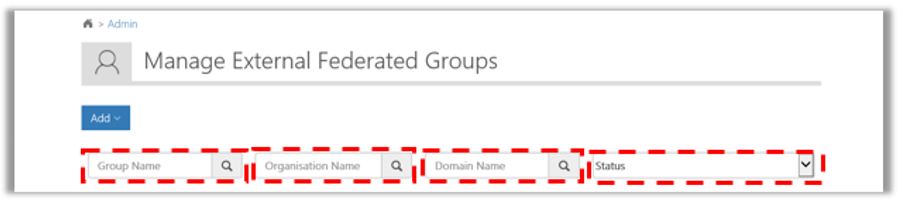 2. Use the search box to find a group. The results of the search will be displayed on the screen
The system will return results for any external federated group which contains the text entered in the search box.
3. Click the External Federated Group to open the Edit Federated Group Import for External Users page
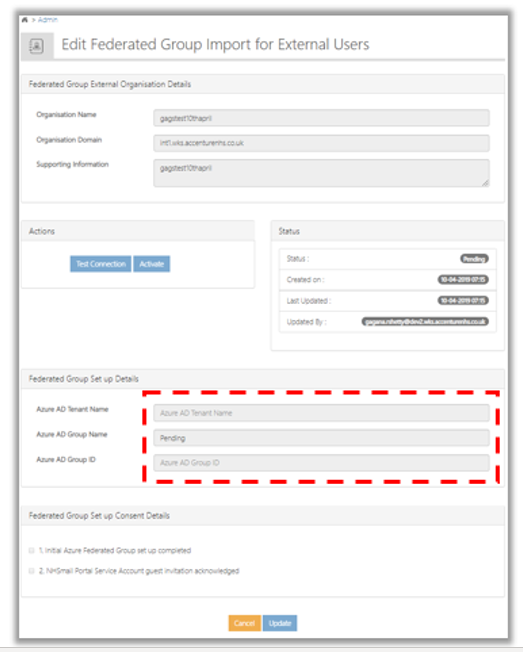 4. Update the Azure AD Tenant Name, Group Name and Group ID fields within the information provided by the Guest Organisation
Note: Refer to the Azure Federated Groups set up guide for more information about gathering the Azure tenant and group details.
 5. Select 1. Initial Azure Federated Group set up completed and select Update
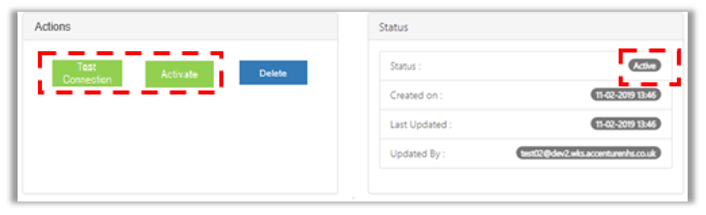
Once External Federated Group Setup has been completed as outlined above, the status will show as Approved Guest Invite Acknowledgement Required.
Once the status shows as mentioned above please raise a request with NHSmail Helpdesk for them to complete the rest of group set up activities by:
- Acknowledging the B2B Portal service account invitation guest invitation
- Testing that the B2B Portal service account has the correct permissions to fetch the members of the group
- Initiating the first group sync
 You’ll receive an email notification once this completed.
| Last Reviewed Date | 11/08/2022 |