
Introduction to Guest Inviter Management
Eligible Guest Inviter groups allow Local Administrators to apply Guest Inviter permissions to a defined group of users. An organisation can only have one group. The users that are members of this group will be given the permissions in Azure AD to invite external users as guests to the NHSmail tenant through the NHSmail portal. These users will also have the permissions to approve guest access extensions for external users.
If you are a Local Administrator, you will be able to manage guest inviters via the NHSmail portal.
Creating an Eligible Guest Inviters Group
To create a group:
 1. Click Admin in the navigation bar at the top of the screen and select Manage Eligible Guest Inviters from the drop down menu
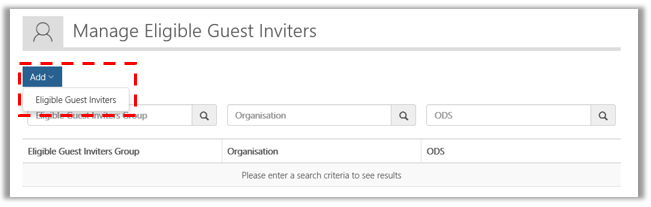 2. Click Add in the top left of the screen and select Eligible Guest Inviters
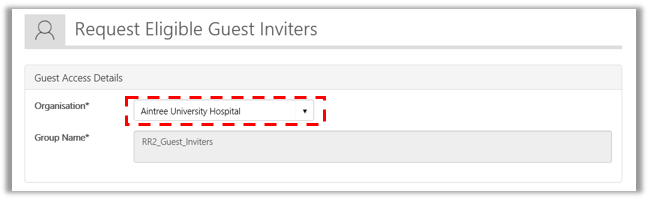 3. Select the owning Organisation to which the new group will apply, from the drop down menu
Once you have selected the Organisation, you can add members to the group. Users can only be added by using the Import option at the time of creation of this group.
Refer the Import section for more information on using Import function.
 4. Select Request to finish creating your Eligible Guest Inviters group. It will then be added to the Eligible Guest Inviters group list.
Editing and deleting an Eligible Guest Inviters Group
To edit a group:
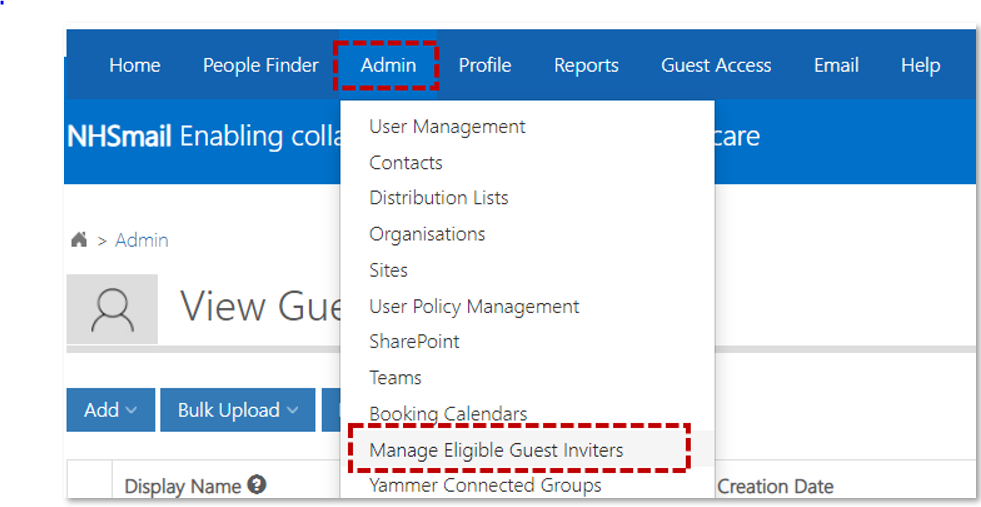 1. Click Admin in the navigation bar at the top of the screen and select Manage Eligible Guest Inviters from the drop down menu
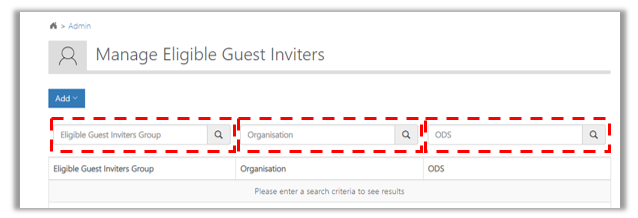 2. Use the search box to find a Guest Inviter group. The results of the search will be displayed on the screen
The system will return results for any eligible guest inviter group which contains the text entered in the search box
3. Click the Eligible Guest Inviter Group to open theEdit Eligible Guest Inviter Group page
Adding members
You can add members to the group, either by using the Add or Import option.
To Add members using Add option
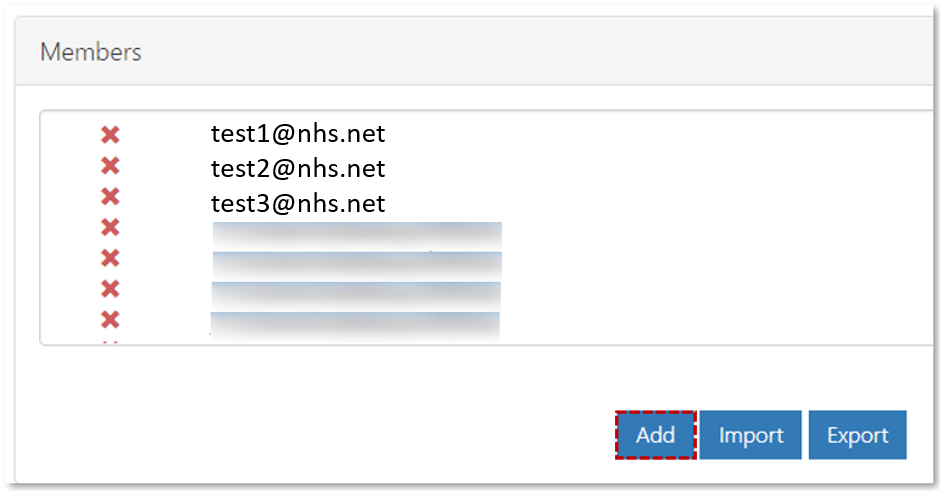 1. Click on Add
 2. After selecting Add, search for user using their email address or display name. After locating the relevant user you want to add as member or owner, select the box on the left-hand side of the screen and then click ‘Select’
 3. Click on Update at the bottom of the page
 A success notification will be displayed
To Add members using Import option
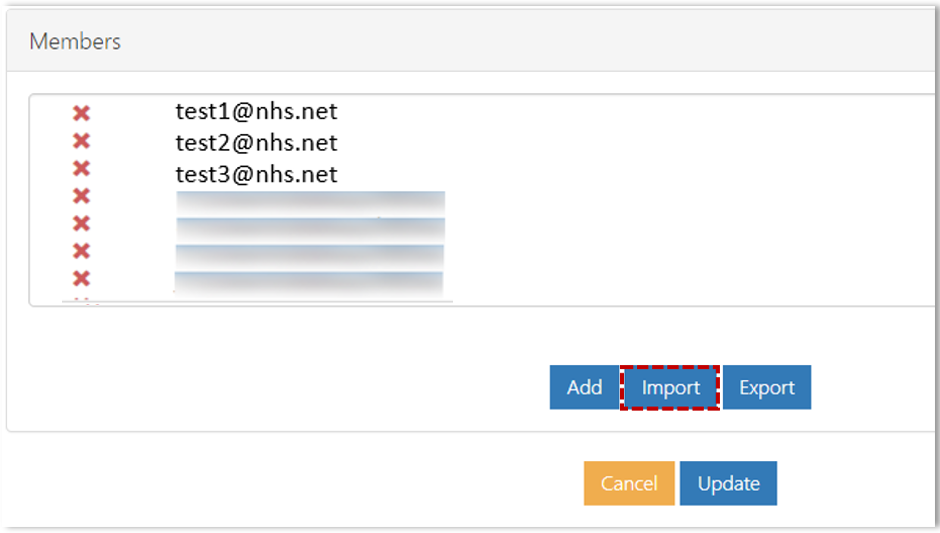 1. Click on Import
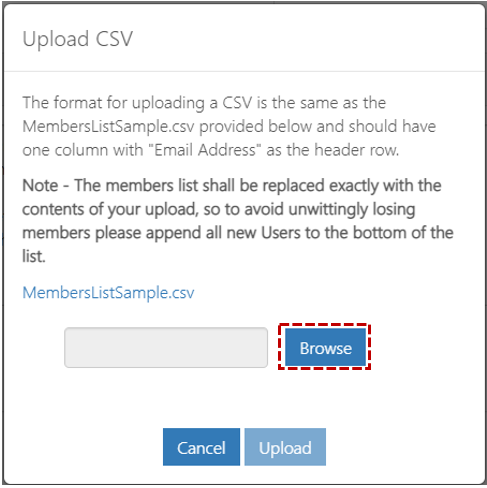 2. Click on Browse
 3. Select the CSV file, click on it and click Open
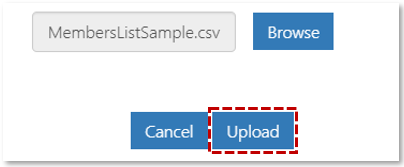 4. Click on Upload
Removing a user
 1. Click on red X to the left of the email address in the list of Members
2. Click on Update
Local Administrators can bulk import to add or remove members into / from an eligible guest inviter group. The list imported will replace the current list of members. This can be done by using the Import function. Refer to the steps in Adding members via Import section for more information.
Deleting Eligible Guest Inviters Group
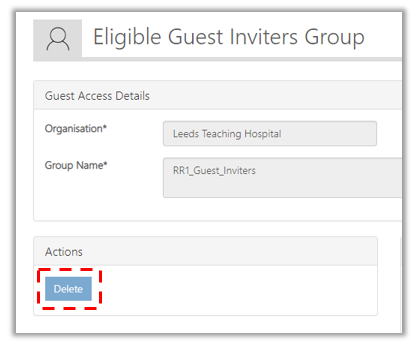 1. Click Delete
| Last Reviewed Date | 03/03/2023 |