Scheduling Assistant offers extra help in coordinating multiple schedules when creating a meeting
It allows you to view when other people are busy or available in order to determine when the best time is to schedule a meeting
 1. Click Calendar in the navigation bar at the top right of the screen
2. Create a meeting and invite attendees
For more information on this, refer to the Creating meetings and inviting attendees section of this module
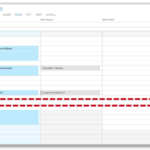
3. Click Scheduling Assistant at the top of the meeting invitation screen to view the times when all attendees are available
 In scheduling assistant you will be able to see the details of others’ appointments and meetings, depending on the permission level they have set for you to view their calendar
The screen allows you to easily identify the best time to schedule a meeting by showing when each attendee is either busy or free, allowing you to see when there are conflicts
Your own meetings will appear as blue boxes in the calendar, whilst other attendees’ meetings will appear as grey boxes
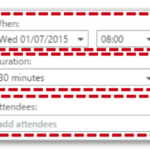
4. Select an option from the When drop down lists to set your meeting at a time when all attendees are free
 5. To adjust the length of the meeting, change the duration in the Duration drop down list at the left of the screen
6. Type a contact’s name into the search box to add more attendees
If you add more attendees, their schedule will also appear on the scheduling assistant screen
You can make attendees optional by right clicking on their name and selecting Attendance optional
7. When you have determined the best meeting time to accommodate all attendees, click OK at the top left of the page
8. When you have finished entering all other meeting details, click Send at the top left of the screen
| Last Reviewed Date | 4/3/2019 |
