1. Prerequisites
1.1 The DigPacks Asset Booker should be installed prior to following this guide
1.2 Ensure that the CSV back-up file only contains the data you wish to restore, to ensure that there are no duplicates restored.
2. Backup process – The scheduled Cloud-Flow
The purpose of this Cloud-Flow is to take a backup of booking data that is held within the ASB_AssetBookings Dataverse for Teams table.
In the event of data-loss, you can use the outputs of this Cloud-Flow as part of you restore plan to restore any data that was deleted since the previous back-up.
Follow the steps below to learn how to backup and restore:
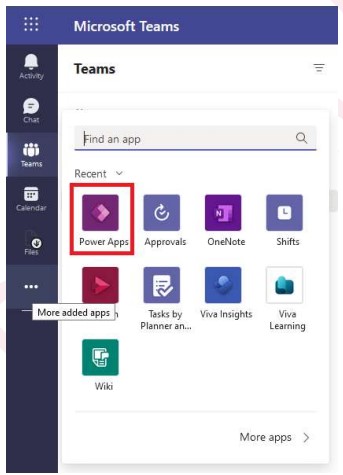 2.1 Click on the Power App icon from the sidebar (you may have to click the ellipsis icon to see more
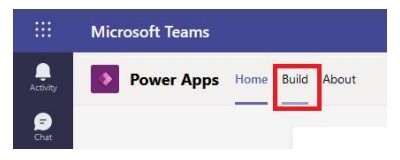 2.2 Click on the ‘Build’ tab from the top.
 2.3 Click on Cloud-Flows
2.4 Click on ASB-Scheduled-Export and click Edit
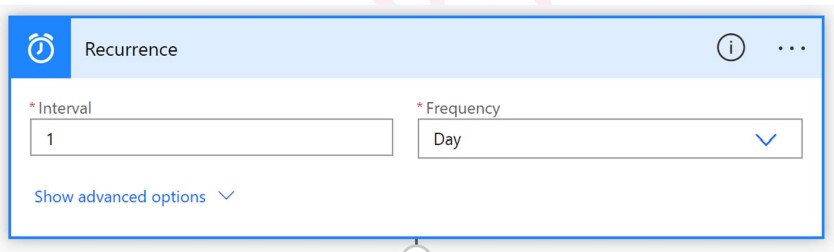 2.5 Change the recurrence to your preference – how often you would like this scheduled flow to back up your data
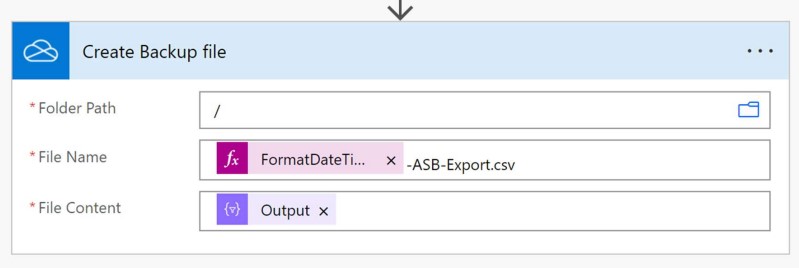 2.6 Configure the location to store this file (in this case we are storing the backup file in a OneDrive
account for a Service Account).
2.7 Run the flow – based on your schedule, an Export file is created in the location of your choice, which can be used as part of the restore process.
3. Restore process
Follow the steps below to restore data that was backed up from following the previous steps in this guide.
 3.1 Navigate to the Dataverse for Teams table and select the ASB_AssetBooking table
 3.2 Click on Import > Import data
 3.3 This will launch a dialogue box, please select Text/CSV:
 3.4 Click on Browse or Link to file to navigate to the backed-up file and click Next
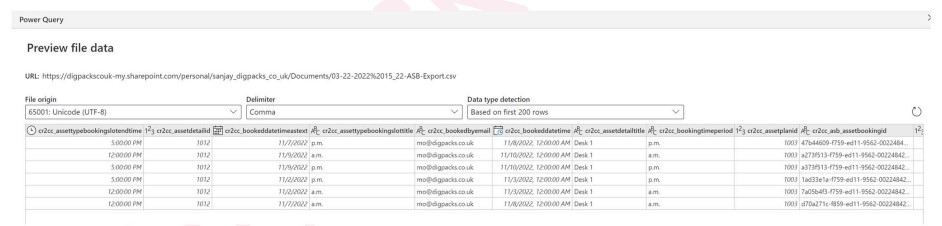 3.5 Ensure that the preview data looks as expected with no red warnings visible on screen, then click Next
3.6 Click next again
3.7 Click on the radio box for “Load to existing table”
3.8 Select the cr2cc_ASB_AssetBooking destination table
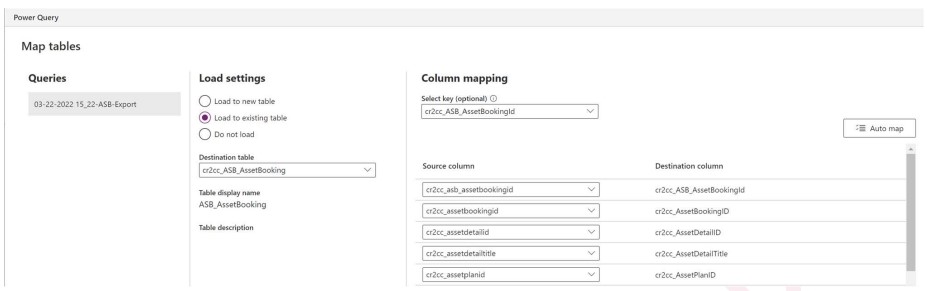 3.9 Ensure that the select key is set to cr2cc_ASB_AssetBookingID and map the source and target
columns:
3.10 Click Publish
3.11 Within 5-10 minutes, the contents of the CSV file will now be available to view in the Dataverse Tables.
| Last Reviewed Date | 13/02/2023 |