
Virtual Ward Collaboration in Microsoft Teams
Virtual Wards enable health and care services to look after people in their own homes. They can provide significant benefits and many health and care organisations are looking to set up Virtual Wards – we are working with organisations around the country to provide digital tools that will facilitate the set up and running of their virtual wards.
We carried out research sessions with staff from four organisations, which led to the following outcomes:
- Detailed case studies for each organisation
- Ideation session to identify potential solutions to the challenges of setting up a Virtual Ward
- Tools to help organisations that are looking to set up a Virtual Ward
Based on our user research we developed a Power App that enables health and care staff to automatically configure a Team in MS Teams to make it suitable for running a Virtual Ward, including elements such as…
- Patient discharge tracker
- Link to a web-based Remote Monitoring Platform
- Link to a web-based EPR
- File storage system
- Make use of Virtual Visits
- Make use of Shifts for Rostering
- Ability to share approved Apps/ Features resources centrally
How to set up a Virtual Ward for your team using the Power App
Using our Power App, you can automatically configure your team in MS Teams to make it suitable for running a Virtual Ward.
Before you start, you will need to create or choose a Teams group to set up your Virtual Ward. To use the Power App, you need to be the Owner of the Team.
Don’t worry if you want to choose a team that you have already made some modifications to – the Virtual Wards tool only adds features to a team: it doesn’t delete or modify anything that is already there.
Once you have created or chosen the Team you will set up your Virtual Ward in, you first need to add the nhsdigital.coe account to your team so it can activate the Power App. Once you have finished setting up your team through the App, you can remove the account. It will not read or take any data from your team.
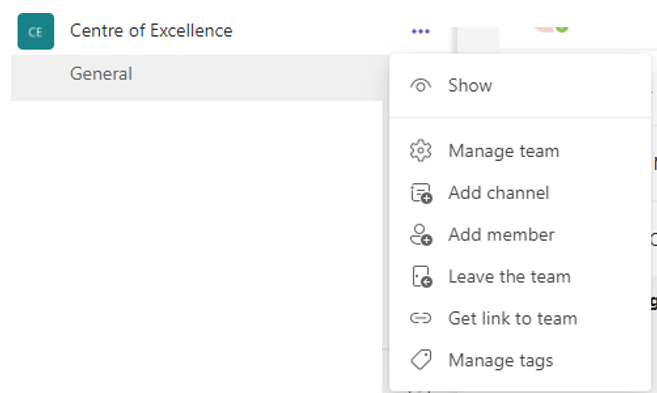 First, click the ellipsis next to the title of your team. Click “Add member“.
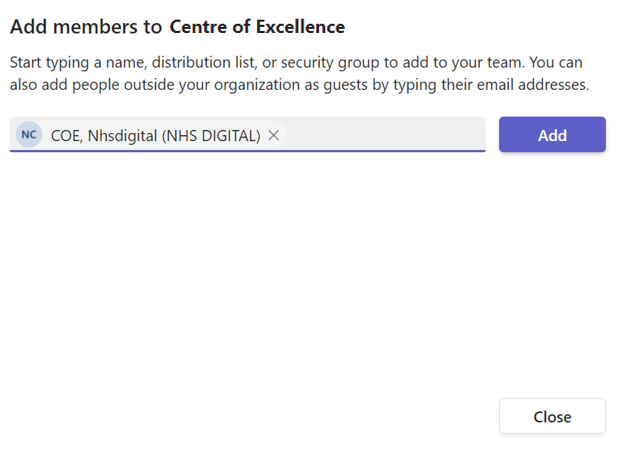 In the search bar, type “nhsdigital.coe“. Click the resulting account, as shown. Finally, click “Add“.
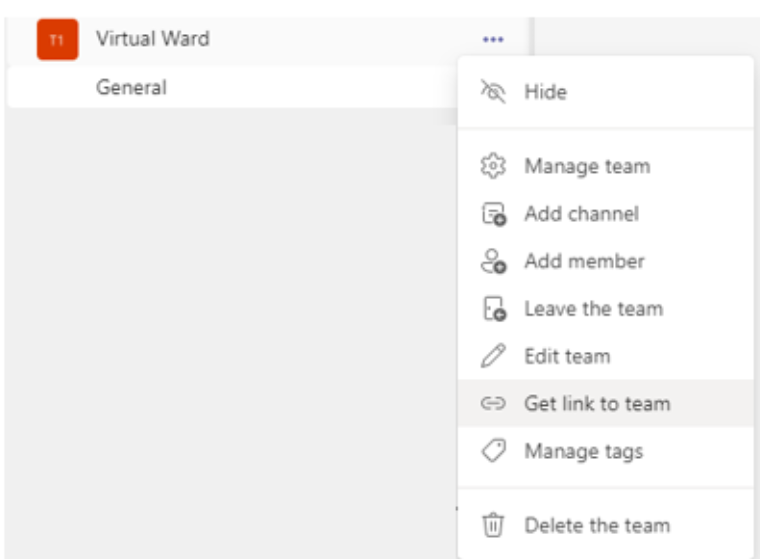 Next, you need to find the link to your Team. The Power App needs your Team ID to make sure it sets up your Virtual Ward in the right team. Find your Team in the Teams section and click the ellipsis (…) next to the name of your team. This will open a menu. Click Get link to team.
Note: Please make sure you have identified the link to your team, not the link to a channel within your team, such as “General”. You can check by making sure the menu bar says “Get link to team”, not “Get link to channel”.
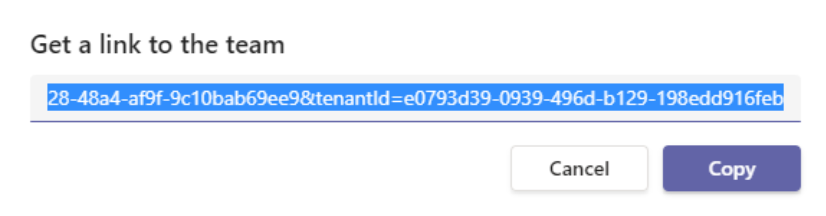
A pop-up window will appear with the full URL for your Team. Click Copy to copy the link to your clipboard.
Once you have the link to your Team, you are ready to customise your Team using the Virtual Wards Power App (click this link to open the App). Don’t forget to remove “nhsdigital.coe” from your team members once your team has been configured with the App.
Find more tools and guidance to help you.
| Last Reviewed Date | 22/12/2021 |