
A Resource Mailbox (also known as a room or equipment mailbox) is a type of mailbox that can be used for booking meeting rooms or equipment. It is set up like a shared mailbox and has owners and members who have access to it and is an effective way to manage/book meeting rooms or equipment. Once set up, users can then include the meeting room or equipment by adding/inviting the Resource Mailbox to their meeting requests.
As a Resource Mailbox is set up like a shared mailbox, refer to Editing a Shared Mailbox for more information on how to change any Resource Mailbox attributions following its creation.
The steps to edit, transfer, delete and restore a Resource Mailbox remains the same as for a shared mailbox.
Additional Information:
- A Resource Mailbox is pre-fixed with an organisation’s shortname
- It has owners and members
- It can be set up by Local Administrators
- Data retention is the same as a personal mailbox as per the Data Retention and Information Management Policy – O365
- As it is set up like a shared mailbox, a password isn’t required to access this mailbox. Permission can be managed by Local Administrators
- Standard mailbox size is 50 GB
- If the mailbox isn’t actively monitored, an out of office message should be added so anyone attempting to send an email to a Resource Mailbox knows not to expect a reply
- Once created, you can request the NHSmail helpdesk to allocate your device to MS Teams if a Teams room account is required
To create a Resource Mailbox:
 Log into the NHSmail portal using your NHS credentials and click ‘Admin’ in the navigation bar at the top of the screen. Select User Management from the drop down menu.
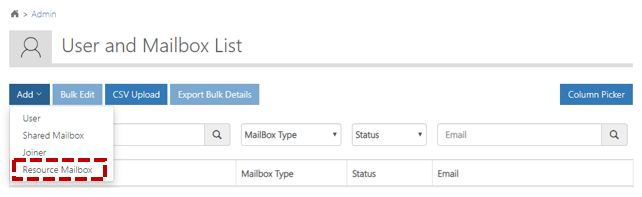 Click Add at the top left of the screen and select Resource Mailbox from the drop down menu
The remaining steps to create a Resource Mailbox replicate those of a shared mailbox. Please refer to the Creating a shared mailbox guide to complete the mailbox creation process.
To set up Resource Mailbox permissions:
To set up access to the mailbox, refer to Setting shared mailbox permissions.
To transfer a Resource Mailbox:
To transfer the mailbox, refer to Transferring a shared mailbox.
To delete a Resource Mailbox:
To delete the mailbox, refer to Deleting and restoring a shared mailbox.
To restore a Resource Mailbox:
To restore the mailbox, refer to Deleting and restoring a shared mailbox.
- Resource Mailboxes can be restored within 30 days of the original date they were deleted. After that, they can no longer be restored
- To perform a Bulk Edit of Resource Mailboxes, refer to Bulk editing users for guidance
To view your Resource Mailboxes:
As an owner of a resource mailbox, you have the ability to view your memberships.
 1. Click Profile in the navigation bar at the top of the screen, followed by My Resource Mailboxes.
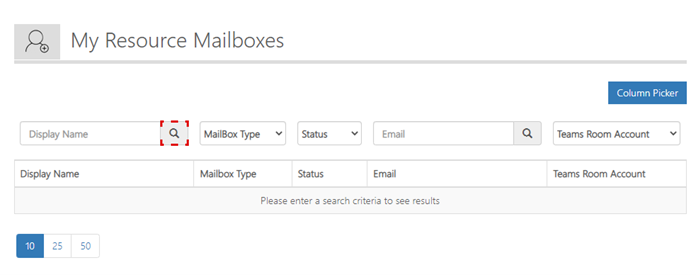 2. Click the Magnifying icon. This should automatically return a list of the mailboxes that you are an owner of.
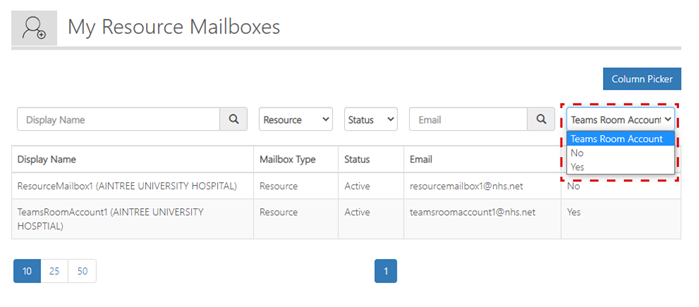 3. To distinguish between a standard resource mailbox and a Teams Room Account, filter using the Teams Room Account dropdown.
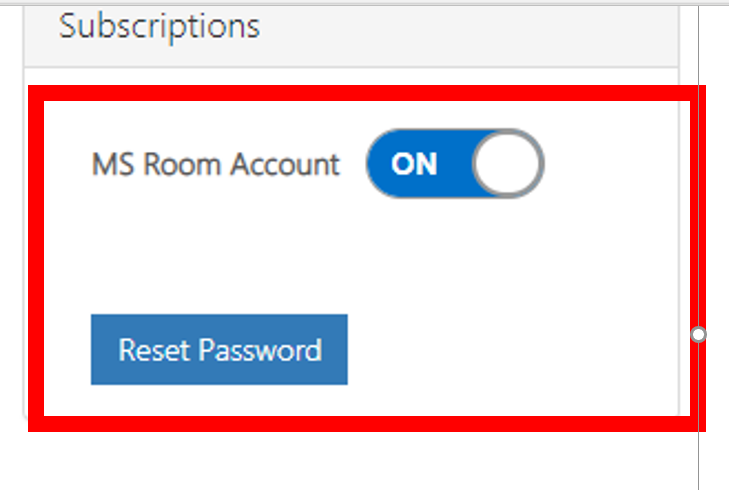
To create a MS Room Account
Once a resource mailbox has been successfully created, MS Rooms account can be created for the resource mailbox.
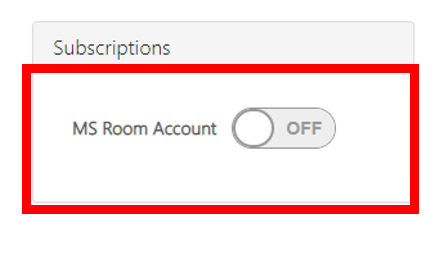 Turn on the toggle for MS Room Account

A new screen will appear to generate the password
Click on Generate password
Ensure that Require Password Change At Next Log On is selected.
Click on Set Password
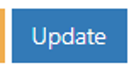 Click on Update.
For a full list of FAQs around the mailbox create process please visit this article
| Last Reviewed Date | 27/09/2021 |