NHSmail is introducing an enhanced self-service password reset (SSPR) function that will allow users to reset their passwords 24/7 without contacting their local IT or NHSmail helpdesks. To use SSPR, users will need to have at least one authentication method set up on their account to verify their identity.
This article provides step-by-step guidance to register the Microsoft Authenticator App or a mobile phone as an authentication method for SSPR.
Once you have an authentication method registered, follow the reset your password guidance in the NHSmail Portal.
Set up Microsoft Authenticator app as your authentication method
To set up the Microsoft Authenticator app follow the below steps:
Please start from Step 5, if you already have the Microsoft Authenticator app downloaded and have enabled Multi-Factor Authentication (MFA) on your NHSmail account.
If you do not have the Microsoft Authenticator app downloaded, please follow the instructions for set up by starting from Step 1. Please note that the Microsoft Authenticator app is free and you do not have to make a payment at any point of the process.
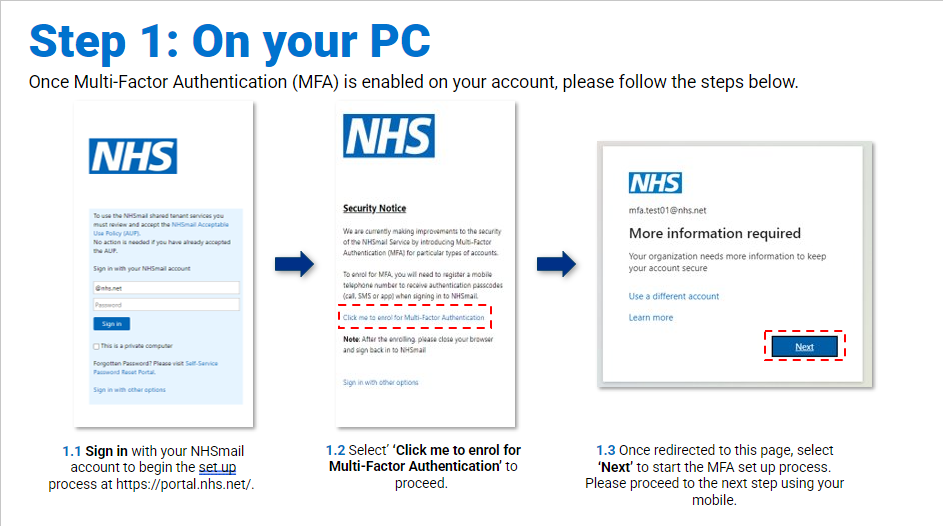
Step 1: Once Multi-Factor Authentication (MFA) is enabled on your account, sign in with your NHSmail account on your PC to begin the set up process at https://portal.nhs.net/. Select ‘Click me to enrol for Multi-Factor Authentication’ to proceed. Once redirected to this page, select ‘Next’ to start the MFA set up process. Please proceed to the next step using your mobile.
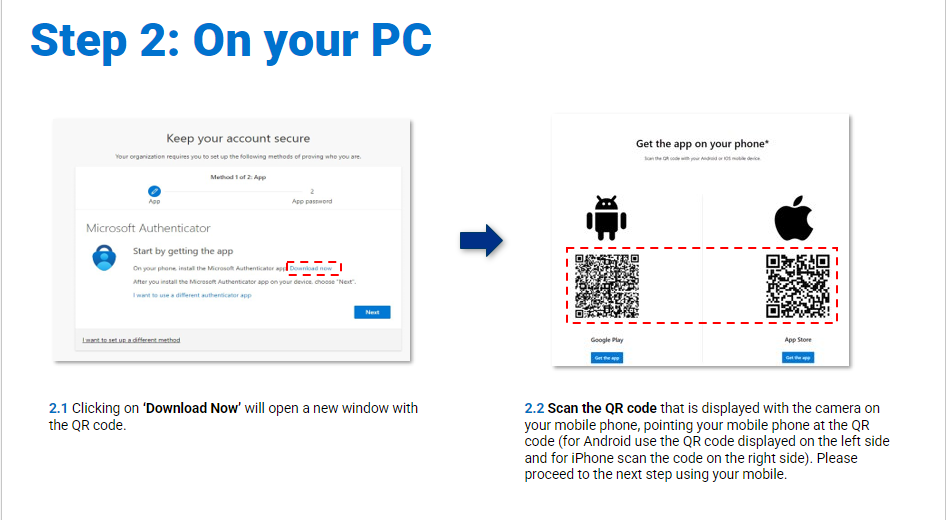
Step 2: Clicking on ‘Download Now’ will open a new window with the QR code. Scan the QR code that is displayed with the camera on your mobile phone, pointing your mobile phone at the QR code (for Android use the QR code displayed on the left side and for iPhone scan the code on the right side). Please proceed to the next step using your PC.
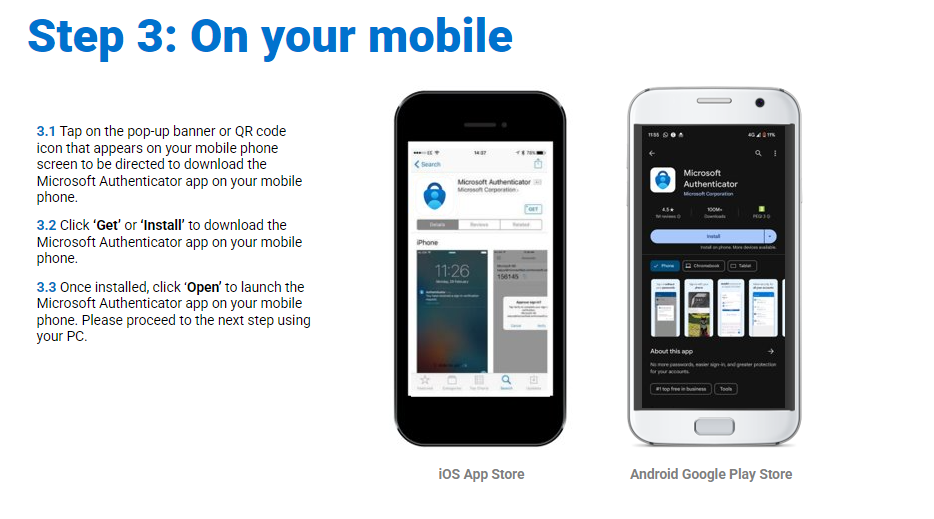
Step 3: Tap on the pop-up banner or QR code icon that appears on your mobile phone screen to be directed to download the Microsoft Authenticator app on your mobile phone. Click ‘Get’ or ‘Install’ to download the Microsoft Authenticator app on your mobile phone. Once installed, click ‘Open’ to launch the Microsoft Authenticator app on your mobile phone.
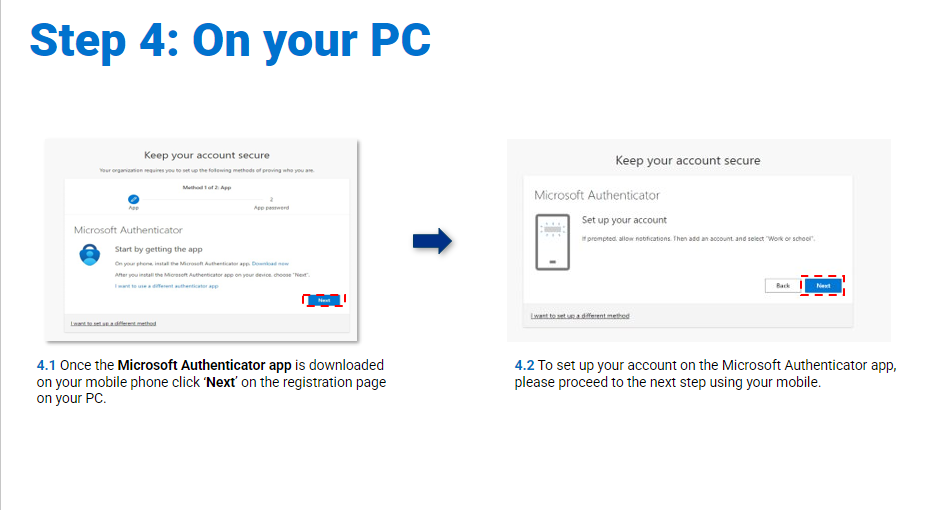
Step 4: Once the Microsoft Authenticator app is downloaded on your mobile phone click ‘Next’ on the registration page on your system. To set up your account on the Microsoft Authenticator app, please proceed to the next step using your mobile.
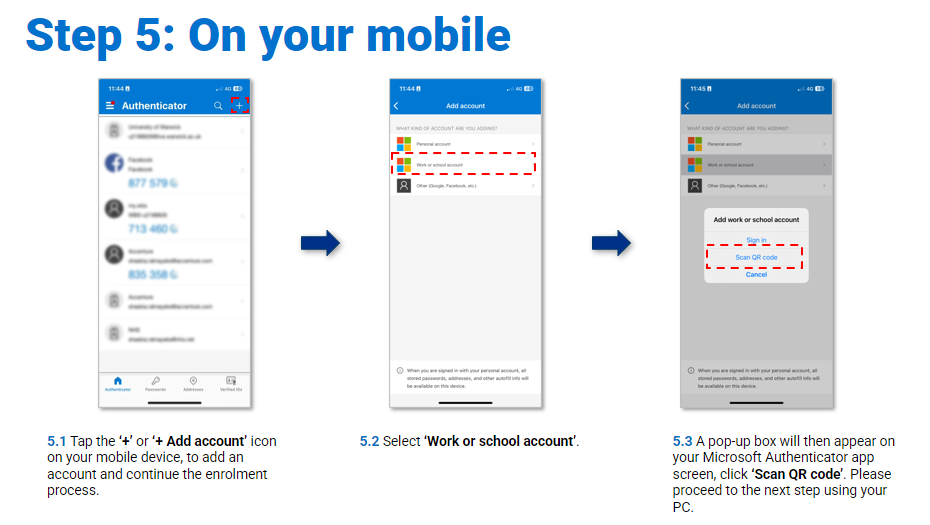
Step 5: Tap the ‘+’ or ‘+ Add account’ icon on your mobile device, to add an account and continue the enrolment process. Select ‘Work or school account’. A pop-up box will then appear on your Microsoft Authenticator app screen, click ‘Scan QR code’. Please proceed to the next step using your PC.
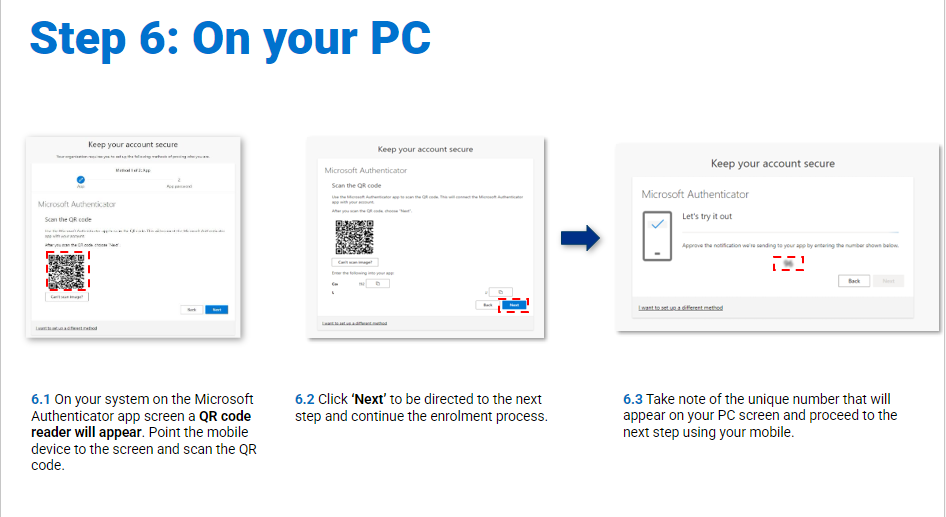
Step 6: On your system on the Microsoft Authenticator app screen a QR code reader will appear. Point the mobile device to the screen and scan the QR code. Click ‘Next’ to be directed to the next step and continue the enrolment process. Take note of the unique number that will appear on your PC screen and proceed to the next step using your mobile.
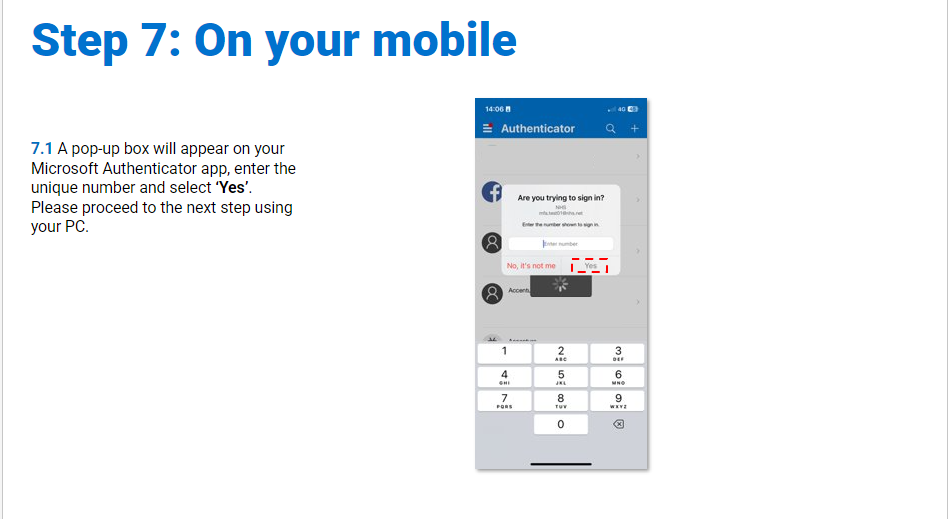
Step 7: A pop-up box will appear on your Microsoft Authenticator app, enter the unique number and select ‘Yes’. Please proceed to the next step using your PC.
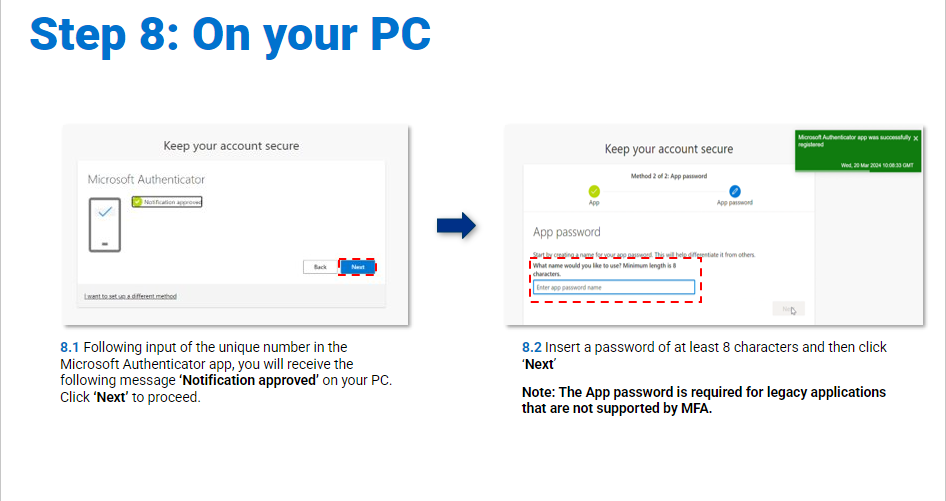
Step 8: Following input of the unique number in the Microsoft Authenticator app, you will receive the following message ‘Notification approved’ on your PC. Click ‘Next’ to proceed. Insert a password of at least 8 characters and then click ‘Next’.
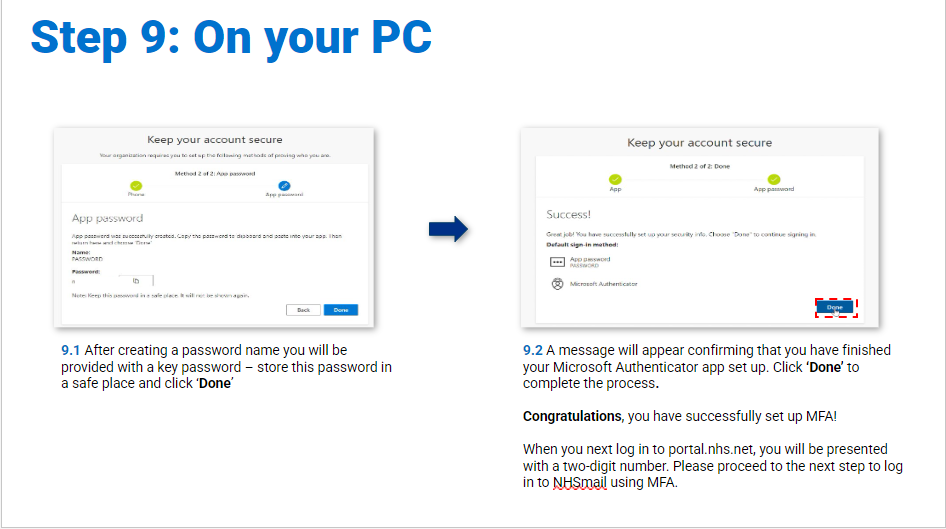
Step 9: After creating a password you will be provided with a key password – store this password in a safe place and click ‘Done’. A message will appear confirming that you have finished your Microsoft Authenticator app set up. Click ‘Done’ to complete the process.
Congratulations, you have successfully set up MFA! Microsoft Authenticator will now appear as an authentication method to reset your password.
Set up a mobile phone (SMS) as your authentication method.
You can use a mobile phone to receive a SMS text message with a verification code to verify your identity. Please note that the mobile phone number registered as part of this process will be securely stored and will not be visible to anyone in the NHSmail Portal or the NHS directory.
To set up a UK mobile phone follow the below steps:
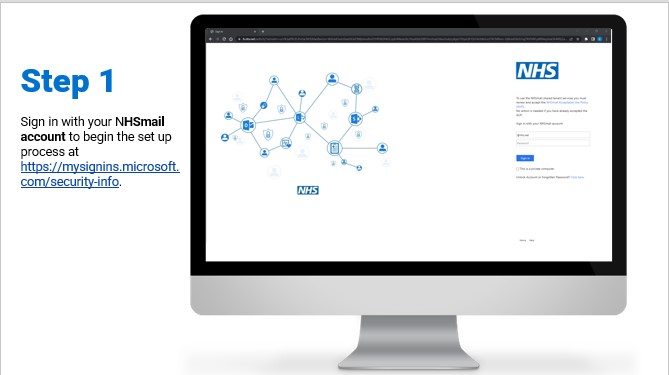
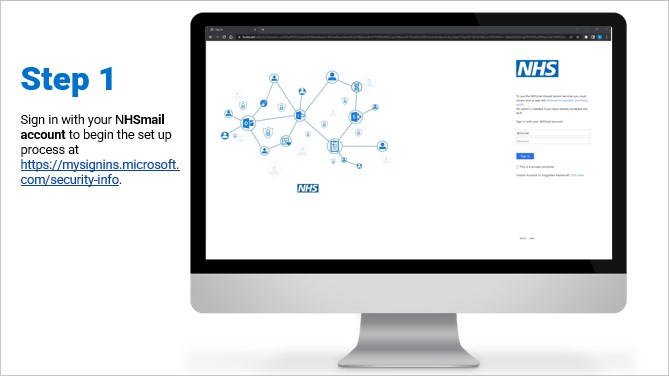
1. Sign in with your NHSmail account to begin the setup process at https://mysignins.microsoft.com/security-info.
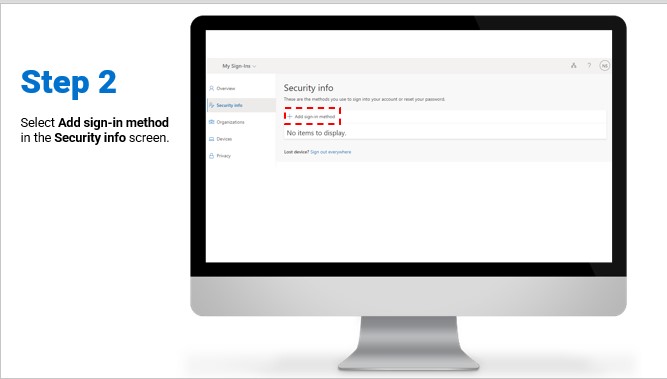
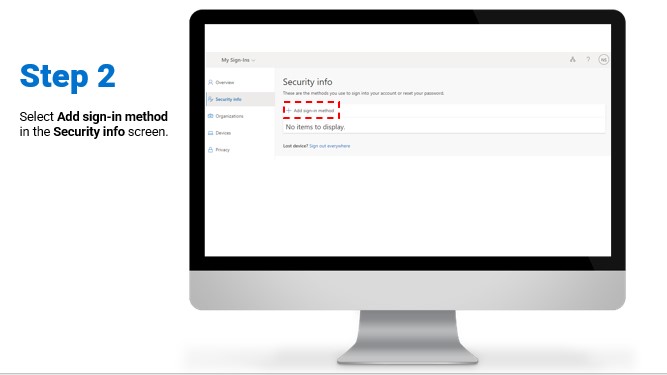
2. Select Add sign-in method in the Security info page.
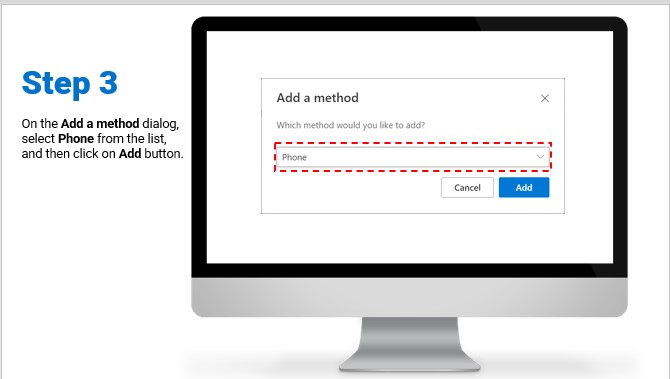
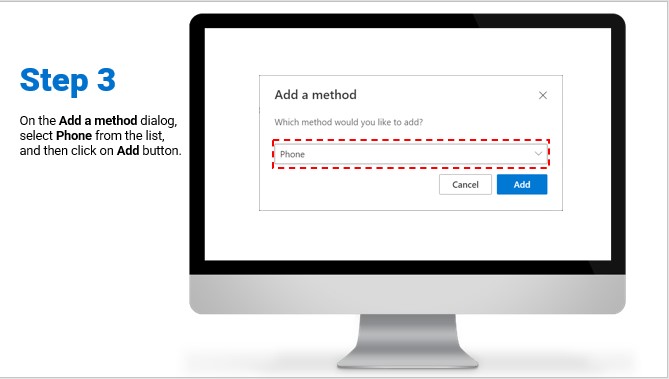
3. On the Add a method dialog, select Phone from the list, and then click on Add button..
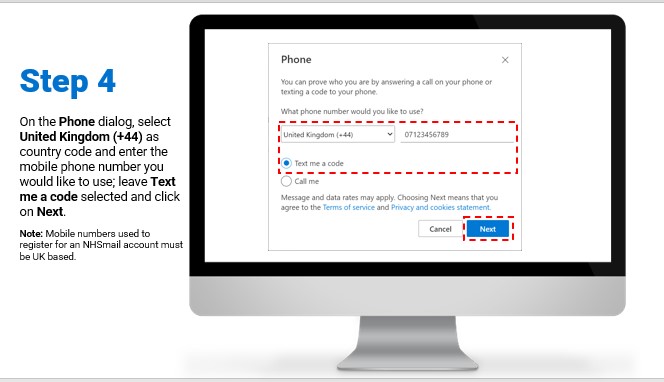
4. On the Phone dialogue, select United Kingdom (+44) as country code and enter the mobile phone number you would like to use; leave Text me a code selected and click on Next.
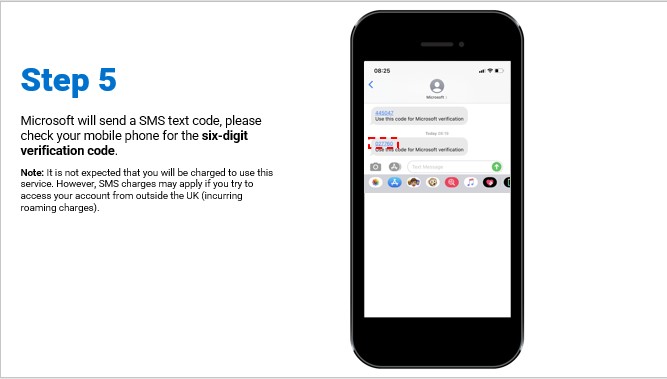
5. Microsoft will send a SMS text message, please check your mobile phone for the six-digit verification code.
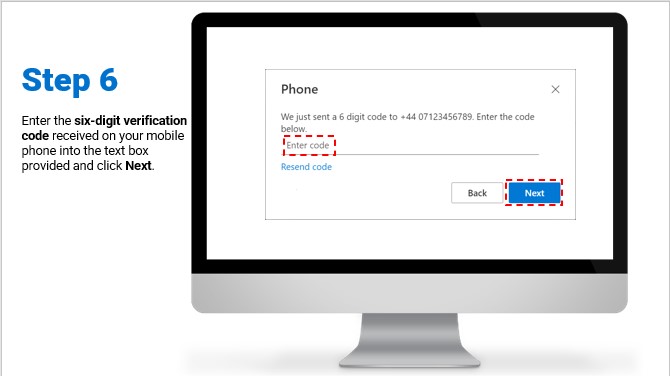
6. On the Phone dialogue, enter the six-digit verification code received on your mobile phone and click Next.
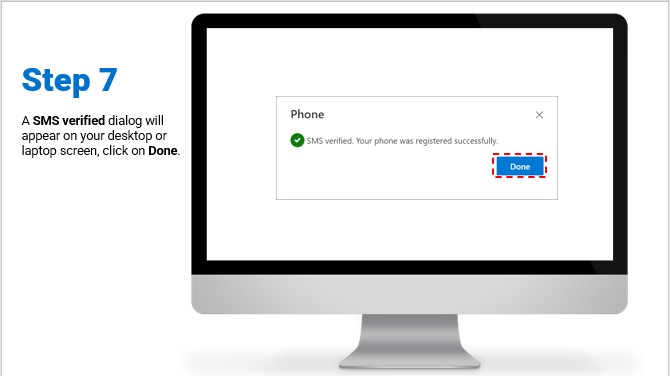
7. A SMS verified dialogue will appear on your desktop or laptop screen, click on Done.
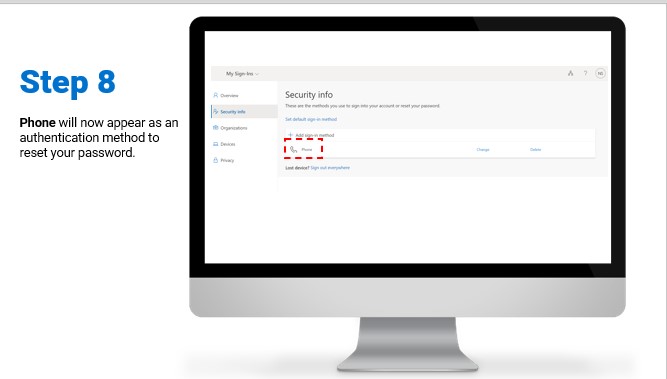
8. Phone will now appear as an authentication method to reset your password.
Set up a mobile phone (call) as your authentication method
You can use a UK mobile phone to receive a call in to verify your identity. Please note that the mobile phone number registered as part of this process will be securely stored and will not be visible to anyone in the NHSmail Portal or the NHS directory.
To set up a UK mobile phone follow the below steps:
1. Sign in with your NHSmail account to begin the setup process at https://mysignins.microsoft.com/security-info
2. Select Add sign-in method in the Security info page.
3. On the Add a method dialog, select Phone from the list, and then click on Add button.
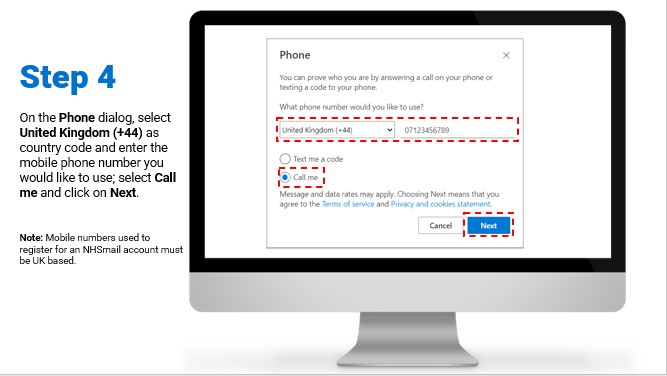
4. On the Phone dialogue, select United Kingdom (+44) as country code and enter the mobile phone number you would like to use; select Call me and click on Next.
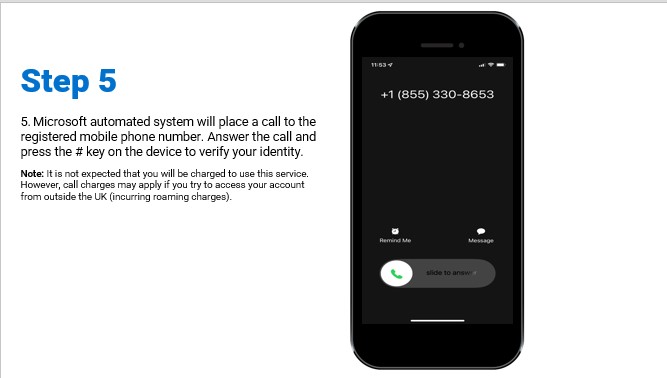
5. Microsoft automated system will place a call to the registered mobile phone number. Answer the call and press the # key on the device to verify your identity.
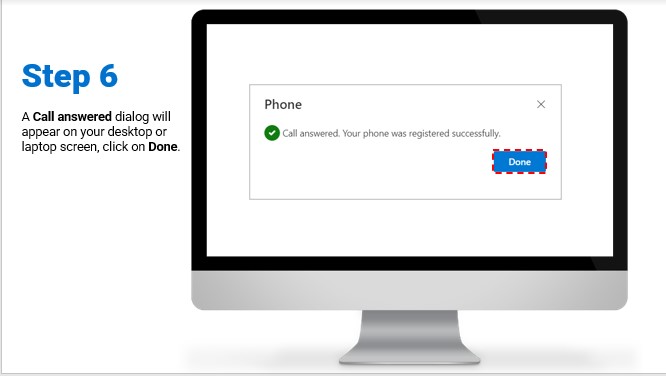
6. A Call answered dialogue will appear on your desktop or laptop screen, click on Done.
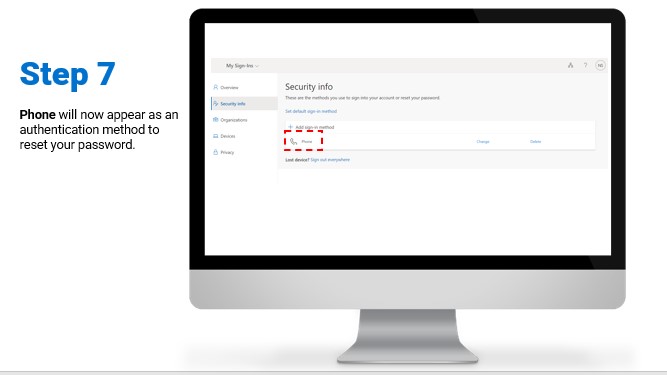
7. Phone will now appear as an authentication method to reset your password.
| Last Reviewed Date | 08/05/2024 |

