This page provides tailored guidance on Microsoft Bookings for health and social care staff. It provides an overview of Microsoft Bookings, and explains how to manage calendars, how to create appointment types and bookings, as well as tips on troubleshooting during an appointment.
This step-by-step guidance is supplemented with screenshots for reference, please click on the screenshots to expand them.
1. Virtual Visits / Microsoft Bookings overview
Virtual Visits is a solution that integrates Microsoft Bookings with Microsoft Teams for NHSmail users, such as clinicians, team administrators and other health and social care staff. Microsoft Bookings is a scheduling tool that is directly added to the Microsoft Teams app for convenient appointment booking and management.
- The Virtual Visits solution integrates Microsoft Bookings with Microsoft Teams for NHSmail users
- Virtual Visits bookings automatically appear in clinicians’ Outlook calendars
- Once a Bookings calendar is set up by a Local Administrator (LA), a new email address is created for the calendar. Appointment and reminder emails are sent to the patient via the Bookings app from the calendar email address, keeping the clinician and admin contact details secure
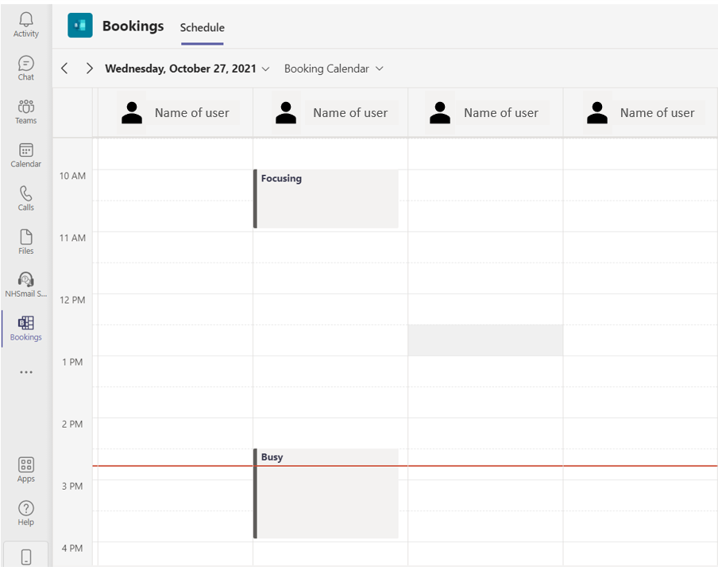
- Administrators can see the availability of multiple clinicians in a single calendar view on Microsoft Bookings
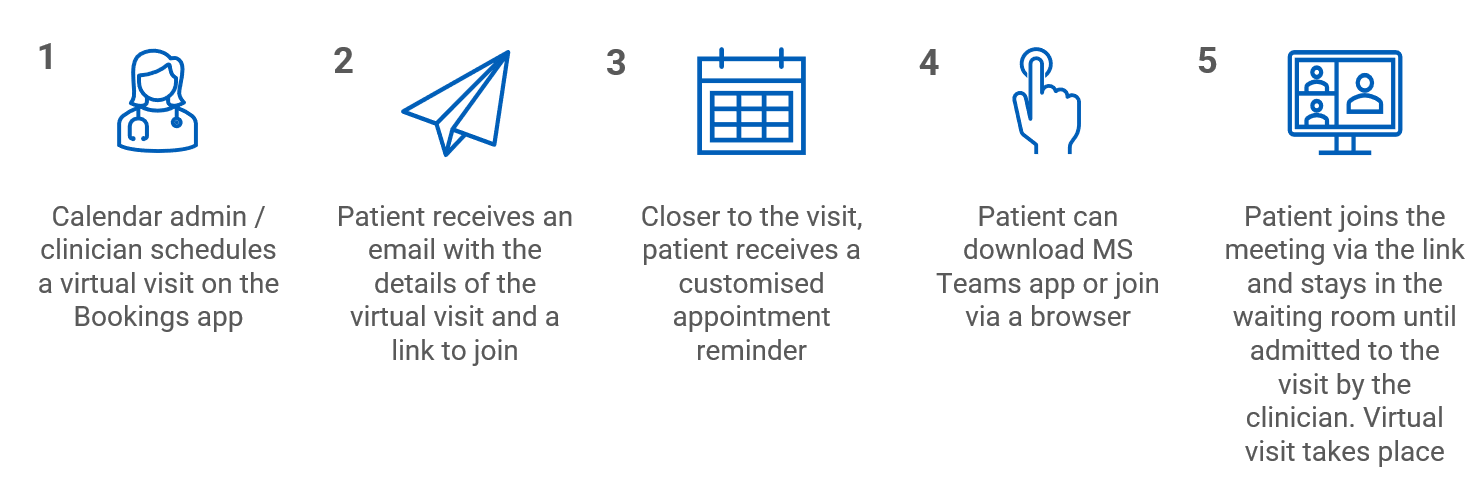
The Virtual Visits solution is not only secure and easy-to-use for clinicians and administrators, but also offers convenience to patients. See below the Patient Flow Diagram, which explains the patient experience with Virtual Visits.
1.1. Naming convention
- The calendar’s name and email address are created automatically and result from combining the organisation’s short name, service area and clinic name
- Hence the email address of the calendar is: OrgShortNameServiceAreaClinicName@nhs.net
- The Service Area field denotes the specific area the clinic is sitting under (for example cardiology, oncology, neurology)
The Bookings app allows patients to join their appointments via Microsoft Teams. This service reduces the complexity of managing virtual appointments, enabling a more secure and user-friendly experience.
1.2. Pre-requisites
- LAs must first enable Microsoft Bookings app for the member of staff and create new Bookings calendar. The detailed steps on how to do that are available in the Local Administrator Guide
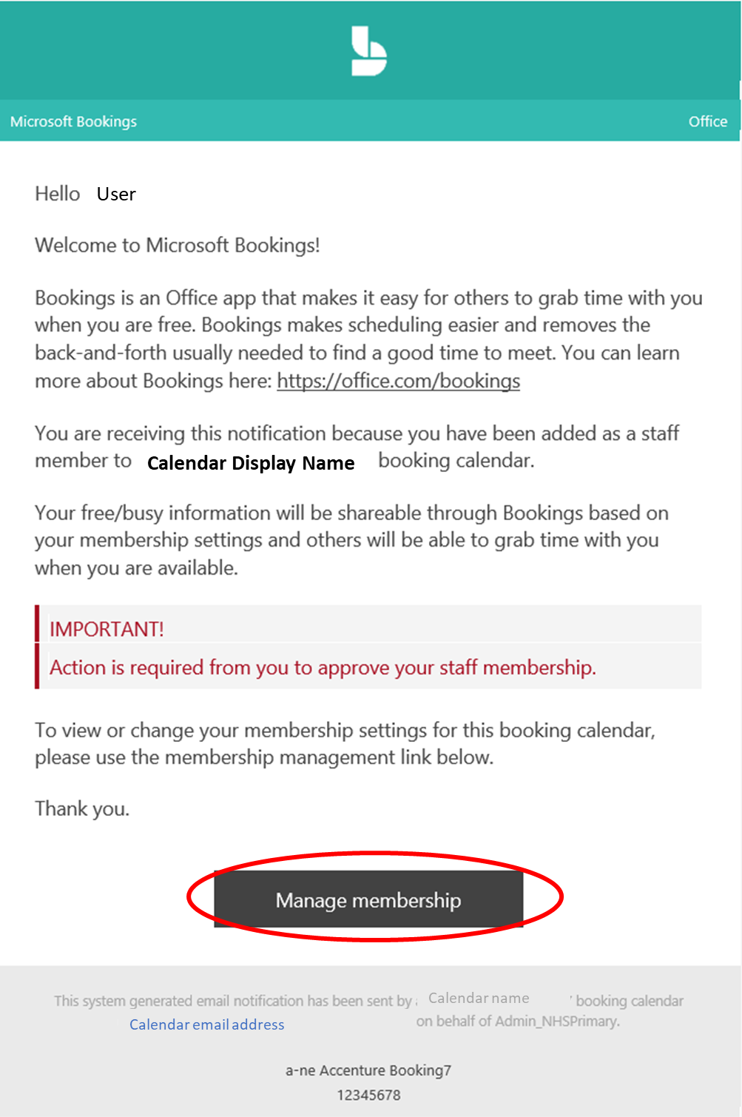
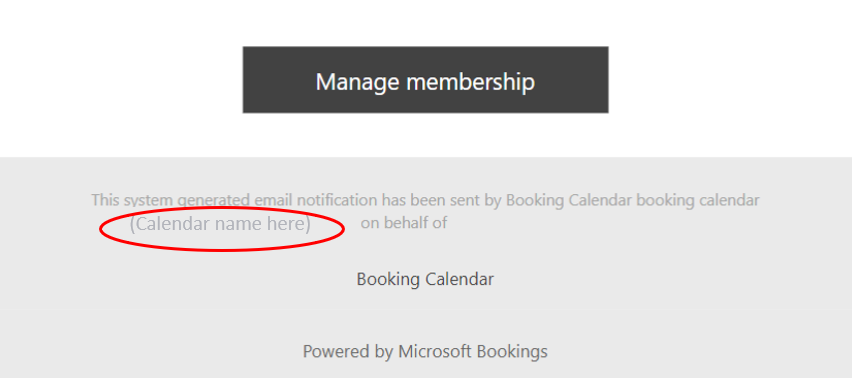
- Once members of staff have been added to a calendar, they should receive the email shown below to confirm their membership to the calendar
- Members of staff must accept the invitation by pressing the ‘Manage membership’ button in the email. Once accepted, they will be added to the Bookings calendar and will be able to login to the calendar via Microsoft Teams or the Bookings app
- Now that users have approved their membership to the calendar, they will receive a confirmation email advising their membership is active
- Users can stop their membership to a Bookings app calendar at any time by pressing Stop membership on the same email
If users have not accepted the membership, they will not be able to be part of the calendar and booking staff will not be able to book appointments or manage their calendars on the Bookings app.
1.3. Types of users on the Bookings app
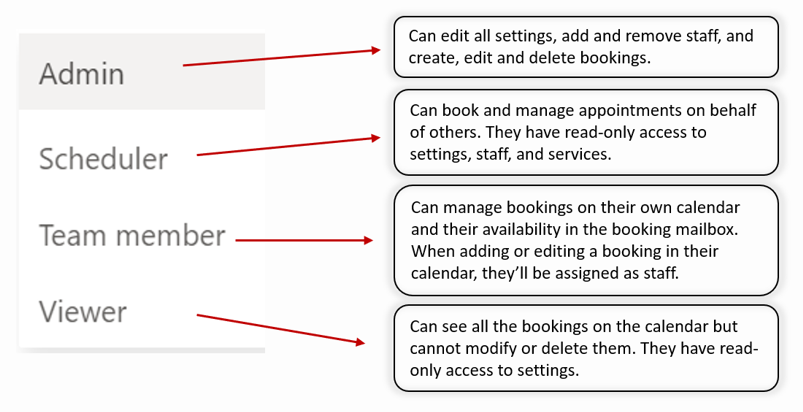
There are four roles that users can be added to in a booking calendar:
- Calendar admin users– who can book and manage appointments. They have full access to the Booking calendar and all its capabilities.
- Schedulers – who can book and manage appointments.
- Team members – who have control over their own appointments and availability.
- Calendar viewers (or visitors) – who receive emails for appointment bookings and have read access to all parts of the calendar but do not have permissions to make any changes. These would typically be the clinicians attending booked appointments.
1.4. Getting the Bookings app on Microsoft Teams
Once LAs from NHS organisations have enabled the Bookings app for selected staff, they will be able to open the Bookings app from within Microsoft Teams.
To add the Bookings app to Microsoft Teams please follow the steps below:
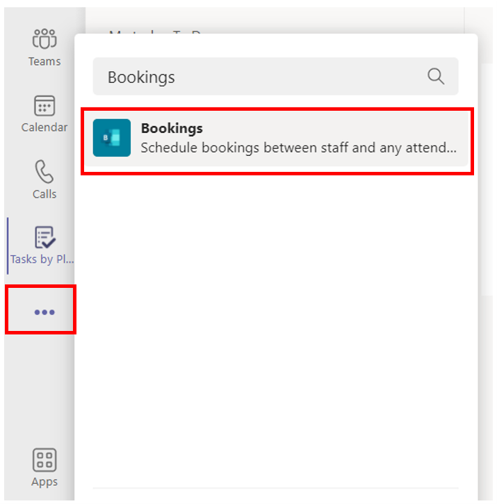 1. To open the Bookings app in Microsoft Teams, go to more added apps (three dots) and search Bookings. Press Bookings and the app will open within Teams
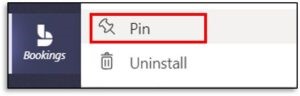 2. Pin the Bookings app in your taskbar by a right mouse click on the icon and then press Pin
3. Once the Bookings app is added to Microsoft Teams, add the calendar within the app by searching for its name. The user can find out the name of the calendar in the grey box at the bottom of the email invitation.
1.5. Seeking Support
If an NHS staff member is experiencing any issues related to Microsoft Bookings, they should get in touch with a member of their local organisation’s IT Support team. Only LAs can raise tickets to the NHSmail Helpdesk. Please visit the NHSmail support pages on how to find your Local Administrator.
2. Managing Bookings app calendars
Admin users can add and remove users from Bookings app calendars, change, add and update appointment types and schedule appointments for themselves and others from within the Bookings app in Microsoft Teams.
2.1. Adding Staff to a calendar from Microsoft Teams
Calendar admins can add staff to specific Bookings calendars from within Microsoft Teams. To add or remove users from calendars, please follow the steps below:
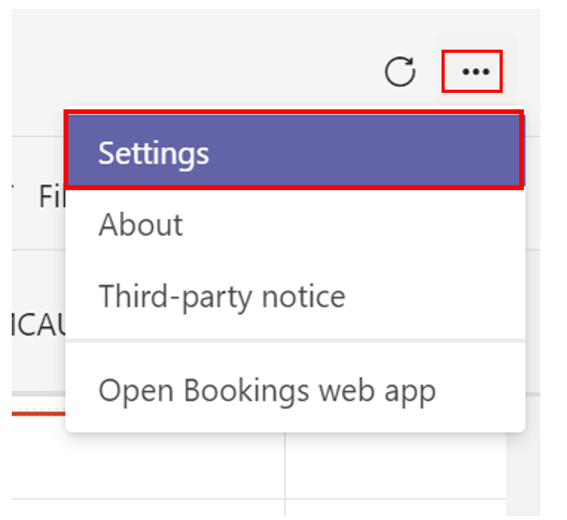 1. Click on the three dots in the top right corner and select Settings.
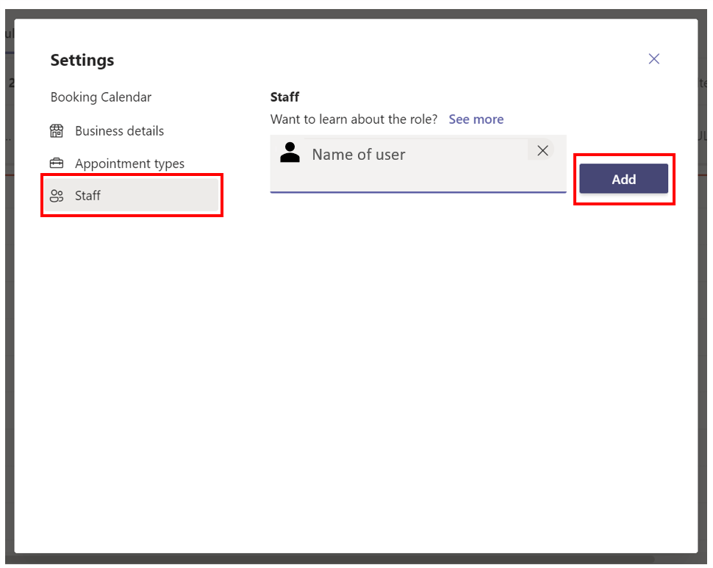
2. Click on Staff and start typing the name of an NHS colleague in the search bar, then click on Add.
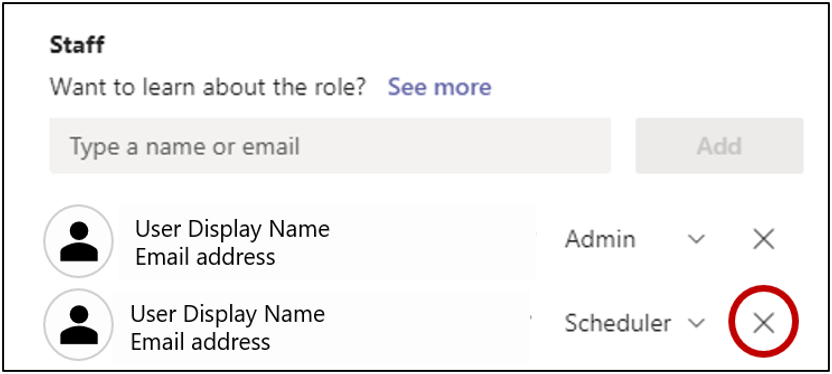
2.2. Remove a Bookings calendar user from Microsoft Teams
i. Select the three dots in the right corner and go to Settings
ii. A list of staff names will appear with a cross icon next to them. Click on this icon to remove staff
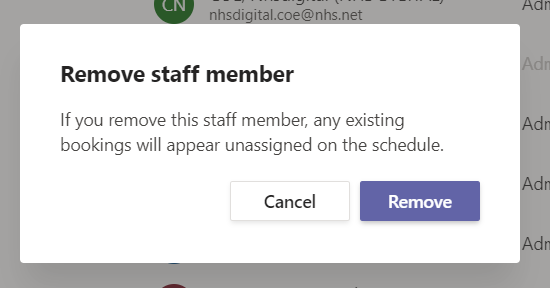
 iii. The calendar admin will then see a pop-up asking them if they are sure they want to delete this staff member. Click on Remove.
2.3. Changing the role of Booking calendar users from Microsoft Teams
A calendar admin can change the role of the staff member in the dropdown on the right next to the name of the staff member. Select the desired role for them to have and in a few minutes, the changes will be effective.
2.4. Appointment Types
Appointment types are the categories of consultation that can take place in a Virtual Visit. Calendar admins can create customised appointment types, such as ‘Initial consultation’, ‘Follow-up consultation’ or ‘Group visit’. See below for the detailed steps.
i. Click on the three dots in the top right-hand corner, select Settings and then click on Appointment types.
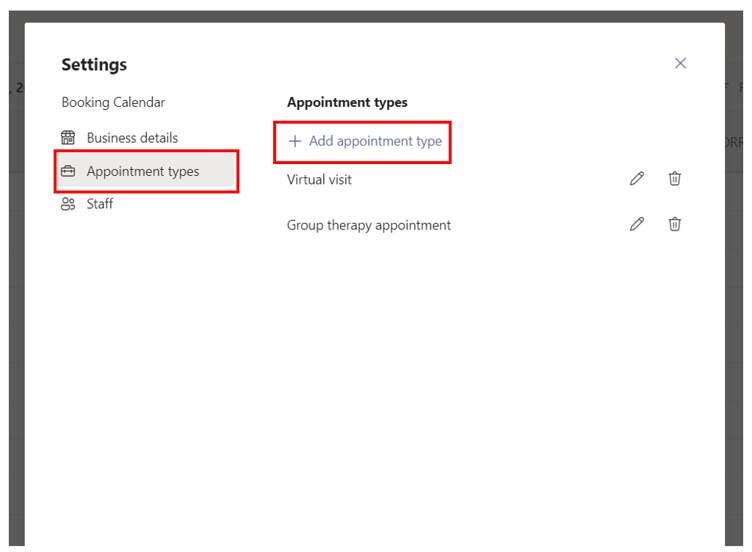 ii. In the Settings, click on Add appointment type to create a new appointment type
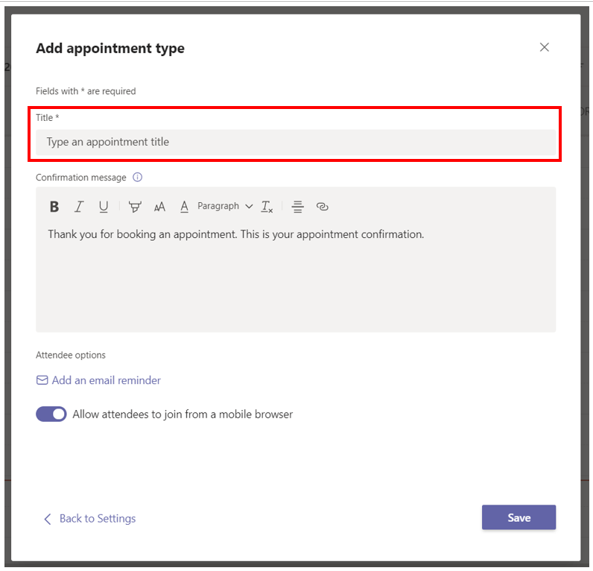
iii. Fill in the title of the type of appointment to be created. This is a mandatory field. Please note that the title can be completed with free text
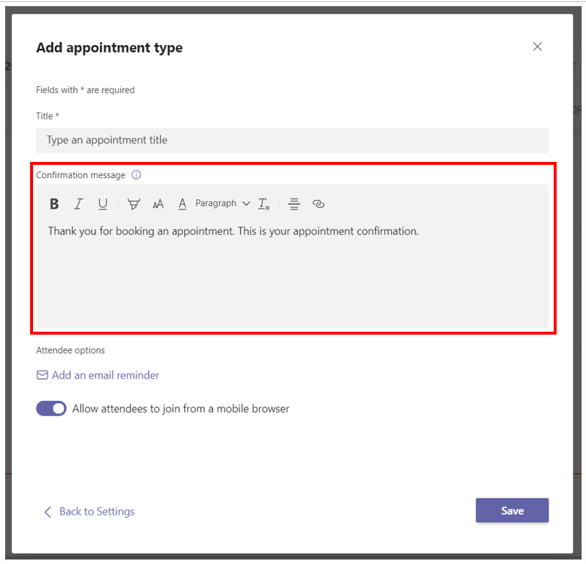 iv. The confirmation message in appointment types includes information and/or links to send to the patients. Each calendar/clinic can have their own standard wording to use in the appointment confirmation message and therefore it would be possible to include different links for different clinic surveys. The wording can be unique to each of the appointment types of a clinic.
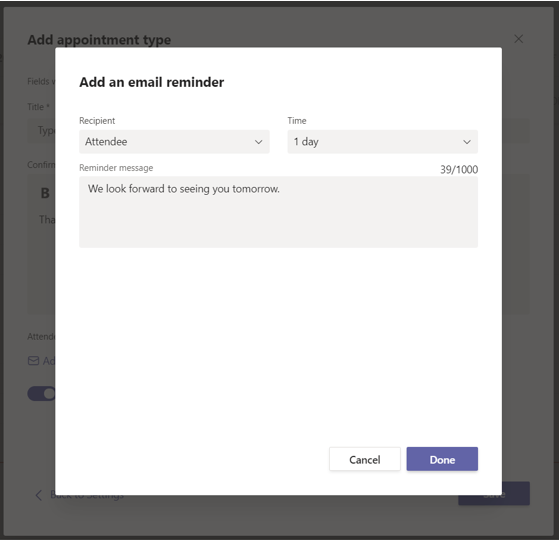 v. Add an email reminder: specify when the reminder should be sent, the recipients (staff, attendee) and the reminder message
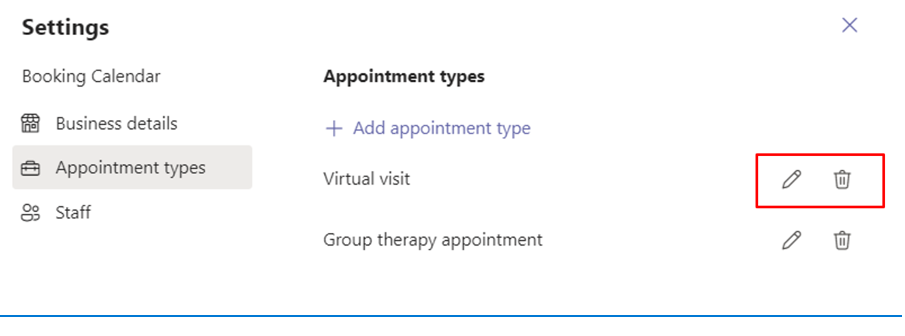 vi. Edit or Delete existing appointment types by clicking one of the respective icons on the right.
3. Manage Bookings
3.1. Create a new booking
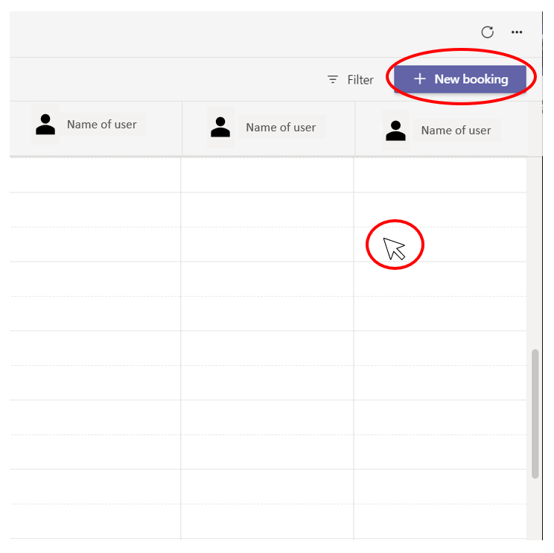 i. Select + New booking. Calendar admins and schedulers can either add the healthcare professional’s name later or find them first and then select an available slot
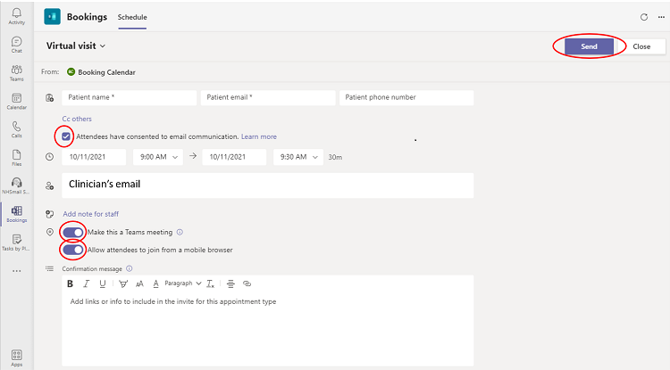
ii. In the new window pop-up the booking staff will be asked to fill in the necessary information, for example the patient’s name, email, consent and time of appointment.
iii. They can CC the appointment to anyone, please note that the appointment cannot be Bcc’d (see instructions on booking group visits in the next section)
iv. They can add one or multiple staff (if they are staffed to that calendar) to an appointment/meeting
v. They can add internal notes (in the Add a note text box). Only staff booking the appointment and selected staff can access the appointment
Please note that there is a limit of 10,000 characters with spaces for the text box, and that it is not possible to add attachments to the notes
 vi. Add reminders on the preferred time and date to send an email to staff and/or attendees before the appointment
vii. The location of the meeting is automatically shown as a Teams meeting. However, the calendar admin / scheduler can switch that toggle off, if the appointment should take place in person, on the phone or through other means. The location of the meeting can be specified in the body of the invite. This flexibility allows calendar admins to build mixed clinics using MS Bookings, if their organisation / clinic runs on a hybrid model.
viii. If you would like attendees to join using a mobile, switch on the toggle that allows attendees to join from a mobile browser. Please note, if this toggle is not switched on, attendees would need to download the Teams app prior to the virtual appointment.
Remember to press Send when all the necessary information has been filled in.
3.1.2 New SMS text notification functionality in Virtual Visits
The SMS text functionality is now available, enabling text messages to be sent to patients about their booking appointments including the link to join the appointment and reminder messages.
 Please note that the mobile phone number must be entered without the initial 0 (i.e. 7712345678):

The option to send the SMS text now appears in every booking appointment as shown here:
The ‘Send a text message to patient’ needs to be toggled on and the box ticked that the patient has consented to SMS messages in order for the text message to be sent.
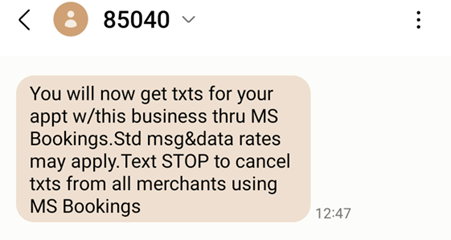 All users will receive the generic Microsoft Bookings opt out message every time they receive a notification:
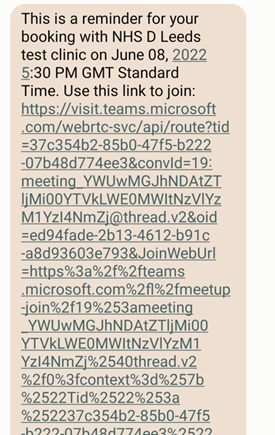 An example of the message received including the link to join the Teams meeting is shown here. Clicking on the link on the patient’s mobile device will automatically take them to the Microsoft Teams appointment in their browser and enable them to join as a guest.
3.1.3 Creating a group appointment
The current version of the Bookings app does not have BCC functionality, which would allow calendar admins and schedulers to include several patients in a meeting invite without revealing each other’s contact details. However, there is a way to set up group sessions from the Microsoft 365 web version.
To do so, the calendar admin first needs to create a group appointment type. This only need to be done once. Below is the step-by-step guide.

1. Calendar admin need to visit www.office.com and sign in with their NHSmail account. Then, click on the 9 dots at the top left corner and find Bookings
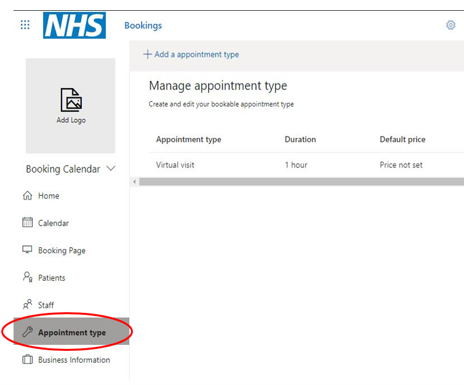 2. If you manage more than one calendar, first select the calendar for which you want to create a group appointment type. Go to ‘Appointment type’.
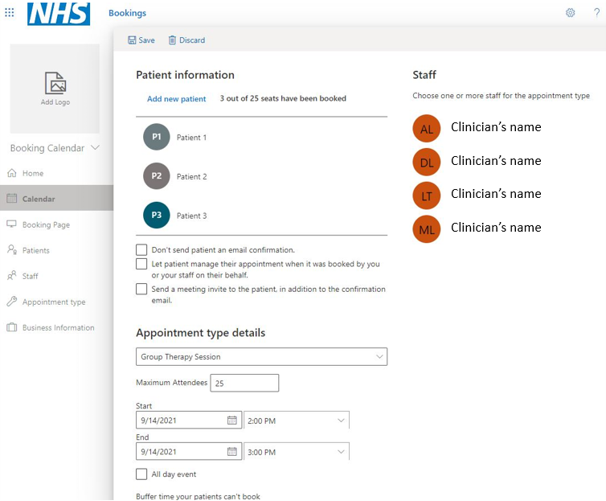
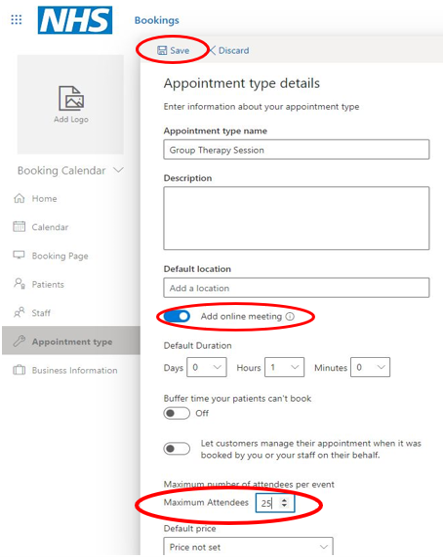 3. Add details, such as appointment type (which will be visible – e.g., Group Therapy Session), description, location, duration and maximum attendees (e.g., 25). Make sure the add online meeting toggle is switched on and appears blue. Click Save in the top left corner of the window
 4. The new group appointment type should now be visible
Once the calendar admin sets up a group appointment type, calendar schedulers can book group visits in the Bookings app within Microsoft 365 web version (this is not currently possible in the Bookings app within Teams). Below is the step-by-step guide.
i. Calendar admin or scheduler visits www.office.com, signs in with their NHSmail account and clicks on the 9 dots at the top left corner of the screen and find Bookings
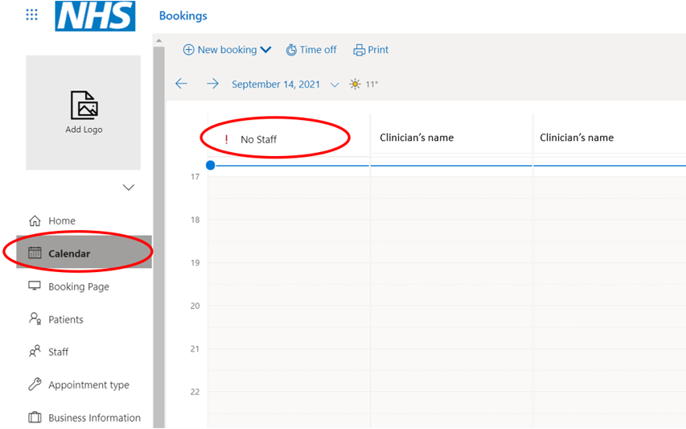
ii. Calendar admin or scheduler then clicks on Calendar and selects the desired time slot in the ‘No Staff’ column
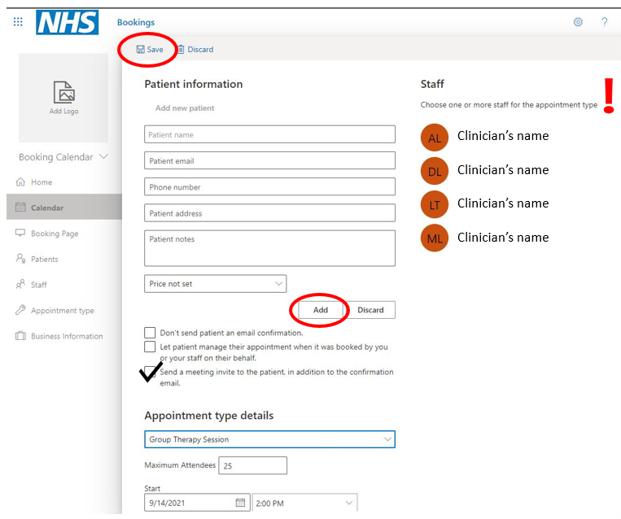
iii. In the window that opens, first choose group appointment in the appointment type details. Complete the information of the first patient, click Add, and repeat the process for additional patients. Complete the rest of appointment details. Please ensure you select the staff for the appointment. Click save in the top left corner of the window
iv. Patients and the clinician(s) will receive an email confirmation of the appointment. Patients will not see each other’s contact information
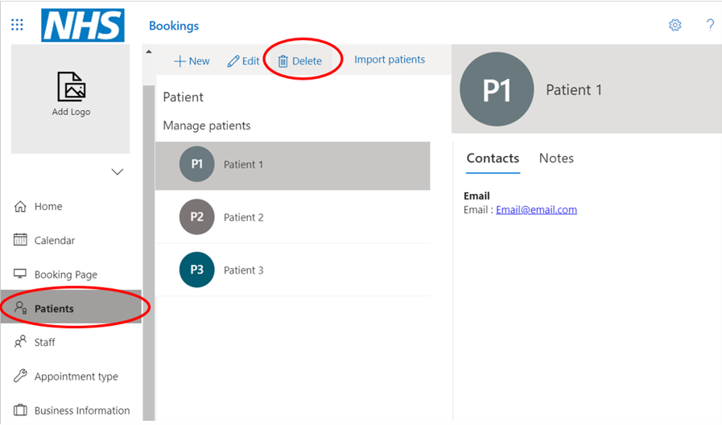
Please note that the patient’s details will be saved after making the appointment and should be deleted by clicking on Patients, selecting the Patient’s name and clicking on Delete.
Only members of the calendar who use the web version will be able to see these details
3.2. Edit or cancel an appointment
 Calendar admins schedulers and team members can edit details or cancel upcoming bookings by selecting it from the schedule.
3.2.1 Edit an existing appointment
- The Calendar admin and schedulers can edit the appointment details including the name of the patient, their email address, contact number, and date and time of appointment. The meeting location and allowing users to join from a mobile browser cannot be changed after the appointment has been created.
- The Calendar admin and schedulers can CC anyone into the meeting by adding their email address. Please note that it is not possible to Bcc the booking
- It is possible to remove or replace staff and add more than one staff member per appointment. Please note that staff can only be added to a booking if they are part of the Bookings calendar
3.2.2 Cancel a Booking
- Calendar admins and schedulers can cancel the booking anytime by clicking on Cancel booking. A pop-up will appear to confirm the intent to cancel this appointment
- Both the patient and the NHSmail user will receive an email advising the appointment is cancelled
3.3. Responses from clinicians
Clinicians can respond to appointments set by the organiser in three ways (Accept, Tentative and Decline).
Accept: Clinicians do not need to accept the appointment as appointments set through the Bookings app are automatically inserted into their calendars.
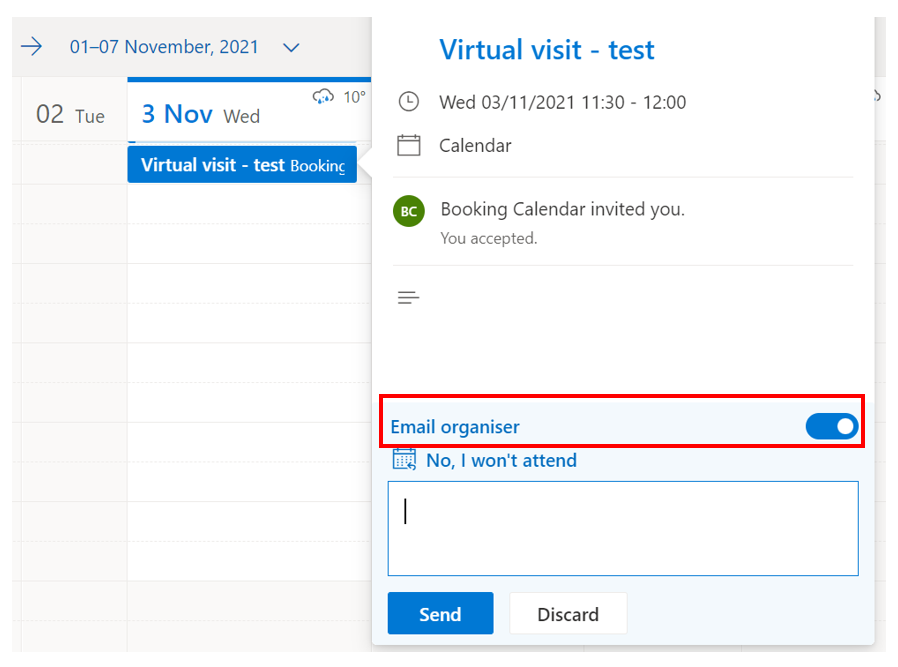 Tentative: If a calendar viewer responds with tentative to an appointment scheduled, the organiser and the calendar email address will receive an email with a notification (provided that the NHSmail user keeps the ‘Email organiser’ or ‘Notify organiser’ toggle switched on when responding to the invite from the Teams or Outlook calendar). Please note that no notification will be sent from within the Bookings app, and the tentative response will only be reflected by a striped colouring on the appointment.
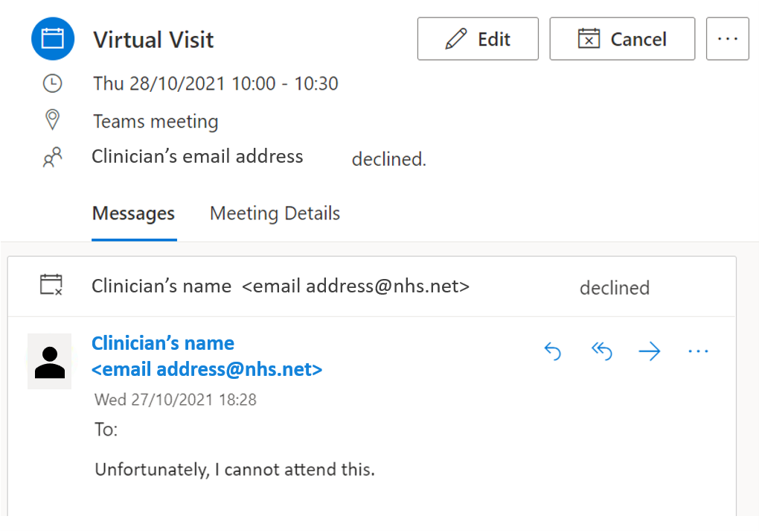 Decline: If a clinician declines an appointment, the booking organiser will be notified by email (should the NHSmail user keep the ‘Email organiser‘ or ‘Notify organiser‘ toggle switched on when responding to the invite from the Teams or Outlook calendar). It will then be up to the booking organiser to ensure the appointment is cancelled for the patient and removed from the Bookings app. This is an important step as the patient will only be notified that the appointment is cancelled if this is done through the Bookings app. Following the meeting cancellation, it will be up to NHS Staff members to agree and schedule a new appointment with the patient.
3.4. Switching between calendars
Bookings calendar users can only see one calendar at a time. If a user is part of more than one Bookings calendar, they can switch between calendar views from within Microsoft Teams by following the steps detailed below:
i. Click the drop-down arrow next to the calendar name
 ii. Select Existing booking calendar

iii. There is the option to search for a different calendar or browse all calendars at the user’s organisation
iv. Select the desired calendar and click Done to view the selected Bookings calendar
4. Joining a Bookings Teams Meeting
There are multiple ways to join a Booking Teams meeting. These are all listed below, accompanied by screenshot guidance:
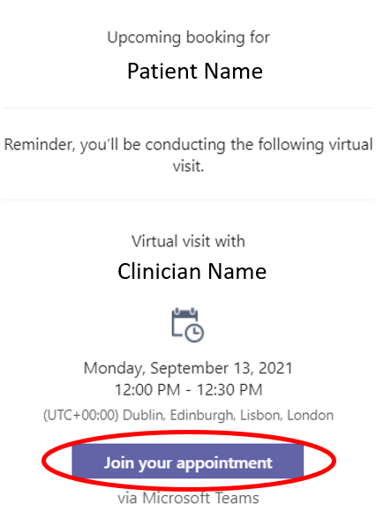 i. Click on the Join your appointment link on the original or reminder email
 ii. Open the Teams calendar and click on the appointment, then click on the Join button
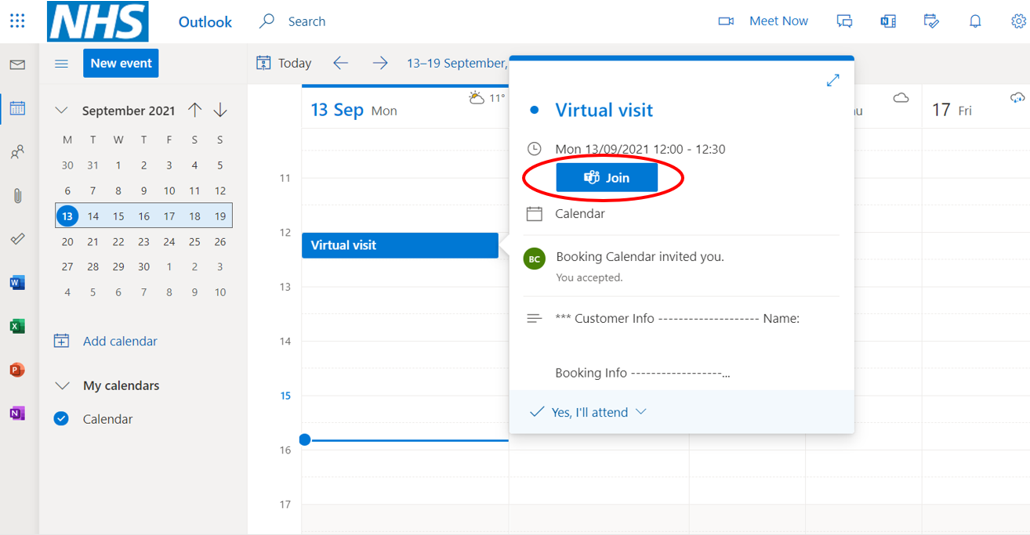 iii. Open the Outlook calendar and click on the appointment, then click on the Join button
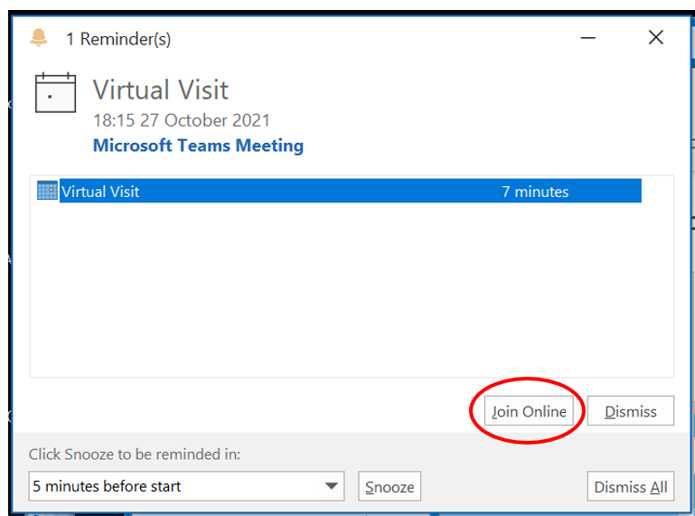 iv. Click Join Online in the outlook reminder
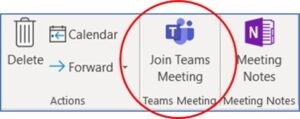 v. When the booking email is open, click on the Join Teams Meeting icon on the Outlook toolbar
 vi. You can join the appointment from a mobile device. Teams will open in a mobile browser. Click Join now
4.1. Bookings Teams Meeting overview
Below are some tips to help clinicians use the Microsoft Teams application and make the most of the software. Each tip has a screenshot to show how to access it.
 i. Once clinicians join the call, they will need to accept patients that are in the Lobby
 ii. Clicking the camera button will turn their camera on/off to allow their patient(s) to see them – Please note, this requires a webcam or external camera to access
 iii. It is possible to mute/unmute with the button shown in the screenshot
 iv. Clinicians can open/close the chat to send instant messages to their patients with the button shown in the screenshot
 v. The button shown in the screenshot will open the share tray to allow the clinicians to share their screen with the patients and vice versa
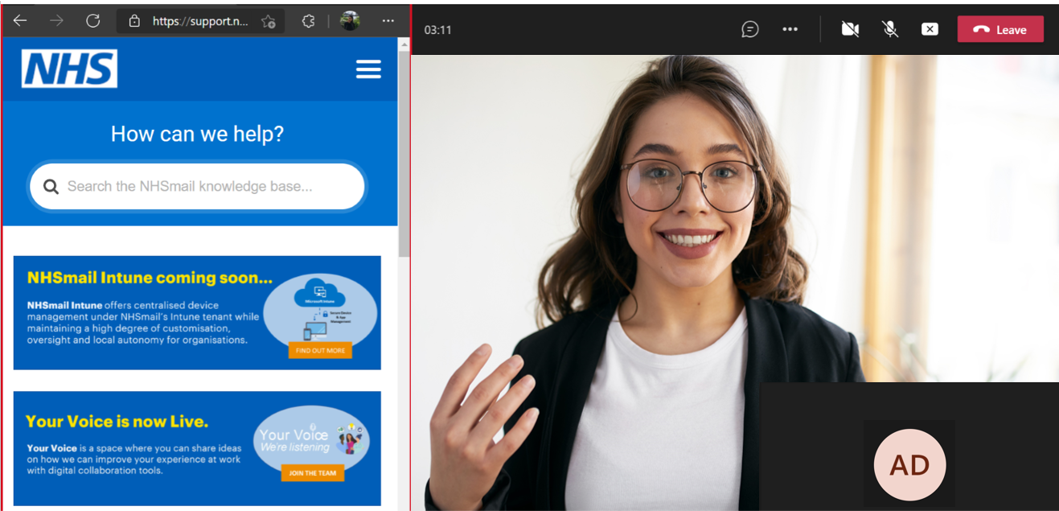 When the screen is being shared, the clinician may need to see the patient in a bigger view than the minimised video meeting window. In that case, the clinician can adjust the size of the screen that is being shared and adjust the size of the Teams window and place them side by side as shownin the screenshot. To adjust the screen size of MS Teams, select the minimise function in the top right corner and adjust the size of the window by selecting and dragging the edges
 vi. The red dial phone icon shown in the screenshot can be clicked to leave the appointment
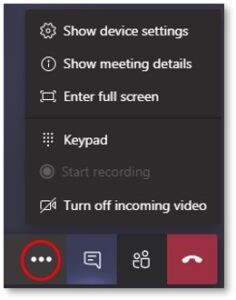 vii. The three dots icon can be clicked to bring up a range of options available for the clinicians and their patient including turning off incoming video, viewing meeting details and editing their device settings for example microphone and camera set up
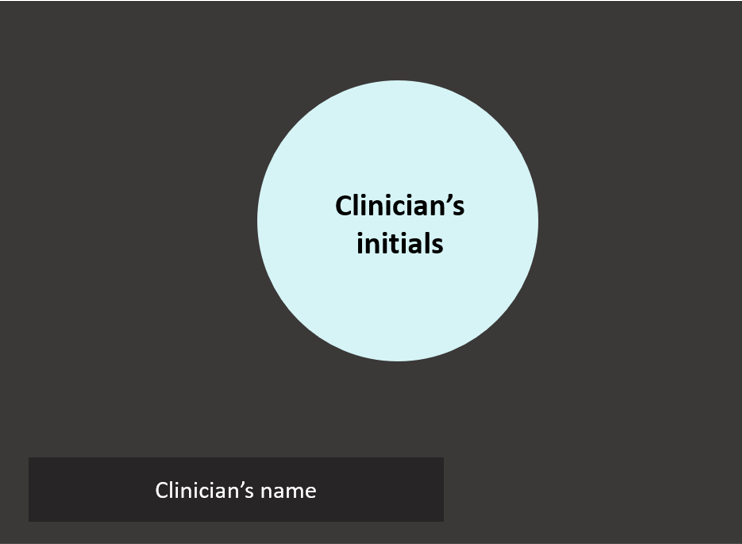 viii. The details shared with the patient are very minimal for the confidentiality and security of the clinicians as shown in the screenshot
 ix. Clinicians can create breakout rooms during virtual visits with more than 1 patient. To do so, the clinician running the visit has to be the meeting organiser (i.e. the clinician must be the one who created the booking for the appointment on MS Bookings). To create a breakout room, click on the icon shown in the screenshot.
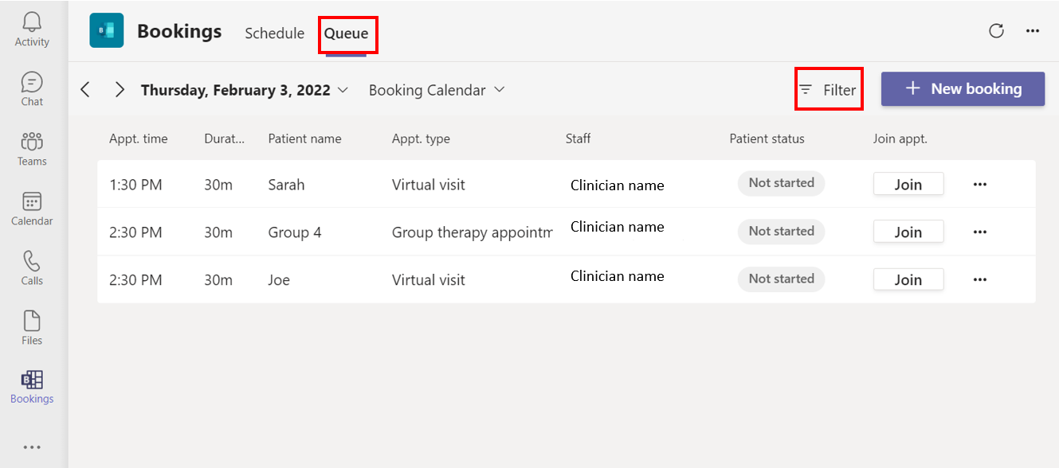
4.2 Queue View
Queue view is a feature within the Bookings Teams App that enables calendar admins or schedulers to view, manage and communicate with attendees and staff all in one place.
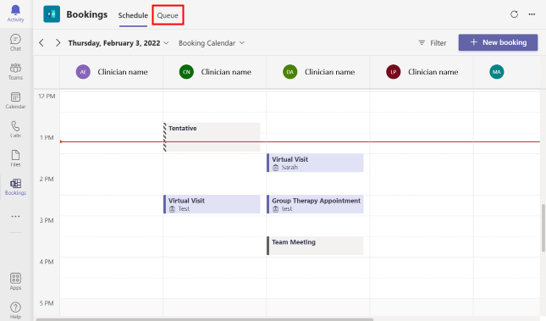
1. To switch to the Queue view, select Queue in the Bookings App within Teams

2. You can search for bookings by date using the calendar in the top left.
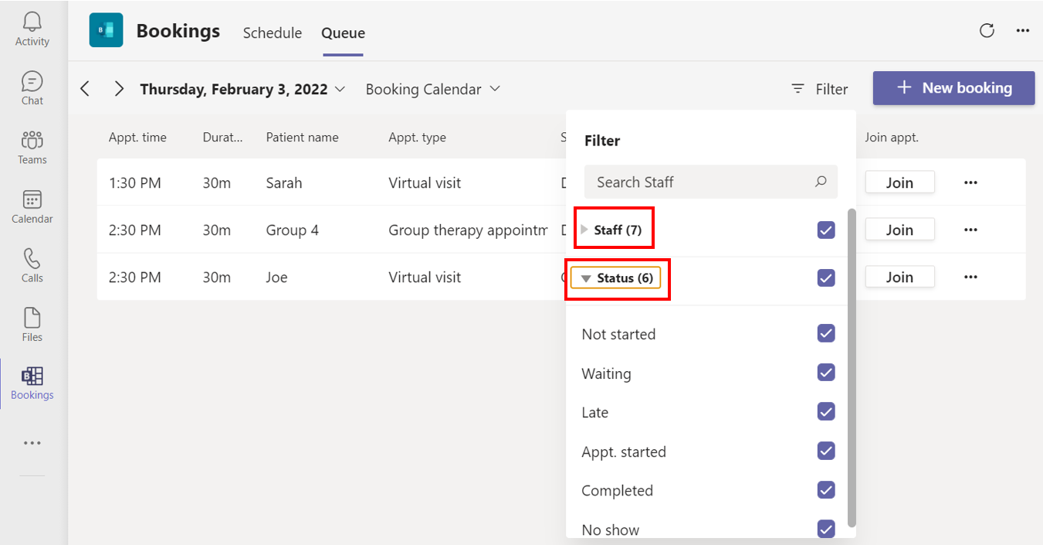
3. You can filter to search by staff member and by appointment status:
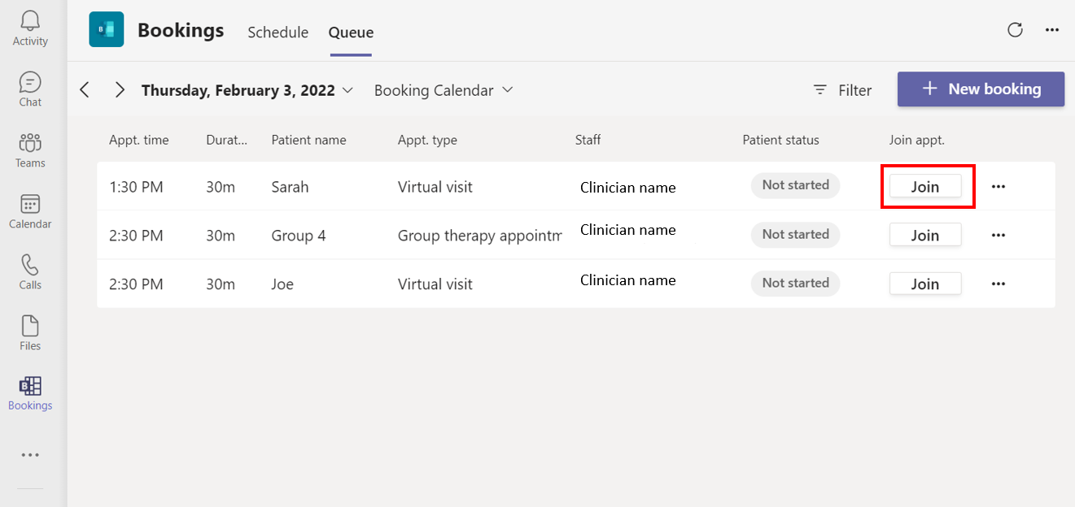
4. From the Queue view you can track appointments and join the appointment by clicking the Join button.
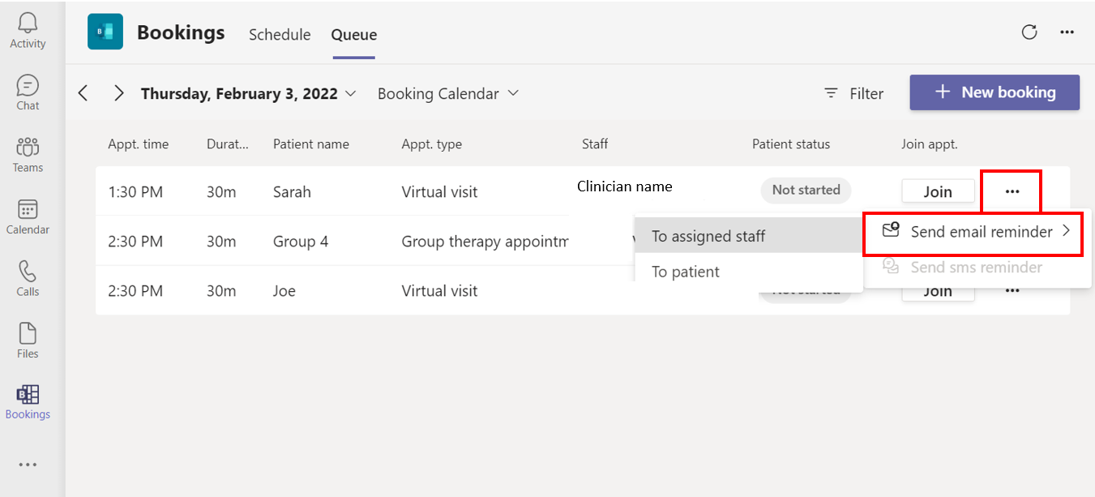
5. You can send automated email reminders to assigned staff or to attendees from the Queue view by clicking on the three dots to the right. You will receive confirmation once the reminder has been sent.
4.3. Post-appointment tips
Once the meeting has ended, the patient (and the NHS staff) can continue to enter the call at any time. If the patient joins the call after the clinicians have left, they will be left in the virtual lobby once more. Clinicians will not get a notification to let them know that the patient is in the lobby.
It is possible to check the calendar view functionality that exists within Teams whereby the meeting slot on the clinician’s calendar is dark navy and shows the Join button every time someone is present on the call. If the NHS staff member joins the call again, they can speak to the patient once more and will be able to see any messages sent during the original consultation.
5. Known limitations of Microsoft Bookings
There are some issues and limitations currently affecting the Microsoft Bookings service. These are not critical to user functionality and have been made known to the appropriate helpdesk either from Microsoft or from NHSmail. These are detailed below:
6. Local organisation processes
Local organisations should ensure the following:
- Where bookings are used, there is a clear process put in place for ensuring that patient confidential information is added to their primary record as soon as possible after the consultation
- Have clear policies on record keeping, including the transcription of electronic communications
- Undertake mailbox hygiene activities on regular basis to minimise the amount of patient identifiable data residing outside of the core care record
- Ensure that sufficient mobile device management capabilities are in place if local policies permit the use of staff’s own mobile devices (BYDOD). This includes device encryption with enforced password, minimum password length, inactivity timeout and maximum number of failed password attempts (resulting in device wipe-out if exceeded)
- Ensure the appointment invitation email uses the additional information section to communicate information about preparing for the virtual consultation and what to do if the appointment is unsuitable, or if problems are experienced in completing the pre-requisite activities. For example, unable to download software or having network issues
7. Virtual Visits top tips from users
| 1 | Clinicians must accept the calendar membership invite first to manage their calendars |
| 2 | Clinicians can be set up as calendar admins, so that they can manage their bookings themselves |
| 3 | Clinicians should practice setting up and running a virtual visit before a real appointment with a patient |
| 4 | Clinicians should ask patients to download the Teams app, where possible, for better experience. It is possible for users to join an MS Teams meeting via a mobile browser, if this feature is switched on by the calendar admin or scheduler at the time of creating the booking. |
| 5 | It is useful to adjust the size of the Teams window when screen sharing, so that the clinician can see the patient’s face |
8. FAQs
This guidance provides detailed instructions on how to use Virtual Visits. Please make sure to check the different sections to see if they can answer your query. We have answered some of the most common questions about Microsoft Teams in the Teams FAQs. If you are still having issues, please contact your Local Administrator.
Yes, when a patient has joined using the link sent to them, they are joining as a guest and will not see the email/contact information of the clinician/healthcare professional regardless of whether they were originally added into the Bookings app appointment or forwarded the invite after.
The reply email is the email entered by the practice to receive attendees’ responses. Patients will not see the reply email, however, if they respond to the calendar mailbox, the response will redirect to the reply email.
Bookings app users can be part of several Bookings app calendars. Users will have to switch between calendars from within Microsoft Bookings. Follow the steps detailed in this guidance to switch between calendars.
NHSmail users and healthcare professionals who require support with the Bookings app should contact their local IT Support teams.
NHSmail users can be added to a Bookings calendar regardless of whether their Local IT Support team has enabled their access to Microsoft Bookings via the NHSmail portal.
In this case, users will receive the email to confirm their inclusion to the Bookings calendar but will not be able to open the Bookings app. Users will need to contact their Local IT Support team to ensure Microsoft Bookings is added to their User Policy from the NHSmail portal.
If a user is deleted from a calendar, they will not be able to access that calendar or be added to Bookings created from that calendar. If the user is part of more than one calendar, they will continue to be a part of the other calendars.
Finally, the Microsoft Bookings will continue to be enabled for that user from the NHSmail portal even if they are deleted from all Bookings calendars.
Find more tools and guidance to help you.
| Last Reviewed Date | 16/05/2024 |