This article provides guidance to organisations wishing to onboard to the NHSmail Teams Phone System using the Calling Plans PSTN connectivity option. Calling Plan is Microsoft’s all-in-the-cloud voice solution for NHSmail Teams users. It connects Microsoft Phone System to the Public Switched Telephone Network (PSTN) enabling calls to landlines and mobile phones around the world. This article will cover:
- Types of Calling Plan
- Prerequisites
- Onboarding Considerations
- Onboarding and Assigning Phone System Administrator Roles
- Calling Plans Number Management
- Porting Numbers
Types of Calling Plan
Domestic Calling Plans
This calling plan enables licensed users to call numbers located in the country/region where they are assigned in Microsoft 365.
There are two domestic calling plan options available, with each licence providing a certain number of calling minutes to individual users each calendar month:- 120 minute Domestic Calling Plan
- 3000 minute Domestic Calling Plan
Domestic and International Calling Plans
This calling plan enables licensed users to call numbers located in the country/region where their Microsoft 365 licence is assigned to the user based on the user’s location, and to international numbers in 196 countries/regions. This licence provides the following number of calling minutes to individual users each calendar month
- 3000 Domestic minutes and 600 International minutes
For more information on types of Calling Plans, please visit Microsoft guidance.
Microsoft 365 Teams Phone System with Calling Plan Bundle
Microsoft 365 Phone System and Calling Plan (bundle) add-on licence is an easy to manage bundle which includes both Microsoft Phone System and Calling Plan licence of 3000 Domestic calling minutes. NHSmail organisations can have Microsoft 365 bundle licenses, instead of procuring Phone System and Calling plan add-on licences separately. The bundle includes both a Phone System licence and Calling Plan licence:
- Teams Phone with Calling Plan (Zone 1 – UK/Canada)
For more information on types of Calling Plans, please visit this Microsoft guidance.
Prerequisites
Licensing
There are several purchase options for Microsoft Calling Plans, and these should be discussed with your licensing reseller. Organisations are responsible for the procurement, onboarding, and assignment of the licences to users via the NHSmail portal. For full details on the licensing required to use Calling Plans please see this article.
Onboarding Considerations
The following considerations are important for all organisations wishing to onboard to the NHSmail Teams Phone System. Please review these and make any required internal plans to facilitate an easy transition to using and managing NHSmail Teams Phone System for your organisation.
- Trial: Organisations should trial a small volume of users before proceeding with the migration of their mass user base.
- Complexity: Consider the current complexity of your organisation’s existing telephony ecosystem and how this may shape your migration journey.
- Onboarding Readiness: Ensure your organisation is not only technically ready, but also business ready, before onboarding to the central offering (e.g., Number Porting).
- Contractual Agreements: Any existing contractual agreements (for example with current third-party providers) will need to be considered.
- Long Term Considerations: Review the overarching objectives of your organisation to ensure the solution is future-proofed and fit for your purposes.
- Disruption, Risk and Compliance: Plan accordingly to ensure that any disruption is mitigated, while making ample considerations for any risk and compliance related issues.
Onboarding and Assigning Phone System Administrator Roles
Local Administrators from organisations wishing to use NHSmail Teams Phone System will first need to submit an Onboarding Request Form via Helpdesk Self-Service (HSS). Once this has been submitted, the Phone System Service Team will allocate your organisation an onboarding slot. These are available each month on a first come, first served basis. To submit an Onboarding Request for NHSmail Teams Phone System, please follow these steps:
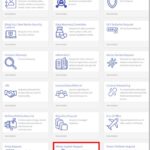
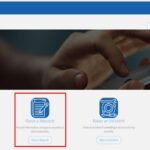 1. Log into HSS, select ‘Raise a Request’ and navigate to ‘Phone System Request Form’.
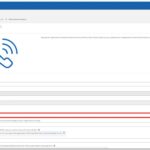 2. On the Phone System Request Form, select ‘Onboarding to Phone System request’ for request type. The ‘Requested for’ and ‘Email address’ fields will be prepopulated with your details.
Complete the rest of the fields of the form. You will be asked to confirm the PSTN connection strategy that will be used, the organisation ODS code/s you wish to onboard, the email of the LA who will be granted Portal permissions for Phone System Admin role assignment and then the emails of the users who will be assigned Phone System Admin roles via the NHSmail Portal once your organisation’s onboarding request has been approved.
You will also be asked to confirm that your organisation has the required licensing in place for your chosen connectivity strategy (Calling Plans or Direct Routing) and (for Direct Routing only) if you have completed the prerequisites. For further information on the licensing requirements for NHSmail Teams Phone System and/or the prerequisites for joining via Direct Routing, please see these articles: Licensing for NHSmail Teams Phone System Onboarding (Direct Routing) SBCs Configuration NHSmail Teams Phone System Terms of Reference
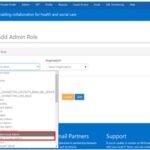 3. Once the Onboarding Request form has been submitted, your organisation will be allocated a slot to onboard to the service. Confirmation of this will be sent to the LA who submitted the Onboarding Request.
The LA requested to be granted Portal permissions to assign Phone System Admin roles will be informed via email that the two Phone System Admin roles should be visible to them in the NHSmail Portal.
4. The Local Administrator should assign the new Phone System Admin roles to the users at their organisation they would like to manage the service.
5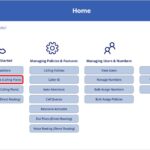 . Once the Local Administrator has assigned these roles, the newly designated Phone System Admins will receive a confirmation email providing them with access to the Phone System Power App. Phone System Admins should follow the instructions outlined in the email to access the Power App for the first time.
Calling Plan Number Management
If you are using Calling Plans, you will be able to purchase new numbers from Microsoft via the Phone System Power App. Alternatively, any existing numbers can be ported over from an existing service provider to Microsoft (the new provider) to be used with Calling Plans.
The number of available phone numbers for users (Subscriber numbers) is calculated by taking the total number of Domestic Calling Plan and/or Domestic and International Calling Plan licences that have been assigned, multiplied by a factor of 1.1.
| Number Type | How do you get the total phone numbers? | Example |
| User (subscriber) number | The number of phone numbers is equal to the total number of Domestic Calling Plan and/or Domestic and International Calling Plan licences multiplied by 1.1. | If there are 50 users in total with either a Domestic Calling Plan and/or Domestic and International Calling Plan licence, it allows an organisation to acquire 55 phone numbers (50 x 1.1). |
| Toll service number | The number of phone numbers is equal to the total number of Phone System and Audio Conferencing licences and uses the following: If there are 1-25 licences then 5 telephone numbers are given. If there are 26-49 licences then 10 telephone numbers are given. If there are 50-99 licences then 20 telephone numbers are given. If there are 100-149 licences then 30 telephone numbers are given. If there are 150-199 licences then 40 telephone numbers are given. If there are 200-499 licences then 65 telephone numbers are given. If there are 500-749 licences then 90 telephone numbers are given. If there are 750-999 licences then 110 telephone numbers are given. If there are 1,000-1,249 licences then 125 telephone numbers are given. | If there are a total of 51 Phone System and Audio Conferencing licences, it allows an organisation to acquire 20 toll service numbers. |
| Toll-free service number | Toll-free service numbers are not supported on the NHSmail Phone System platform |
Request Numbers from Microsoft (batches of up to 200 numbers)
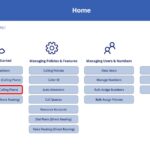
 1. Log in to the NHSmail Teams Phone System Power App. On the Home screen, select ‘Request Numbers (Calling Plans).
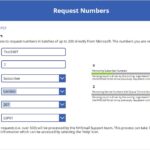 2. You will need to complete the fields provided on this screen to request your numbers. Gauges on the right-hand of the screen will let you know if you have enough licences to request the quantity of numbers you need. Select ‘Next’ once you have completed these fields.
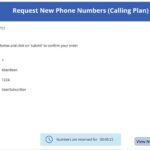 1. On the next screen, select ‘View Numbers’ to view the numbers that have been allocated to you. If there are numbers available, these will be displayed beneath ‘Reserved Numbers’. The numbers will be reserved for 8 minutes while you confirm your order – a countdown timer will be shown at the bottom of the screen. To finalise your order, click ‘Submit’.
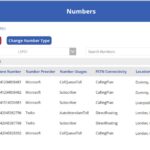
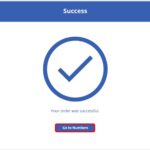 2. Your number order will be processed automatically, and you will be directed to a Success screen which will confirm that your order was successful. To view a list of the newly available numbers to be assigned, select ‘Go to Numbers’.
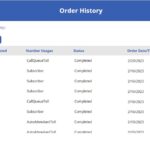
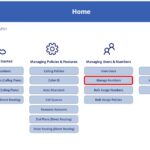 3. You can view all previous number requests by navigating back to the Home screen of the Power App, selecting ‘Manage Numbers’ and then ‘Order History’.
Requesting Numbers from Microsoft (more than 500 numbers)
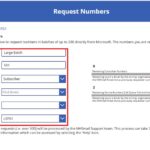 1. Large quantity number requests (over 500 numbers) will need to be processed by the Phone System service team. To submit a request for over 500 numbers at once, complete all required fields on the ‘Request Numbers’ screen.
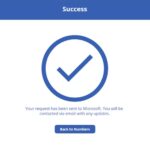 2. If you have enough numbers, select ‘Next’. You should then see a Success screen confirming that the request has been passed onto the Phone System service team to complete on your behalf with Microsoft.
3. You will receive an email, detailing that your request has been submitted, along with your request reference. Once your request has been actioned, you will receive the list of numbers as an attachment via email. Your request will then be closed, and you will receive a closure email.
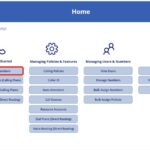 4. Once the numbers have been provided via email, navigate to ‘Upload Numbers’ from the Home screen.
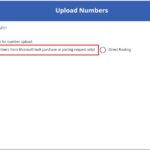 5. Select ‘Calling Plan (numbers from bulk purchase or porting request only)’.
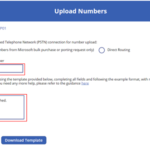 6. Further fields will appear on the webpage, which you will need to complete before progressing. Provide your ServiceNow request item (RITM) number, and then download the template provided. Populate the template with the requested numbers and upload. Attach the completed template and then select ‘Submit’.
7. Once the numbers have been uploaded, you should see a screen confirming that your numbers have been uploaded. By navigating to ‘Manage Numbers’ from the Home screen / navigation bar, you will be able to view the full available list of numbers.
Porting Numbers
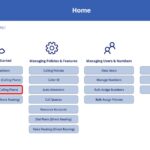 1. To port numbers into the NHSmail Teams Phone System application from an existing provider to Microsoft, navigate to the Home screen and select ‘Port Numbers (Calling Plans)’.
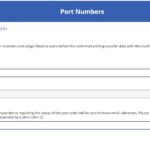 2. On the ‘Port Numbers’ screen, you will need to complete all the fields in order for your porting request to be completed. You will need to scroll down to view all of the fields and will need to provide your current service provider’s details as well as a porting date.
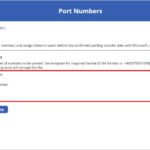 3. At the bottom of the screen, there is an attachment box. You will need to provide a list of the numbers to be ported. Download the template provided and populate it, ensuring that all numbers are in E164 format. Select ‘Submit’.
4. Your number porting request will be submitted to Microsoft on your behalf via the NHSmail Phone System service team. All subsequent communications on the progress of your porting request will be sent to the email address confirmed in the ‘Notification emails’ field via email.
5. As part of the porting process, organisations will need to provide Microsoft with a Letter of Authorisation (LOA).
6. You will receive confirmation via email from the Phone System Service Team once the numbers have been successfully added to the tenant.
You will then need to licence and assign these numbers to respective users and / or Auto Attendants / Call Queues as per the porting plan to avoid any service outage after porting.
| Last Reviewed Date | 13/02/2024 |

