This article introduces the Microsoft Store capabilities from which organisations can request applications for enablement across the NHSmail shared tenant. This spans the Teams store, SharePoint store and AppSource, Microsoft’s home for verified applications.
To request an application to be enabled you need to follow the process outlined in O365 Stores Request Process – NHSmail support.
The platform also facilitates requests for custom or third-party apps subject to Technical Design Authority (TDA) approval. Please visit O365 Stores Request Process – NHSmail support for more information on all application enablement requests.
What are O365 app stores?
SharePoint Store applications
The SharePoint app store is a marketplace for Microsoft provided SharePoint related applications.
You can request that applications from the SharePoint store are added to the NHSmail global SharePoint app catalogue.
Teams Store applications
The app store in Teams lets you find hundreds of apps to help communicate, automate, consolidate, and collaborate in different ways.
You can request that applications from the Teams app store are added to the NHSmail global Teams app catalogue.
App Source (add-ins) application
Office add-ins can help users to personalise their documents and streamline the way they access information on the web.
You can request that App Source (add-ins) applications from the App Source store are added to the NHSmail global App Source (add-ins) app catalogue.
How to access approved applications:
SharePoint Store applications
 1. Login to a SharePoint Site collection as an owner
2. Click on the Settings gear and select Add an app
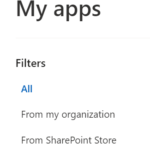 3. Click on From my organisation and/or From SharePoint Store from the left navigation bar to find the required app
4. Select the app from the app catalogue and follow the instructions to add it to your site collection
Teams Store applications
![]() 1. Login to Teams and click on Apps
1. Login to Teams and click on Apps
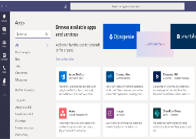 2. The available apps will appear on Teams. Select an app and follow the steps to add the app to your Teams or channel
3. Once an app is added, follow the instructions to use the app. The instruction will vary from app to app and might require a valid registered account with a third-party app provider
App Source (add-in) applications
Accessing a Microsoft Word add-in
 1. Login to the Microsoft O365 Word app
2. Click Insert and select Add-ins
 3. In the Office add-ins, select the Admin Managed option to install a new add-in
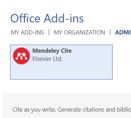 4. Select the add-in you want to install and click on Add
Accessing a PowerPoint add-in
 1. Login to the Microsoft O365 PowerPoint app
2. Click Insert and select Add-ins
 3. In the Office add-ins, select the Admin Managed option to install a new add-in
![]() 4. Select the add-in you want to install and click on Add
4. Select the add-in you want to install and click on Add
Accessing an Excel add-in:
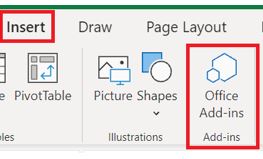 1. Login to the Microsoft O365 Excel app
2. Click Insert and select Office Add-ins
 3. In the Office add-ins, select the Admin Managed option to install a new add-in
4. Select the add-in you want to install and click on Add
5. Once an add-in is added, follow the instructions to use the add-in. The instruction will vary from add-in to add-in and might require a valid registered account
Accessing an Exchange add-in:
1. Login to the Microsoft O365 Outlook Web app
2. Select an existing message or open a new message
3. Select … More actions
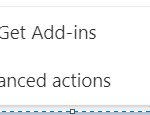 4. Go to bottom of the list and select Get Add-ins
 5. On the add-ins for Outlook page, find the required add-in
6. Select the add-in you want to install and click on Add
| Last Reviewed Date | 17/10/2022 |
