
If you need to create a large group of users in bulk, you can do this by uploading a CSV (comma separated values) file containing the users’ details. Before you upload the CSV file, you must ensure the data is formatted correctly, using the same headings and in the same order as in the sample file. You can download this file from the Upload Users Screen by clicking on the sample file hyperlink in the instructions at the top of the page. You should always check whether a user already exists in the system before bulk uploading new users. You can generate a complete list of current users, by running the Mailbox Report through the Portal to check.
The CSV upload also supports the old NHSmail 1 CSV file format. Any upload that does not follow the sample file or the NHSmail 1 format will not successfully validate.
The CSV upload process follows a two-step process; Validate CSV file and Create Users
This approach is an alternative to the traditional connector management approach and can be used in parallel or as a new method of user bulk upload.
Validate CSV file

Click Admin in the navigation bar at the top of the screen and select User Management from the drop-down menu
 Click on CSV Upload on the top tool bar

Click on Browse
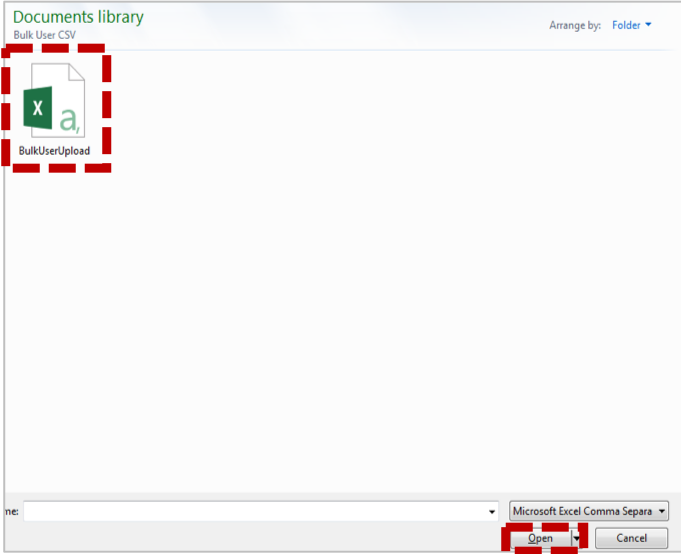 When you have found the CSV file, select it and click Open
 Click Validate
The file will then be validated, and a message displayed to let you know whether the validation has been successful or if there are any errors in the CSV file. Validation errors are usually due to formatting or syntax errors. The list of file validation results will indicate the location of any errors on a line-by-line basis.
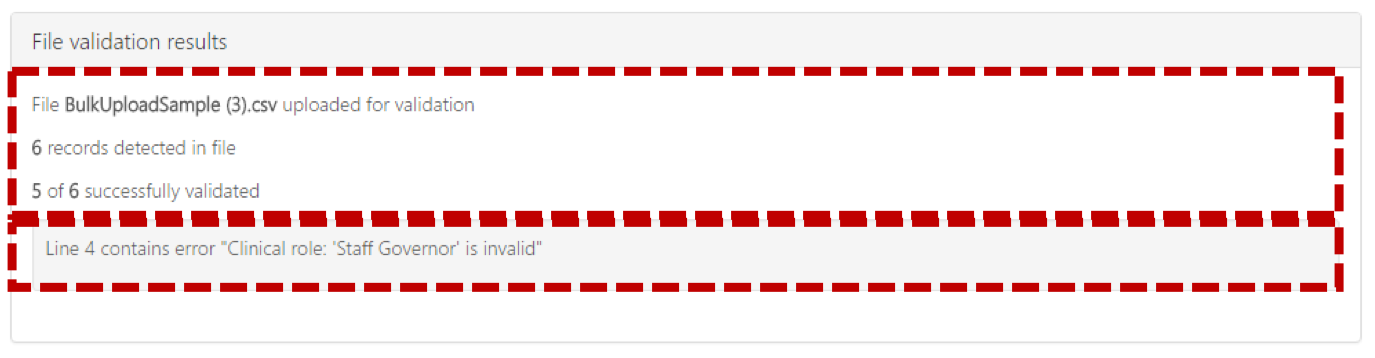 Below is an example of what you will see if the CSV file has failed its validation:
You must make the required change to the incorrect lines within the CSV file and follow the steps above to re-upload the file for a successful validation.
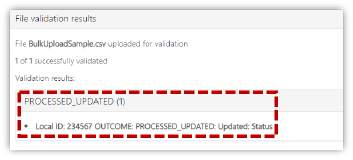
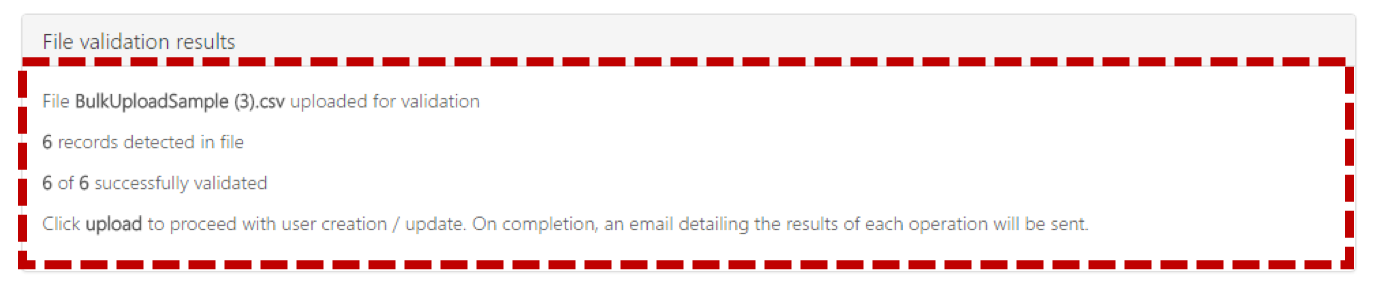 This is an example of where the CSV file has successfully validated:
How to create and complete the CSV file
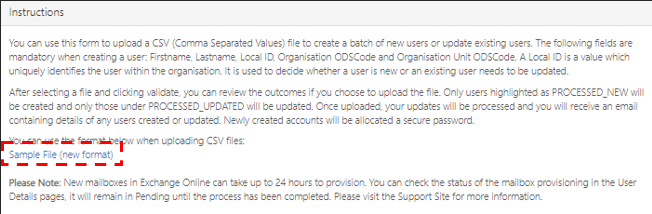 Click on Sample File (new format) to download the sample file.

Sample file
| Attributes/Columns | Description |
| ID | ID is the portal database ID which is populated only to link and update existing accounts. This can be found in the mailbox report but is not a mandatory field when either creating or updating. |
| Mobile | Current mobile number of the user, not a mandatory field for creation. |
| Clinical Specialities | Example: Nephrology, Gynecology, ENT, Dermatology etc. |
| Clinical Roles | Example: Doctor, Nurse, Analyst etc. |
| Work Areas | Example: Education, General Acute, Imaging, etc. |
| Mailbox size | Current mailbox size of the user (4GB, 50GB), user will be given a 4GB mailbox by default if left blank. NHSmail support pages have more information on how to manage mailbox quotas. |
| Local ID | Local ID is a string of text provided by the organisation to link the user to their local directory or a local staffing system/record. This can be found in the Mailbox Report, it is the External Sync ID column and is mandatory in both creation and updating in bulk. |
| Site | A site ODS Code should be used when a user needs to be moved or created to be under a specific site in their organisation. |
| Status | CSV functionality can be used to mark user accounts as leavers or joiners. Please see the next section Marking a user as a leaver via CSV upload. |
| User’s email address. This is automatically generated upon creation and should be left empty. When updating existing users, this is a required field. |
Create Users:
Once the file has successfully validated, the next step is to upload, and bulk create the users’ accounts
 Click Upload at the bottom of the page
 If you are uploading a large file, this upload might take some time. You can leave the bulk upload screen and can refer to the notification screen by clicking on the notification’s icon at the top right of the screen to see the status of the file upload as seen in the screenshot below.
 You can continue to work on other tasks whilst a CSV upload is in progress.
 The message will be displayed as shown.
Admins will receive the results to their CSV upload via email. This will contain the uploaded CSV file along with additional columns providing the result of each user creation
Marking a user as a leaver via CSV upload
You can also use the CSV functionality to mark user accounts as leavers or joiners. For information on leavers and joiners please refer to Marking a User as a Leaver and Accepting a Joiner into your Organisation section.
To mark a user as a leaver:
1. First download the sample file. Refer to Downloading sample CSV files for more information.
 2. Update the Status column as ‘leaver’ for the user(s) account in the CSV file to be marked as leaver(s)
 3. Follow steps 1-5 of the CSV File Validation section to validate a CSV file with updated user information
When the file is successfully validated, you will be notified with a message showing status as updated.
 4. Click on Upload
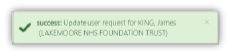
 This message will be displayed.
You will also receive a CSV results email. This results email will have the uploaded CSV file attached with an additional column which contains the result of each user account update.
Marking a user as a joiner via CSV upload
To mark a user as a joiner:
1. First download the sample file. Refer to Downloading sample CSV filesfor more information.
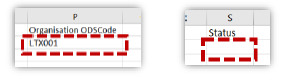 2. Update the ‘Organisation ODSCode’ column with the correct ODS code of the organisation and leave the ‘Status’ column as blank.
 3. Follow steps 1-5 of the CSV File Validation section to validate a CSV file with updated user information
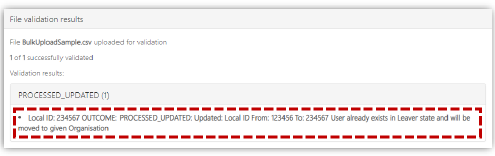
When the file is successfully validated, you will be notified with a message showing ‘User already exists in Leaver state and will be moved to given Organisation’.
 4. Click on Upload
 This message will be displayed.
You will also receive a CSV results email. This results email will have the uploaded CSV file attached with an additional column which contains the result of each user account update.
| Last Reviewed Date | 20/06/2024 |