
Teams files
Top tips
- Creating folders: This is particularly useful in a channel where lots of files are being shared as it helps keep files organised.
- Pin the most used files to the top of the files tab or add them as a tab for easy access
- All the files stored in a channel of a team will be visible to everyone in the team.
Creating a new file in teams
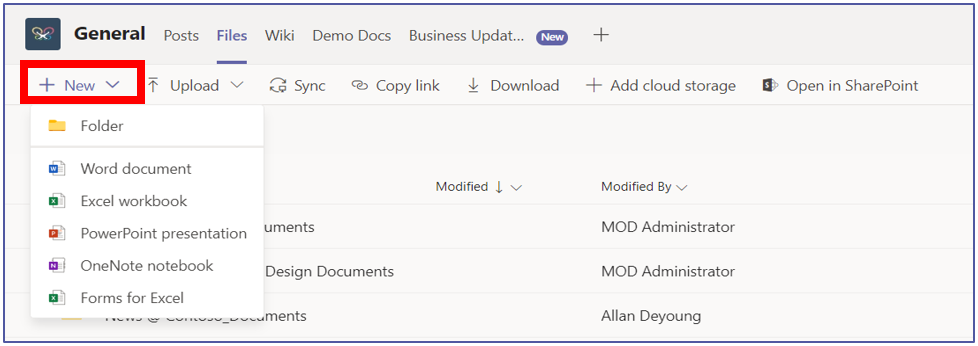 You can create certain types of office files directly into a team by navigating the files tab of any channel clicking New. A drop-down list will appear displaying the types of documents you can create. You will also have the option to create a new folder.
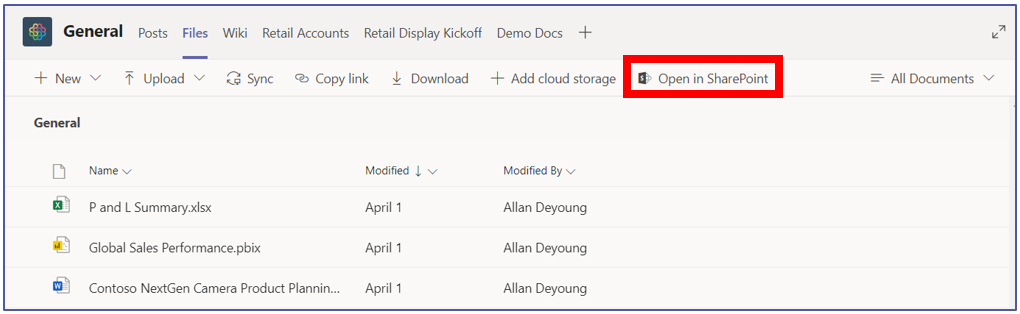
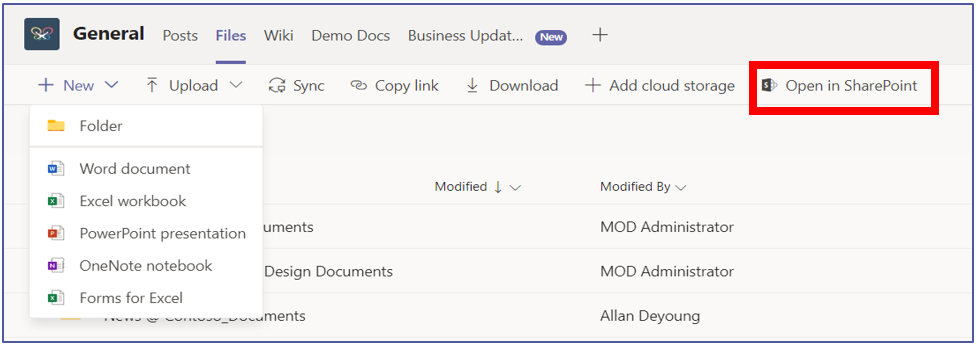 When a team is created, a linked SharePoint site is also created. Every channel has a folder in the documents library on this site. This is where all of the files that appear in the files tab of a channel is stored. To see this folder, click Open in SharePoint.
File options
To select a file, hover over it and check the checkbox that appears in the far left column. Once a file is selected, you can you the top menu bar do a number of actions, including:
- Rename the file
- Download a copy of the file
- Pin a file to the top of the tab so that it appears as a large icon above the list
- Delete it from the channel’s file storage
- Move or Copy the file to a different team or channel
Alternatively, hover over the file to see the three dots for more options and all of the options listed above will be available on the drop-down menu that appears.
Files space
Top tips
- If you’re in lots of teams it can be difficult to find files, use the ‘Recent’ tab within the files space to quickly find recently accessed files whether they’re in OneDrive or Teams!
- Remember you can’t delete files from the files tab, you would need to do this from the channel within which it is stored.
The recent tab
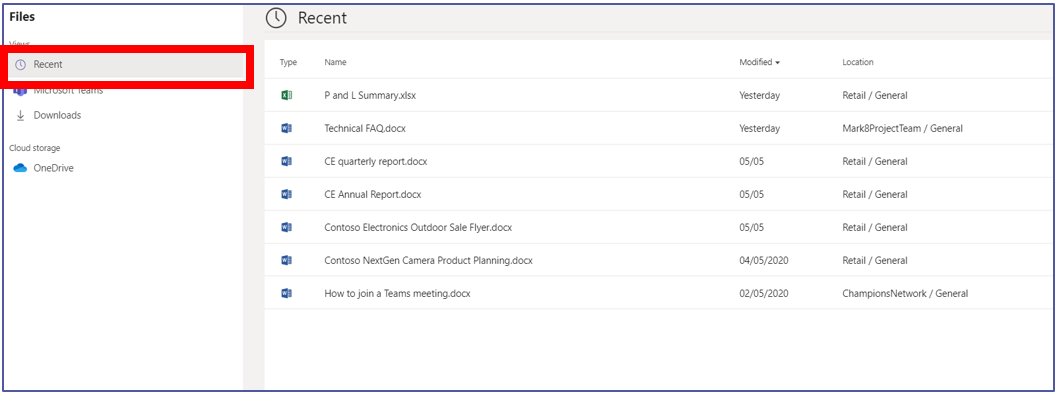 The Recent tab shows you any file that you have opened from Teams. By default, it shows the files you opened most recently first and shows when you last opened them in the modified column.
The Microsoft Teams tab
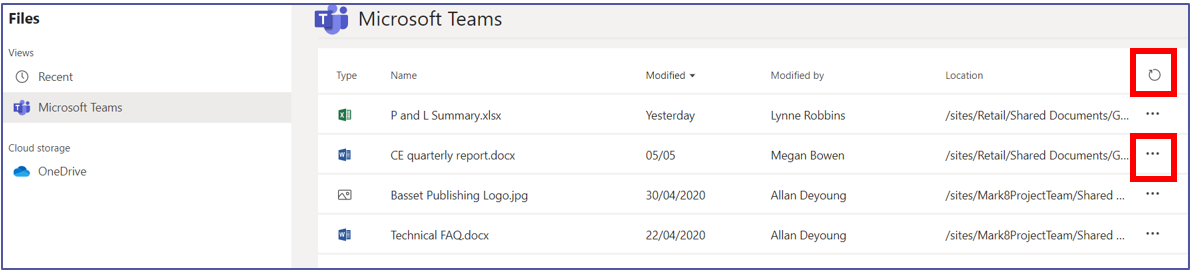 The Microsoft Teams tab shows all files stored in any channel or chat in Teams. By default, it is order by the modified column, which shows the most recent time anyone opened the modified column. To see the latest changes of what documents have been edited, click refresh in the far right column header. You can also use the three dots (more options) in this column to open or download a particular document.
Other storage areas
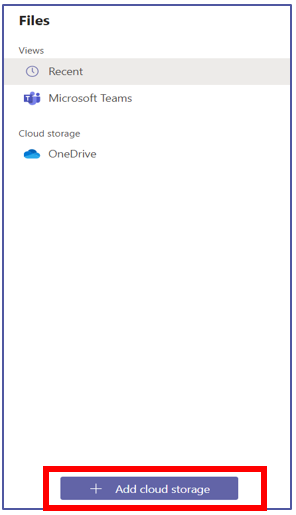 You can also see your OneDrive from this space. The folder structuring is retained in this view.
Additionally, you can add certain third-party file storage apps, such as your Google Drive, Teams by pressing Add Cloud Storage at the bottom left- hand side of the page.
Note: This ability may have been turned off by your admin.
Sharing externally
Top tips
- Use this feature to share files with people in your organisation who aren’t in the same team that the files are stored in
- You can share a link to a whole folder not just a team. This allows the recipient to upload files into the folder as well as access existing files
- You can only block recipients from being able to download files if you’ve shared a read-only link.
To do this

- Navigate to the files tab of the channel containing the file to be sent and click Open in SharePoint.

- In SharePoint, select the file to be shared and click on Share.
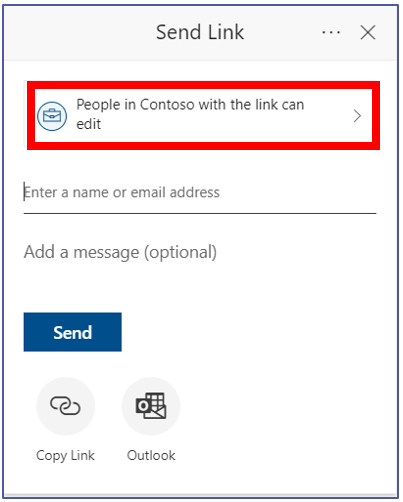
- From the ‘send link’ pop up box, click on the current link setting, e.g. “People in Contoso with the link can edit”.
- On the next screen that appears, click on Specific people.
- If you would/wouldn’t like the recipient to be able to edit the document, check/uncheck the Allow editing

- If you are not allowing the recipient to edit the button, you can also stop the recipient from being able to download the document and obtain their own separate copy by toggling the Block download
- After you’ve adjusted the settings, click Apply.
- You will be taken back to the Send Link page where you can enter the email address of the recipient
- Press Send.
Co-authoring
Top tip
- You can edit files on the move if you have the mobile app – no need to get your laptop out to make small edits.
- Use the ‘conversation’ button when you’ve opened a file in Teams to talk about the file without editing it. Any previous posts about the file will be visible here too.
- If you need to restore version history make sure no-one else is in the document otherwise you’ll be asked to try again later.
To edit a live file:
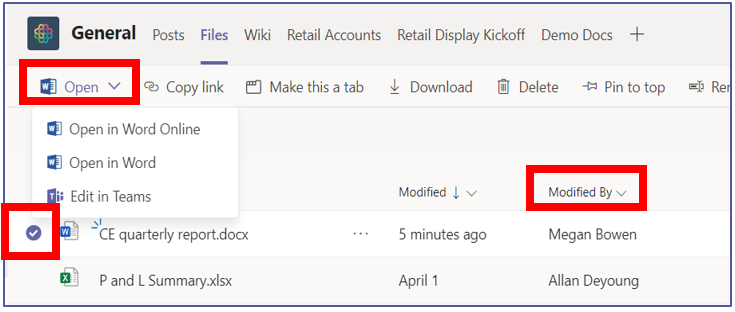
- Locate the file in the appropriate channel. You can see who last made changes to the document in the Modified By column and when they made those changes in the modified column.
- Hover over the file to make a circular check box appear in the far-left column. Click on it to select the file.
- On the menu bar, click on Open, then Edit in Teams.
 You can also choose to edit in the browser or desktop version.
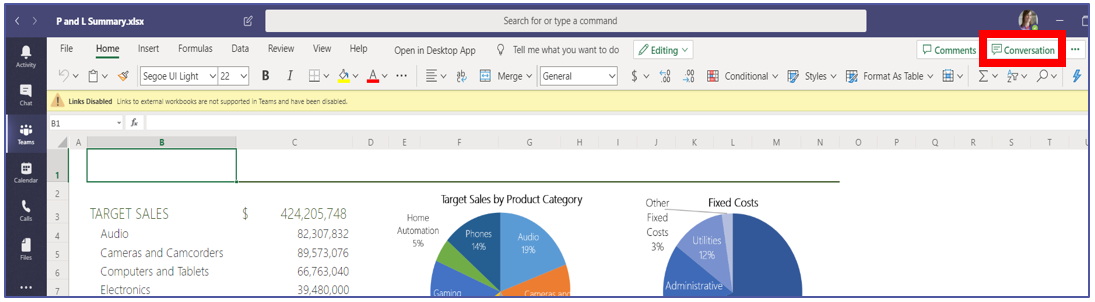 In Teams, you can start a conversation about a file without actually editing it by clicking on Conversation in the top right corner.
You can also make use of the commenting tools to annotate specific parts of the text while reviewing a document.
 Conversations can only be seen in Teams, but comments can be seen in the desktop and browser app.
Version History
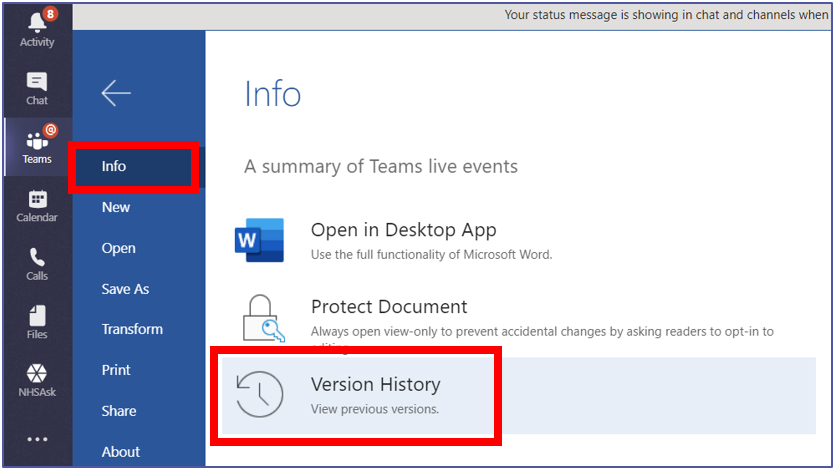 You can see previous versions of a file by clicking on File, then Info, then Version History. Here you see the changes made by different people and save a copy of the document at a certain point. You can also restore a previous version, which removes all changes made after that version of the document was created.
File recovery
If you have deleted a file from Teams it can be recovered via the linked SharePoint site that sits behind each team created in Microsoft Teams.
To do this:
- Open the files tab of the channel where the deleted file is located
- Click Open in SharePoint on the bar located under the tabs
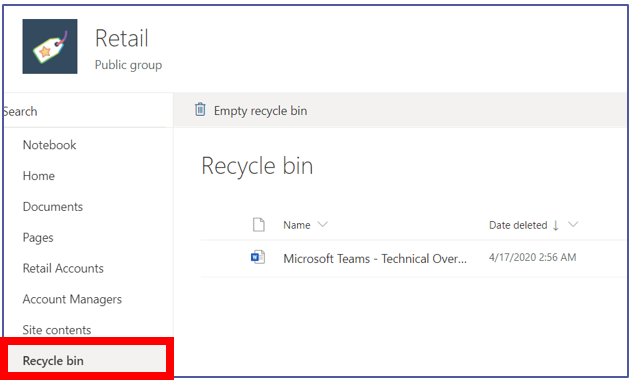
- In the SharePoint site, click on Recycle Bin from the menu bar on the left.
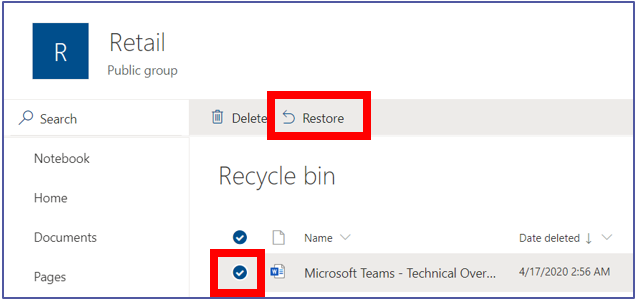
- Select the file
- Click restore from the menu ribbon.
| Last Reviewed Date | 2/7/2020 |