
1. Overview
This Quick Start User Guide is intended to be used by end users at who have HoloLens 2 devices enrolled onto Intune.
Please follow the step-by-step instructions to begin using your Intune-enrolled HoloLens 2 device. If you have any questions or queries about any of the following enrolment steps or other content in this document please contact your Local Administrator (LA).
2. Getting started with HoloLens 2
Step 1
Plug your HoloLens 2 device in to charge it. The LEDs below the Power button display the battery level and will fade in and out when your device is actively charging
 Step 2
To turn on your HoloLens 2, press the Power button as indicated in the image
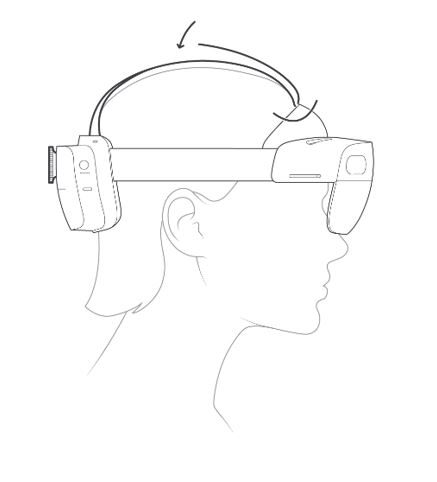 Step 3
Next, place the HoloLens 2 on your head. For steps on how to adjust the fit, please refer to:
https://docs.microsoft.com/en-us/hololens/hololens2-setup
 Step 4
To start using your device for the first time, you will need to set up Windows holographic. You will see the Microsoft logo which will turn into a hummingbird flying around following your hand. A button with a Microsoft logo will appear. Press the button.
 Step 5
Next, select the Microsoft Logo button to initiate the set-up steps. From the drop-down menu, select your language.
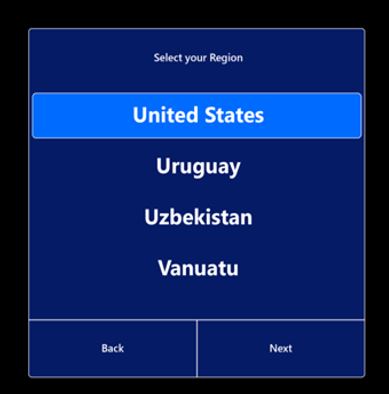 Step 6
Next, select the arrow flow (^) to find United Kingdom as your region from the drop-down menu.
 Step 7
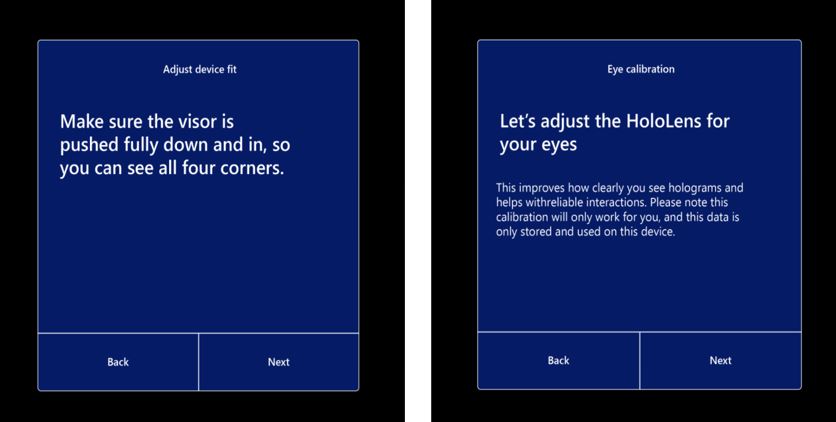
You will then need to calibrate HoloLens 2 to your eyes by following the steps presented on your device. Follow the instructions presented to you on the screen to complete this step. You should see the screens shown below.
 Once completed, a confirmation message will be shown. Select Next.
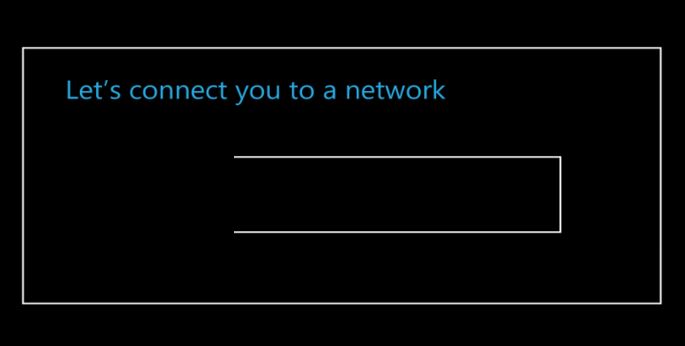 Step 8
Connect to your Wi-Fi or ethernet connection. Once connected to the internet, the out of box experience (OOBE) should begin.
Step 9
The Autopilot process starts. A window with Let’s get you setup for Work appears. Allow time for this process to complete on the device. You are not required to take any action for this step.
 Step 10
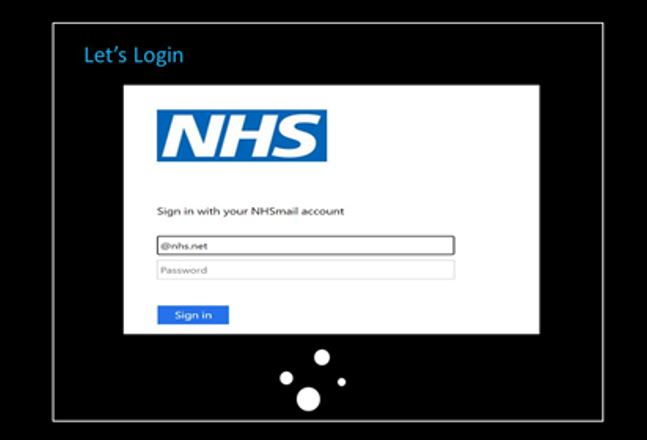
A Windows Sign In option screen will now be displayed to you. Select Add Account and you will be prompted to sign in. Please enter your nhs.net credentials (email address and password).
Step 11
Once the autopilot build is complete, you may be asked to complete a Multi-Factor Authentication (MFA) step before the enrolment can progress.
MFA is an additional security step and may already have been set up by you for your nhs.net email address. The MFA prompt will appear on the device on which you set up two-factor authentication for your NHSmail account. This may be another device.
You will need to follow the instructions presented to you, and select Approve, Confirm or Allow when asked to do so.
Step 12
The eye calibration process will start again. Please repeat Step 7, once completed please continue to Step 13.
 Step 13
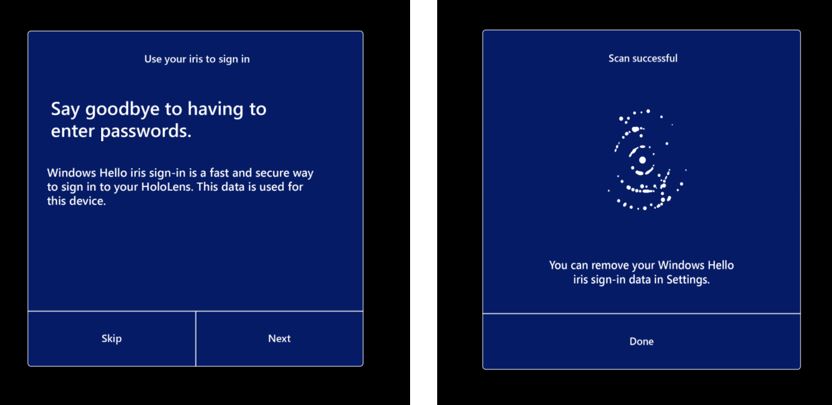
If you wish to set-up Iris sign-in, select Next and you will be directed to an eye calibration set-up screen. Once this scan is complete, select Done. You can select Skip to bypass the Iris sign-in step if you do not wish to set this up.
 Step 14
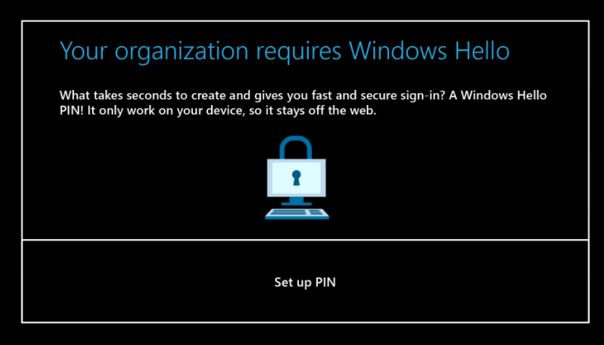
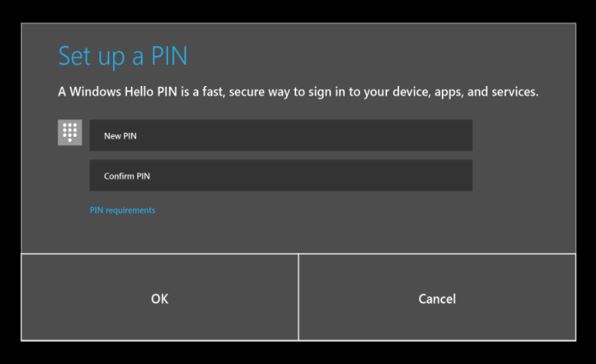
You will be asked to setup a PIN to log into your HoloLens device going forward. Please follow the PIN requirements provided to set up your PIN.

 Step 15
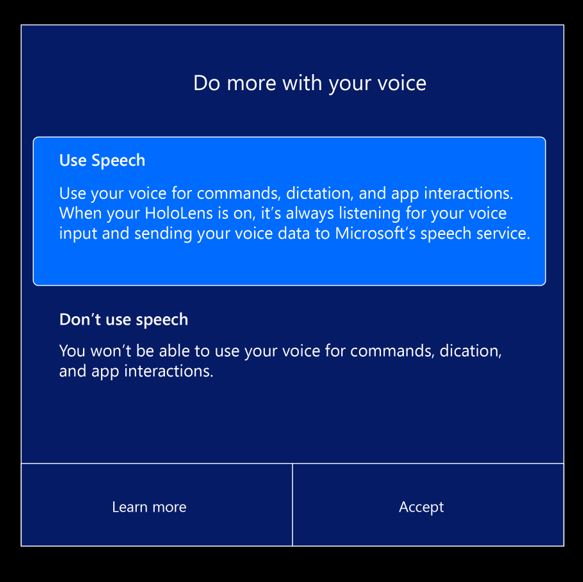
Your device will prompt you to enable speech recognition. Select Accept.
 Step 16
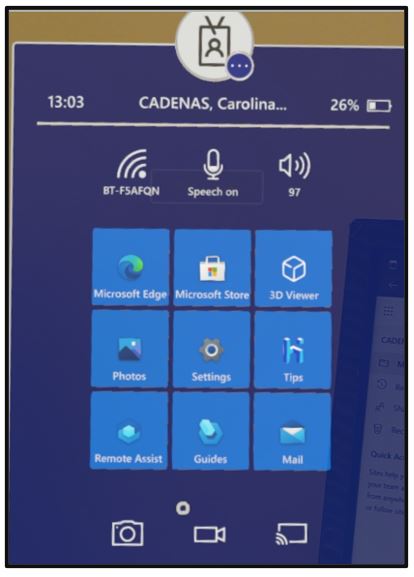
Next, a screen detailing guidance on how to use the Start menu will be displayed.
 Step 17
The HoloLens 2 enrolment process is now complete. Your device should display the Home screen and your applications will begin to download.
Your HoloLens 2 is now ready to use.
| Last Reviewed Date | 29/02/2024 |