
Automated all users security groups are now available for all organisations.
You can now use these security groups to manage access to SharePoint sites and applications as well as sharing Power Apps and Microsoft Teams. You can find the groups by searching the following naming convention: allusersgroup.{ODS Code}.
What do I need to do?
There is no action required to update the groups. Updates to the groups are automatic including joiners, movers and leavers. However, you can use the groups to share applications, manage access to sites and applications.
How can I use the groups to share?
All groups have the following naming convention allusersgroup.{ODS Code}.
The main uses of the groups are for following applications*:
The automated all users security groups can also be utilised for the NHSmail Intune Service. Organisations who have onboarded onto the NHSmail Intune Service will soon be able to find more information on how to request the groups in the Operations Guide for Local Administrators and Onboarding Managers.
*Note there may be additional uses for the groups beyond these applications.
SharePoint sites
The following steps outline how to utilise the automated all users security groups on SharePoint.
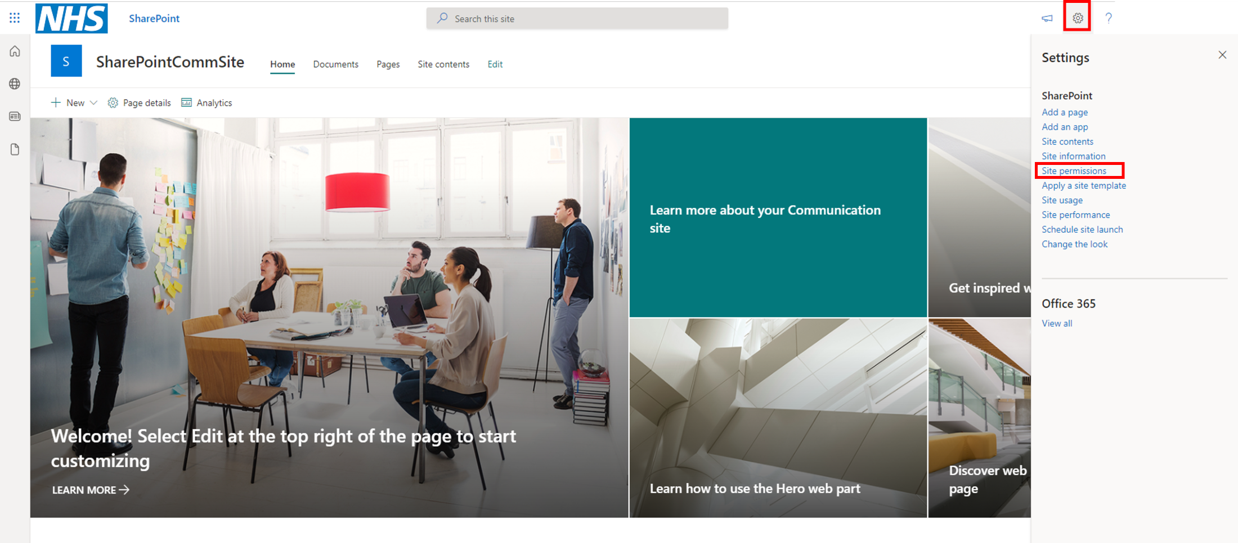
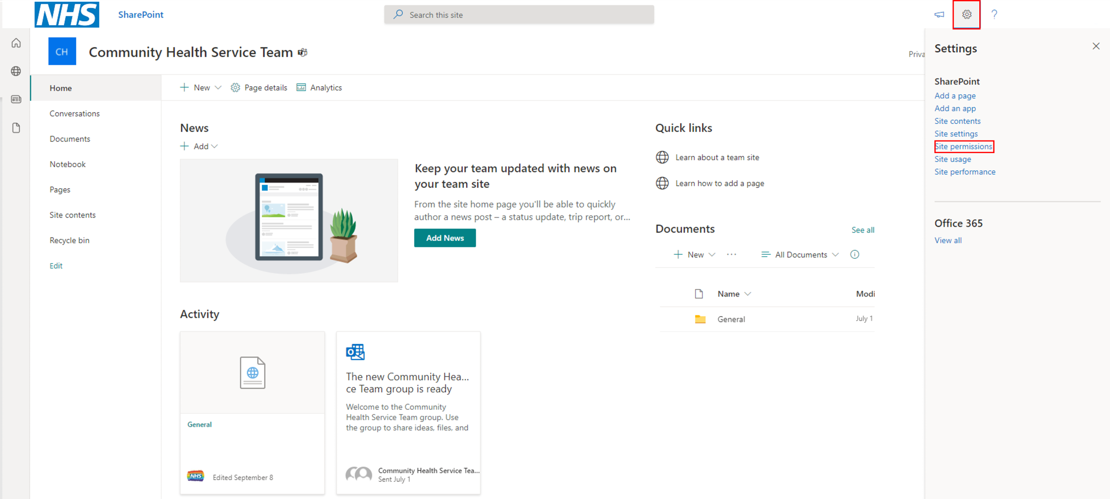
1. Once in SharePoint, click the “Settings” cog icon
2. Click “Site permissions” from the drop-down
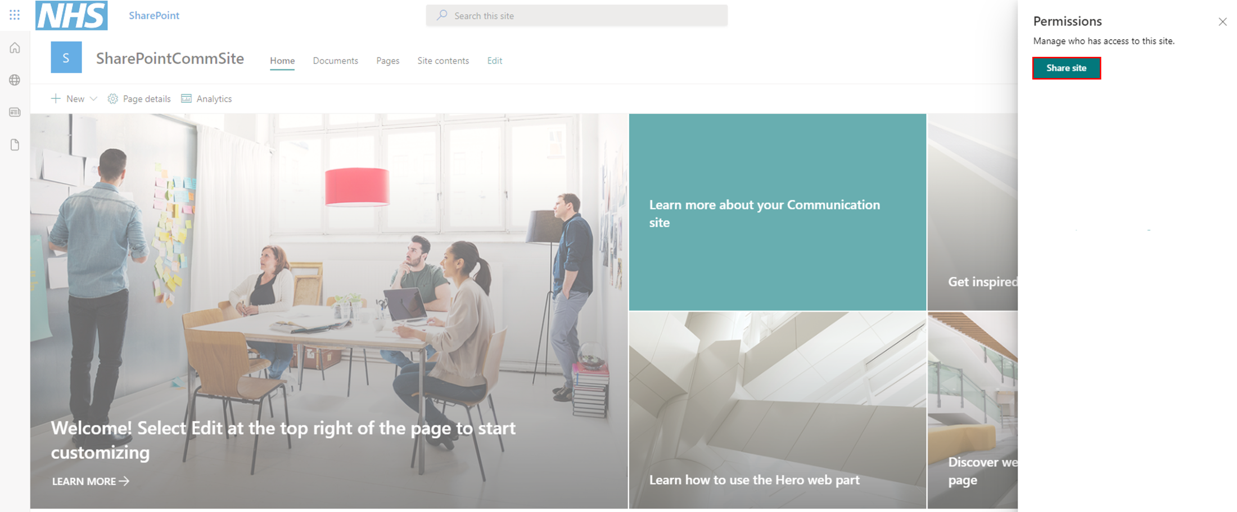
3. Click the “Share site” button in the top right corner of the page
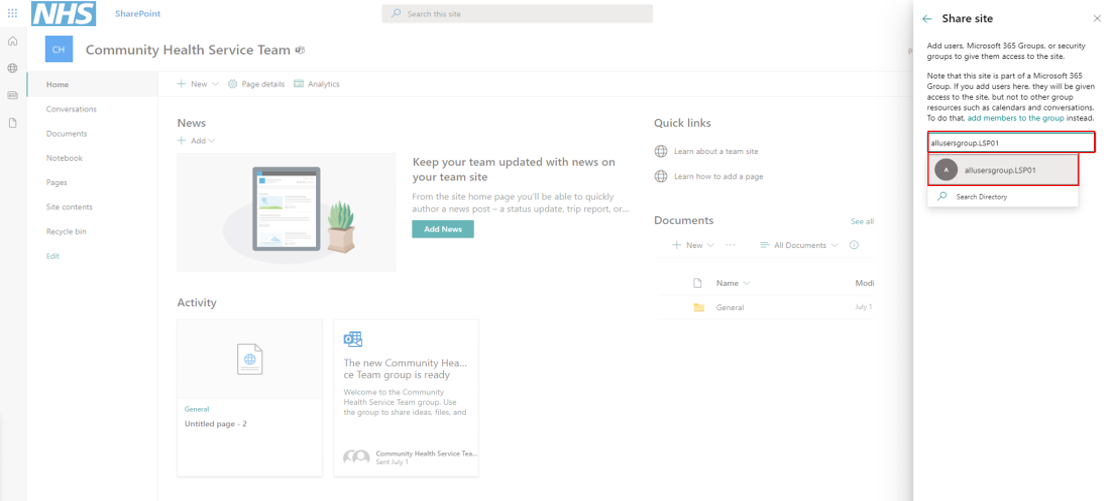
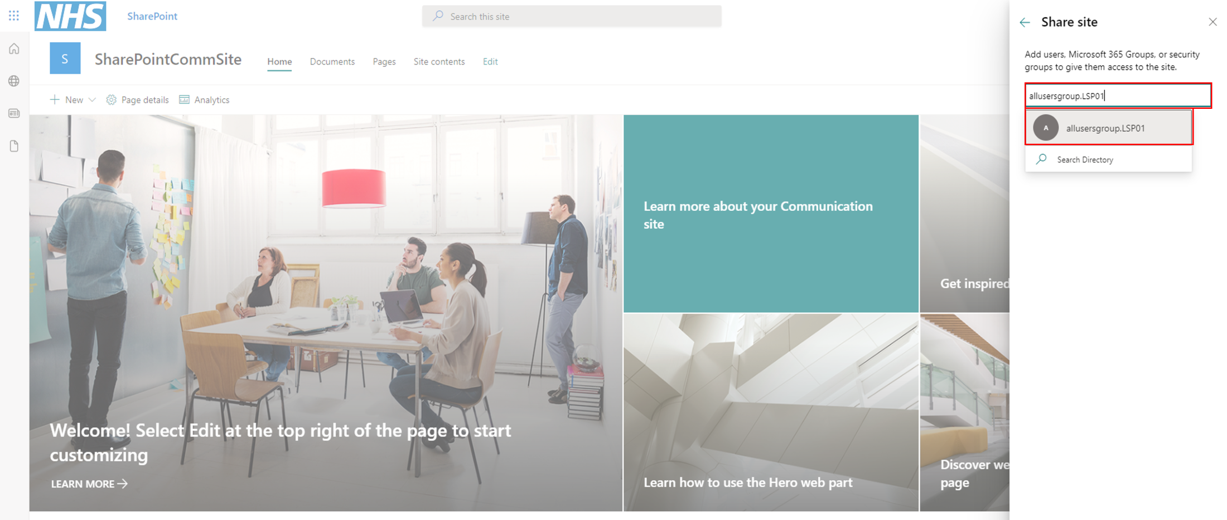 4. Search for the security group. In this example “allusersgroup.LSP01” and click the pop-up
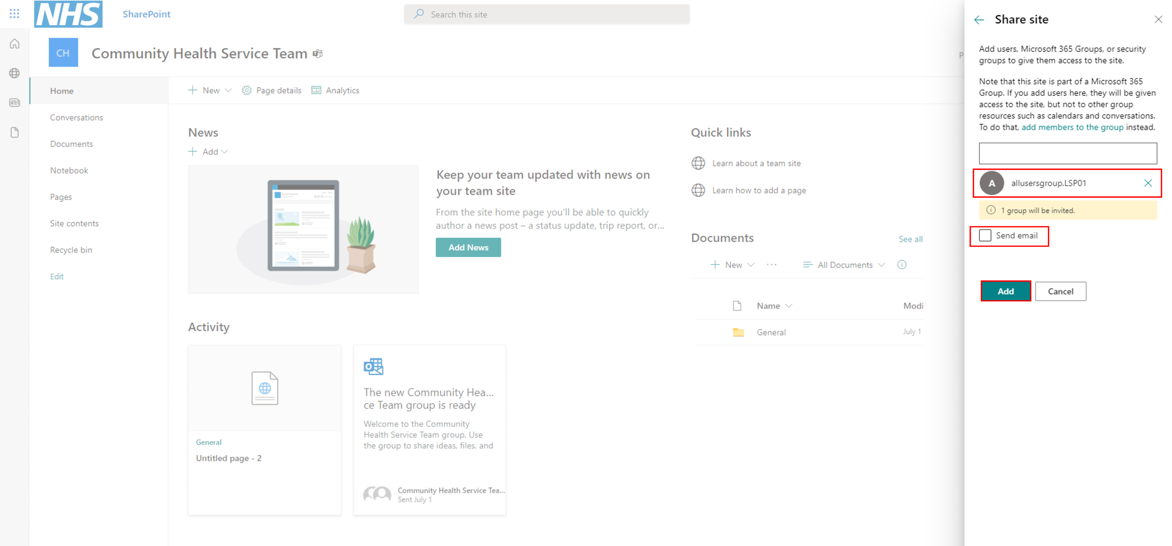
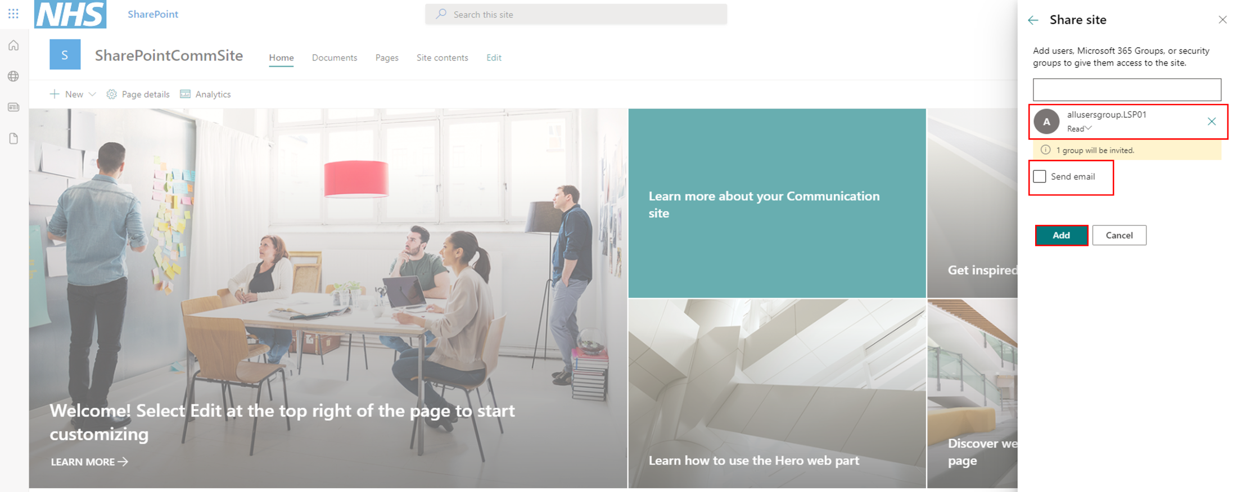 5. Confirm that the selected group is the correct one. Untick “Send email” and left click the “Add” button to complete the steps
Power Platform
The following steps outline how to utilise the automated all users security groups on Power Platform, specifically PowerApps in this example. Please refer to the Power Platform guidance for further information on licensing:
 1. Navigate to https://make.powerapps.com/ where your PowerApp is stored
2. Ensure that you are in the right environment
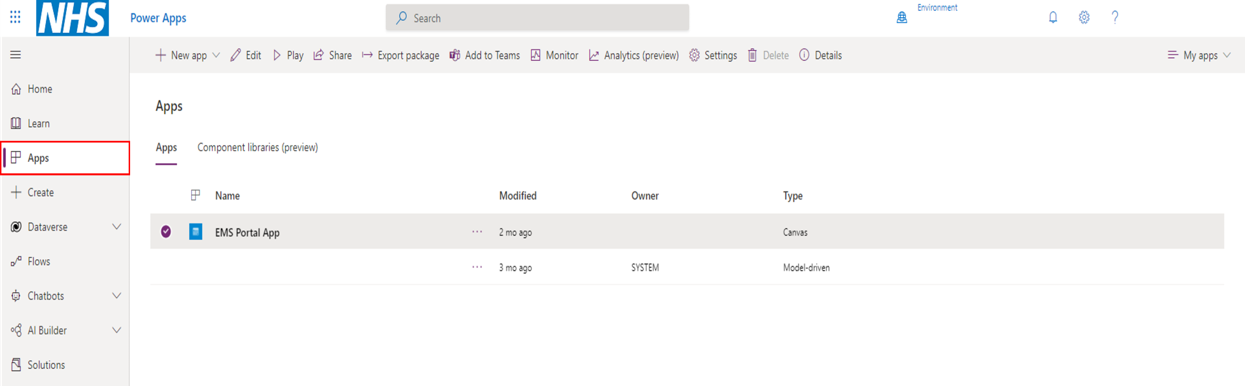
3. Select “Apps” from the left menu
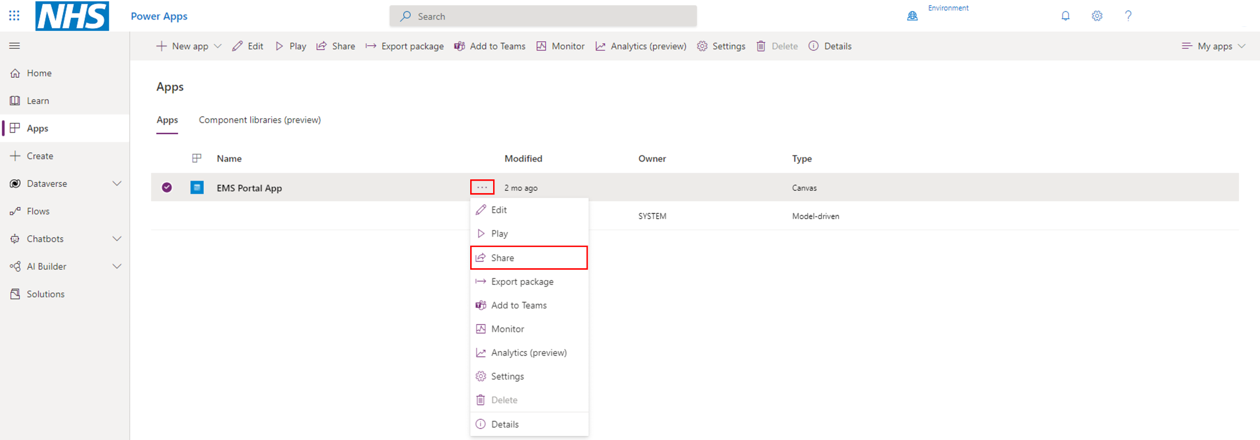 4. Select the ellipses “…” next to the “Modified” column on the PowerApp and click on the “Share” option
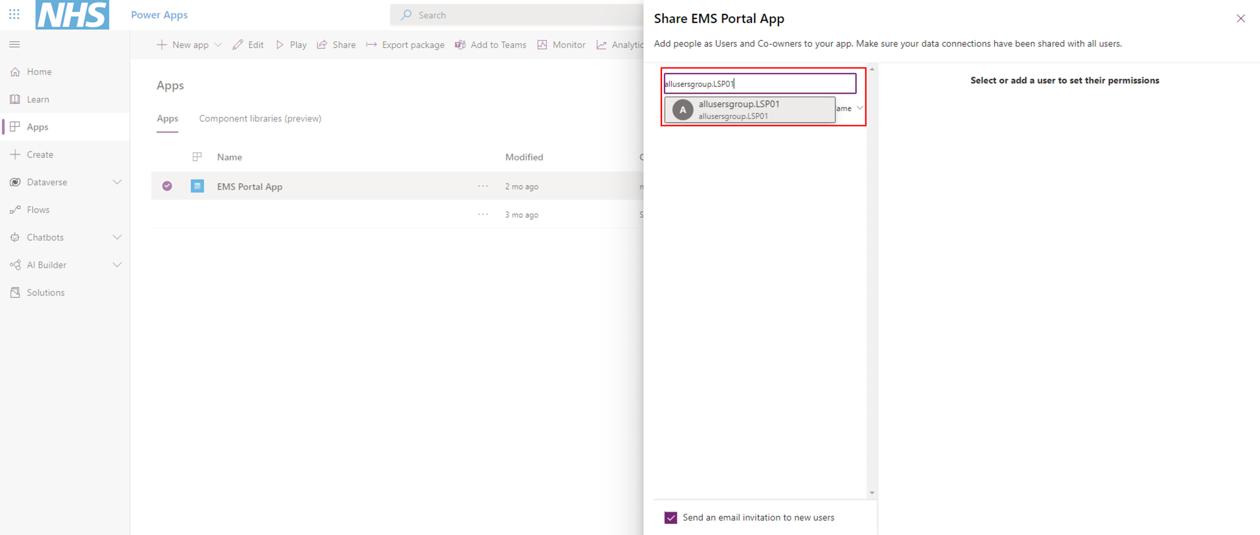
5. Search and select the security group. We will used a group called allusersgroup.LSP01 in this example. Your organisation’s group is in the format allusersgroup.{ODS Code}
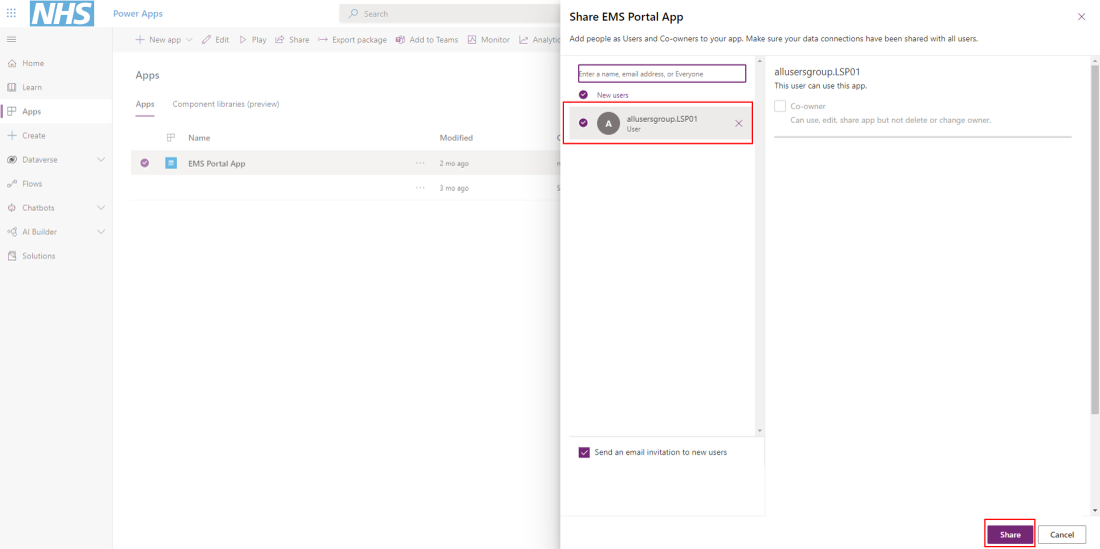 6. Share the PowerApp with the security group
Microsoft Teams
Please note, the following steps will not keep the Microsoft Teams team update to date. Syncing security groups with teams is on Microsoft’s Roadmap due for release to the public in 2022. View Microsoft information the for further details.
The following steps outline how to utilise the automated all users security groups on Microsoft Teams.
 1. From Teams, click on the “Teams” icon
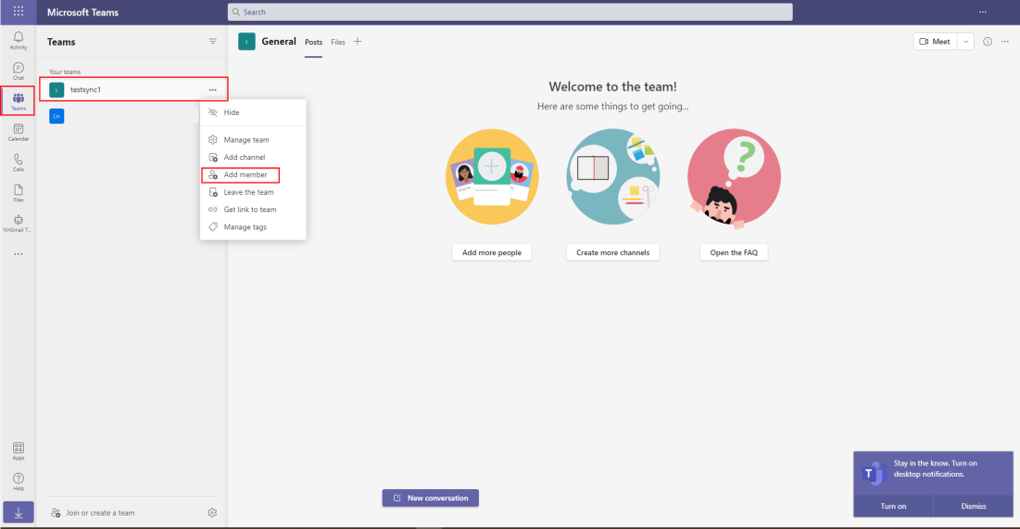
2. Right click on the teams group you would like to share. It is “testsync1” in this example
3. Select “Add member”
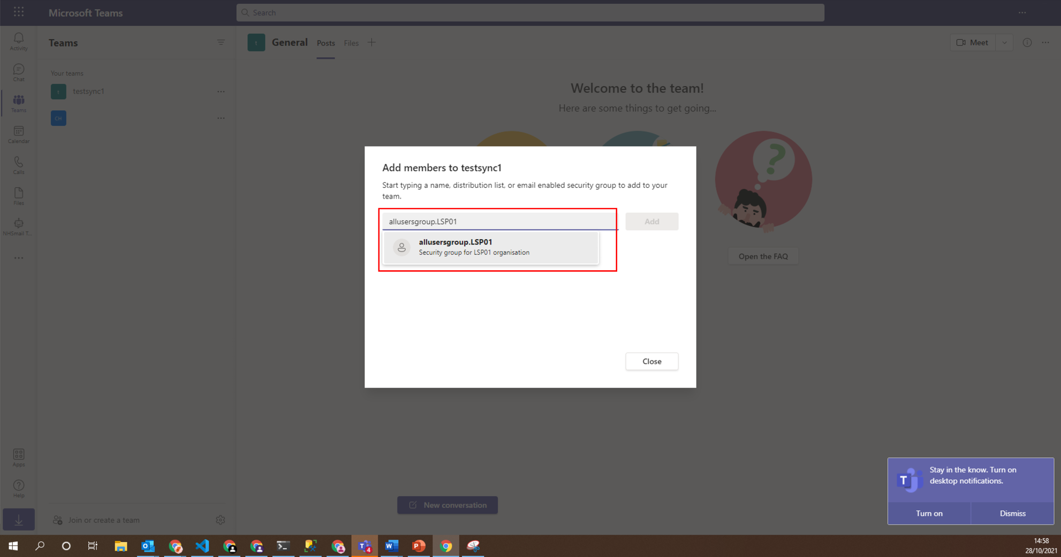
4. Search for the Security Group and it should pop up as show in the image below. Your organisation’s group is in the format allusersgroup.{ODS Code}
5. Select the pop up to key in the group
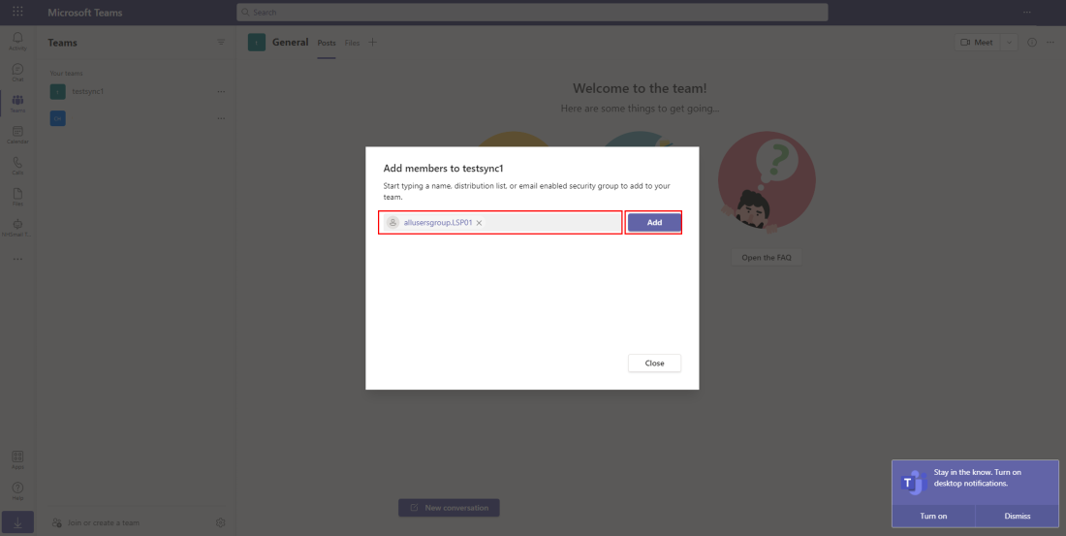 6. Ensure the name of the group is in the search as shown
7. Click the “Add” button
Microsoft Teams / SharePoint sites
The following steps outline how to utilise the automated all users security groups on Microsoft Teams groups with SharePoint.
To get to a Microsoft Teams group’s SharePoint site:
 1. Click the “Teams” icon
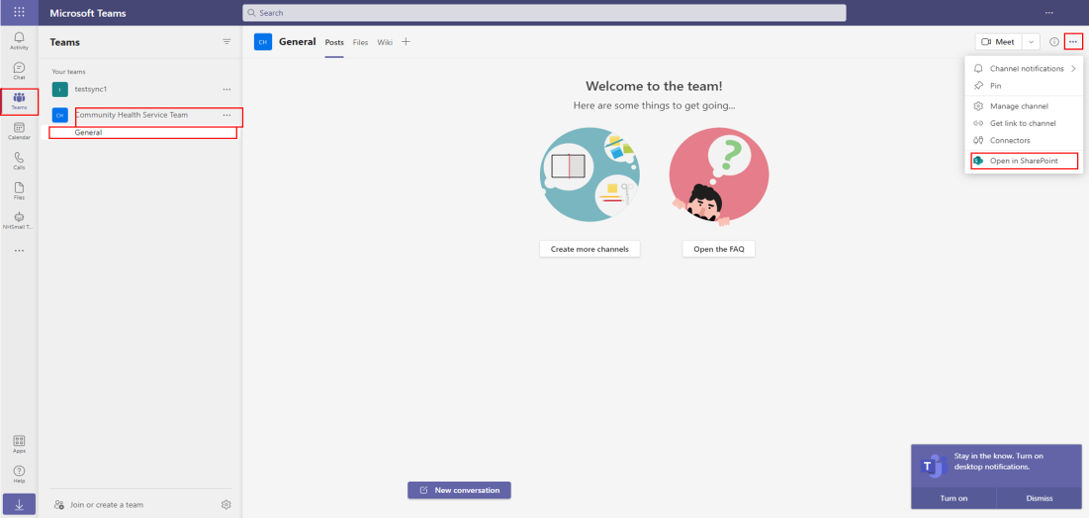
2. Click a Teams group, in this example “Community Health Service Team”
3. Select a Teams channel from the drop-down, in this example “General”
4. Click the ellipses located in the top right corner of the screen
5. Click the option that reads “Open in SharePoint” from the drop-down
 6. Click the “Settings” cog icon
7. Click “Site permissions” from the drop-down
 8. Click the “Add members” drop-down in the top right corner of the page
9. Select the “Share site only” option from the drop-down
 10. Search for the security group. In this example “allusersgroup.LSP01”. Your organisation’s group is in the format allusersgroup.{ODS Code}
11. Click the pop-up
12. Confirm that the selected group is the correct one
13. Untick “Send email”
14. Click the “Add” button
Who can use the share functionality?
Please note users need a level of permission before sharing the groups in any of the following capabilities.
| Capability | Level of Permissions |
| Power Apps | To share a Power App, a user must have the role ‘Environment Maker’ assigned in a power platform environment*.
Note, if the Power Platform environment is restricted via an existing security group, this will also restrict who environment makers can share an application with. *Please note build is restricted on the default environment, for more information on environments visit the Power Platform guidance here. |
| Teams | To utilise the automated all users security groups with an existing Team you must be an owner of the Team. |
| SharePoint | To share a SharePoint site with the automated all user security group you must be a site member.
When creating a SharePoint site, it is also recommended to update the permission of the site to restrict sharing to owners only. If this setting is changed, only site owners will be able to use the groups. Please view the instruction outlined below for the step-by-step process to update site ownership. |
Removing share functionality from SharePoint sites
The following steps outline how to restrict permissions on SharePoint sites to owners only. Once in SharePoint, click the “Settings” cog icon
1. Click “Site permissions” from the drop-down
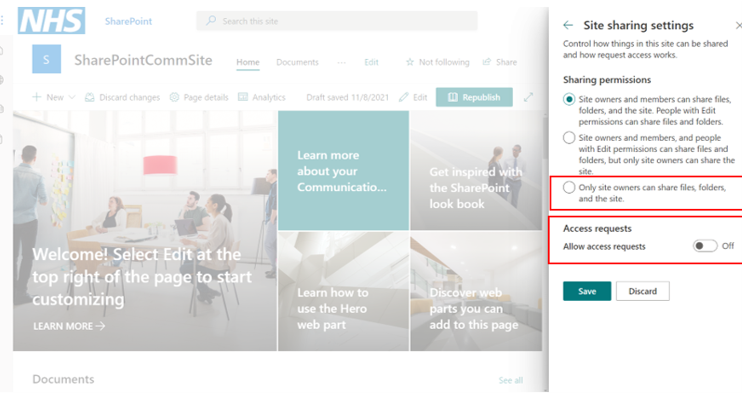 2. Click ‘Change how members can share’
3. Turn off ‘Allow access requests’
4. Select ‘Only site owners can share files, folders and the site.’
5. Click save.
Frequently Asked Questions
Once the portal and cloud have synchronised, the changes will update within 5 minutes. End to end the process is expected to take approximately 4 hours.
No, current Teams membership limits and channel mentions still apply. The automated all users security groups will not bypass these limits.
Yes, Power apps can be shared with automated all users security groups. When a Microsoft 365 (M365) group is created a planner, resource is available which will inherit the members of the M365 group.
Yes, it is possible to add multiple groups.
Yes, it is important to deselect the ‘send email’ option if you do not wish to email all members of the group.
No, this is not currently available.
There is no targeted activity to ensure site/apps/teams owners change the settings of their group to use the automated all users security groups. However, owners and Local Administrators will now be able to use the groups to restrict access.
Please refer to the guidance on Data Retention and Information Management Policy which outlines the account management lifecycle for users including active, inactive and deleted accounts.
This solution is for All Users dynamic groups only and there are no sub-groups available. The NHSmail Intune Service allows LAs (with RBAC permissions) of onboarded organisations to manage Groups without requiring native access to Azure AD.
This allows LAs granular control over the creation, editing and deletion of their organisation’s Groups within Intune and permit LA’s to closely and independently manage Groups scoped to their organisation.
Organisations onboarded to the NHSmail Intune service will automatically be provided with access to the application.
Yes. Automated all users security groups are available for organisations onboarded to the NHSmail Intune Service. Further details can be found in the NHSmail Intune Operations Guide for Local Administrators and Onboarding Managers.
Where can I get support?
If your query remains unanswered, please contact your local IT department or the NHSmail helpdesk helpdesk@nhs.net for support.
| Last Reviewed Date | 08/09/2023 |