Setting up Unattended RPA
Please refer to the Licensing and Other Pre-requisites section to ensure you have all relevant licences before running unattended RPA. As a user of unattended RPA, you can build and test desktop flows, which can be run in attended or unattended mode.
While W365 Cloud PCs are a recommended approach for unattended RPA, additional network configuration steps may be required to use them for Human Resources (HR) or other cloud / on premise activity outside the NHS.net Connect shared tenant. This is because Cloud PCs operate within a Microsoft-hosted network environment, which is isolated from on-premises or third-party networks unless explicitly configured. If the target system resides on a private network with no direct routing or VPN access, the Cloud PC can’t reach it. For such use cases, the Bring Your Own VM option may be more appropriate and cost effective.
More information on this is available through Microsoft’s guidance: Setup Power Automate.
W365 Cloud PC
This section describes the essential steps to set up your W365 Cloud PC for using unattended RPA. If you do not have one, please raise a ticket to have one assigned to you.
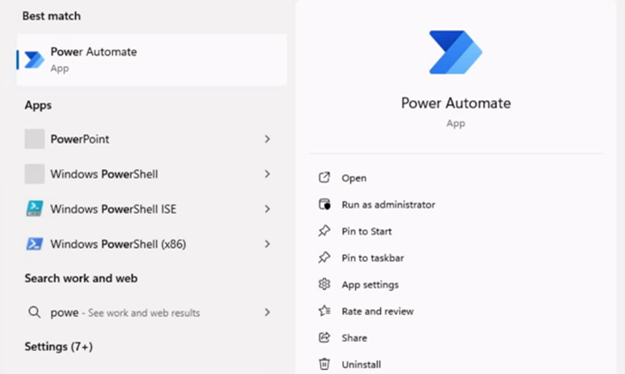 Step 1: Once your W365 machine has been assigned, verify that all required licences are allocated and that Power Automate Desktop is installed on the machine.
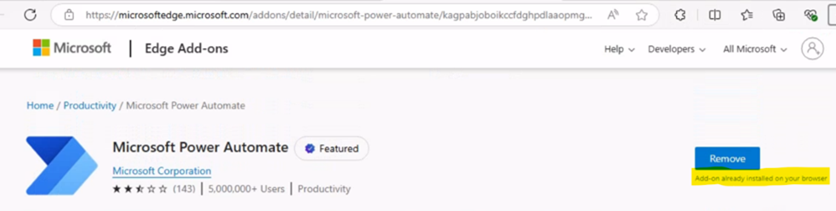 Step 2: Confirm that the Power Automate Edge extension is enabled. If the extension is installed, it will display an option to ‘Remove’, as shown in the image.
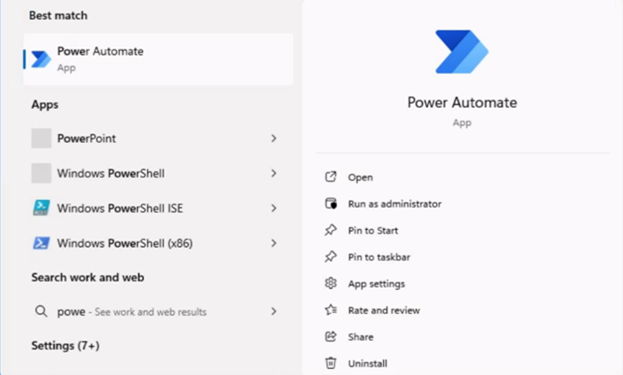
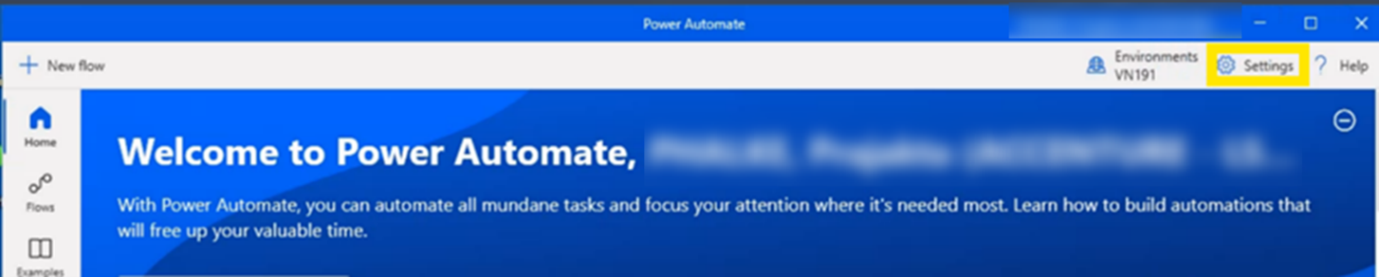 Step 3: Install Power Automate machine runtime. If it is already installed, you may proceed to Step 4. If it is not installed, open Power Automate and select ‘Settings’ from the top right-hand corner. Select ‘Install Power Automate machine runtime’ and follow the instructions. After the installation process is complete, confirm that Power Automate machine runtime is installed. If an error occurs during installation, try restarting the machine and repeating the steps.
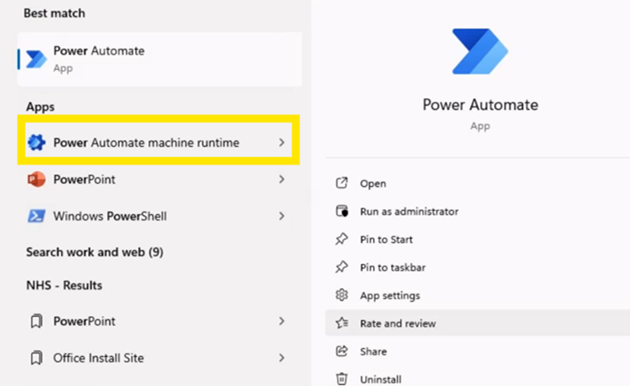 Step 4: After installation, open Power Automate machine runtime.
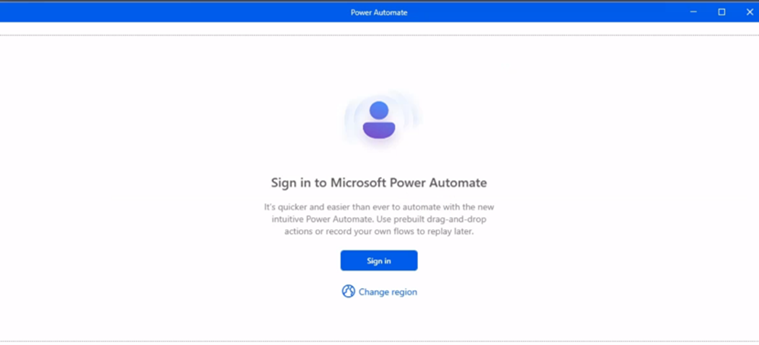
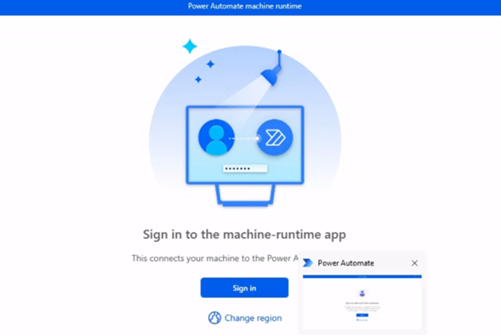
 Step 5: Sign in using the environment credentials for the location where you plan to implement unattended RPAs, ensuring that the necessary licences are attached. Your machine should then automatically register in the selected environment.
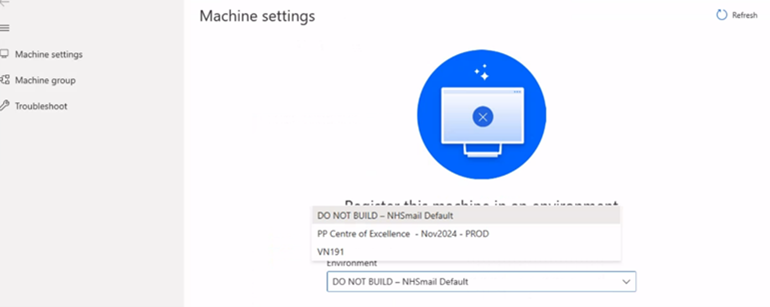 Step 6: If your machine is not yet registered, you will receive a prompt to select a machine-running environment. Power Automate will then use this environment to execute all triggered desktop flows.
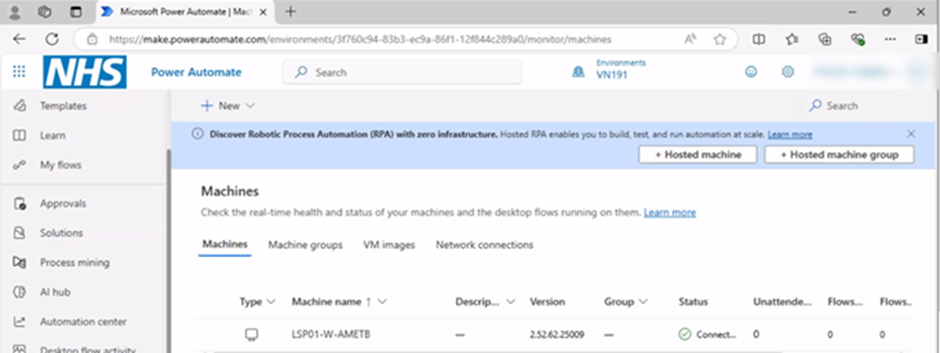 Step 7: To ensure that your machine is registered to the environment, log into the Power Automate portal. In your select environment, the registered machine should be visible.
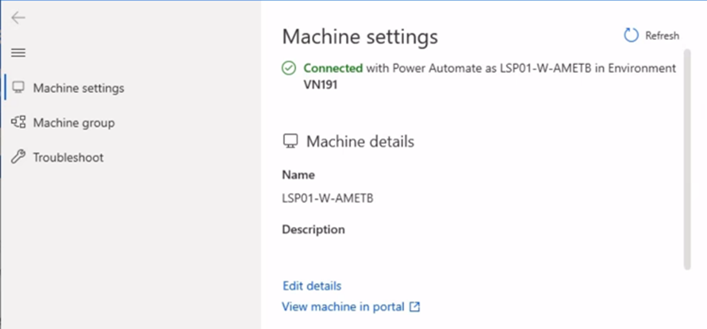
 Step 8: Once the connection is successfully established, the machine settings will display the following fields:
- Machine name: A unique name to identify the machine
- Machine description: An optional description of the machine
- Machine environment: The running environment of the machine
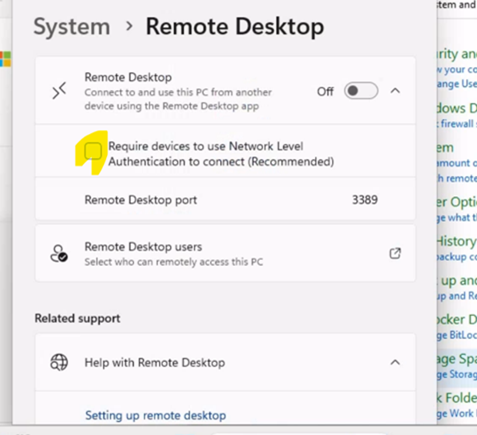 Step 9: Confirm that Network Level Authentication is disabled. Navigate to Control Panel > System and Security > System > Remote Settings > System Properties > Remote > Remote Desktop. Verify that ‘Require devices to use Network Level Authentication to connect (Recommended)’ is unchecked.
 Step 10: Go to your physical machine, open the Power Automate desktop, and log in to the same environment.
 Step 11: Create the flow that performs the required actions and test it.
 Step 12: The example below is a sample flow for creating and saving an Excel file on a W365 machine. Save your own flow and then test it on a physical machine.
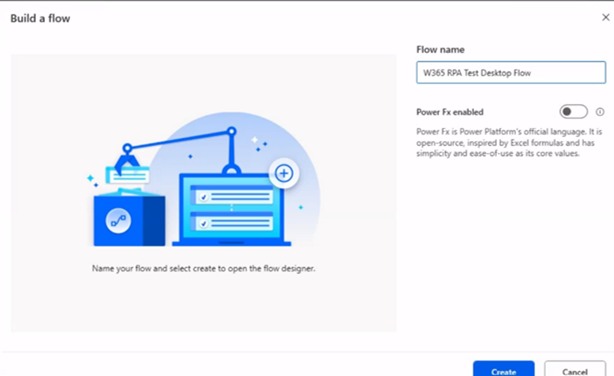
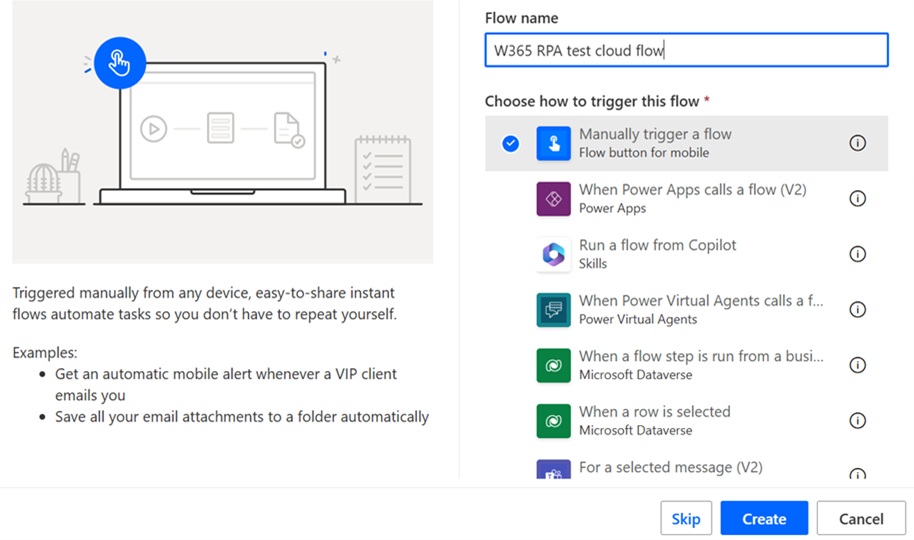
 Step 13: Navigate to the Power Automate web portal. Name and create an instant flow to trigger the desktop flow you created. The example below shows a manual trigger, but you can specify other triggers that would automatically launch a Windows 365 Cloud PC session and run the flow independently.
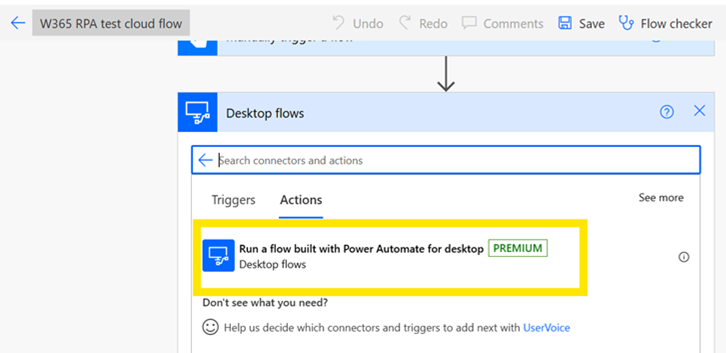
 Step 14: Add the ‘Run a flow built on Power Automate for Desktop’ action to trigger the previously created desktop flow. Since this is a Premium action, a Power Automate Premium licence is required to use it in the flow.
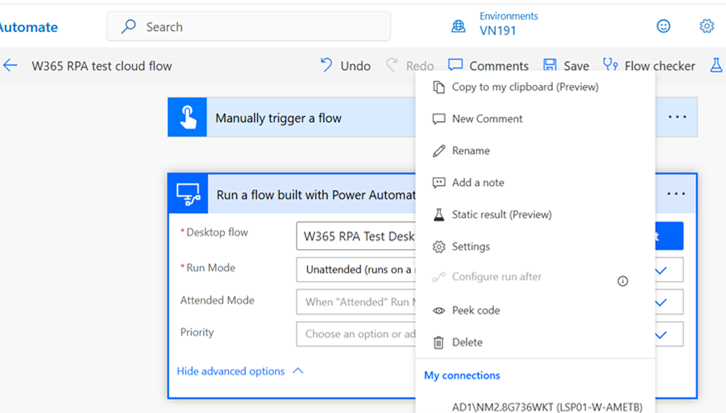
 Step 15: Configure the ‘Run a flow built on Power Automate for Desktop’ action. From the drop-down menu, select your desired desktop flow. Set the Run mode to ‘Unattended’. Create a connection using the credentials you use to log in to the W365 machine.
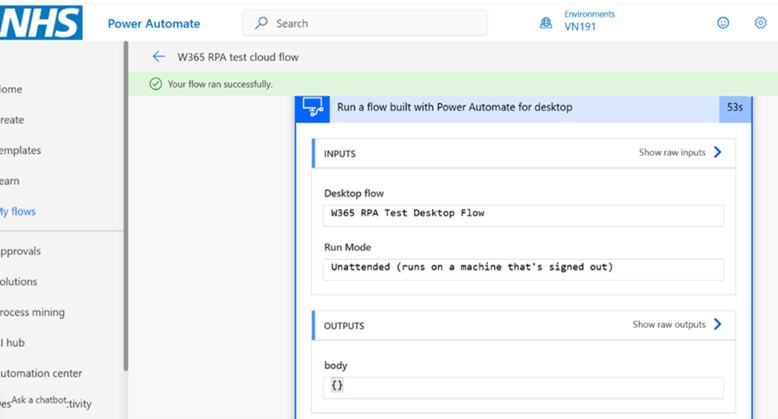
 Step 16: Close your W365 machine session and run the flow. It is important to note that the flow will fail if the session remains open. Ensure that the flow has completed before reopening the session. Once the flow executes successfully, reopen the W365 machine and verify the actions performed by the RPA. Do not open the session while the flow is running, as this will cause it to fail.
Please see Considerations for unattended automation and Error code when running desktop flows for recommendations on resolving error codes encountered during the execution of unattended desktop flows.
Bring Your Own Virtual Machine (VM)
This section outlines the steps to set up Bring Your Own VM for using unattended RPA.
 Step 1: Provision the virtual machine (VM) in your environment, whether it is cloud-based or on-premises. If Power Automate Desktop is not already installed on the VM, proceed with the installation.
 Step 2: Verify that the Power Automate Edge extension is enabled. If the extension is installed, you will see an option to remove it, as shown below.
 Step 3: Install Power Automate machine runtime. If it is already installed, you may proceed to Step 4. If it is not installed, open Power Automate and select ‘Settings’ from the top right-hand corner. Select ‘Install Power Automate machine runtime’ and follow the instructions. After the installation process is complete, confirm that Power Automate machine runtime is installed. If an error occurs during installation, try restarting the machine and repeating the steps.
Step 4: If your VM is provisioned on a different network than your Power Platform environment, you will need to update Power Automate Desktop to enable registration. Please refer to the tenant registration guidance for detailed instructions.
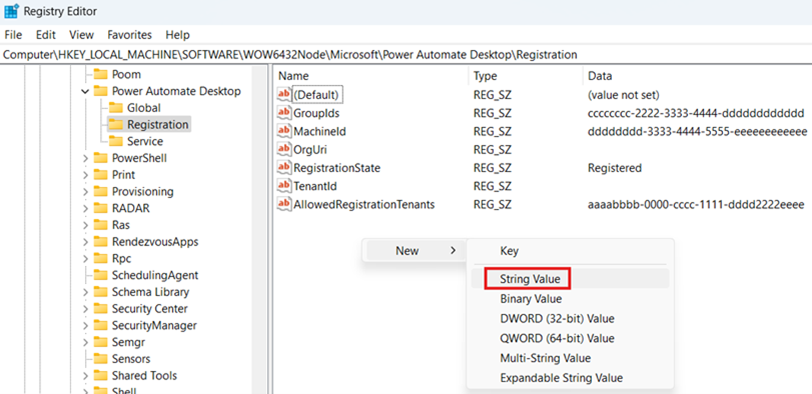 Step 5: To add your local tenant to the allowlist on a single machine, start by launching the ‘Registry Editor’ (regedit.exe) by pressing Windows + R. Navigate to Computer\HKEY_LOCAL_MACHINE\SOFTWARE\WOW6432Node\Microsoft\Power Automate Desktop\Registration. Then, select Edit > New > String Value and create a new string value named AllowedRegistrationTenants.
Step 6: If you do not know your tenant ID, log into the Power Automate portal and press Ctrl + Alt + A to locate the tenant ID in the TenantId property. Then, double-click the AllowedRegistrationTenants string value and set its data field to a comma-separated list of the tenant IDs that the machine is allowed to register with (e.g., 3EF1d993-CBD4-4DEA-A50E-939AEDB23F21,5B19777D-814C-43F3-9317-CDBAD0846ED8).
 Step 7: Register the machine with the environment. Open Power Automate machine runtime.
 Step 8: Sign in using the environment credentials for the location where you plan to implement unattended RPAs, ensuring that the necessary licences are attached. Your machine should then automatically register in the selected environment.
 Step 9: If your machine is not yet registered, you will receive a prompt to select a machine-running environment. Power Automate will then use this environment to execute all triggered desktop flows.
 Step 10: To ensure that your machine is registered to the environment, log into the Power Automate portal. In your select environment, the registered machine should be visible.
 Step 11: Once the connection is successfully established, the machine settings will display the following fields:
- Machine name: A unique name to identify the machine
- Machine description: An optional description of the machine
- Machine environment: The running environment of the machine.
 Step 12: Confirm that Network Level Authentication is disabled. Navigate to Control Panel > System and Security > System > Remote Settings > System Properties > Remote > Remote Desktop. Verify that ‘Require devices to use Network Level Authentication (Recommended)’ is unchecked.
 Step 13: Go to your physical machine, open the Power Automate desktop, and log in to the same environment.
 Step 14: Create the flow that performs the required actions and test it.
 Step 15: The example below is a sample flow for creating and saving an Excel file. Save your own flow and then test it on a physical machine.
 Step 16: Navigate to the Power Automate web portal. Name and create an instant flow to trigger the desktop flow you created. The example below shows a manual trigger, but you can specify other triggers that would automatically launch the VM and run the flow independently.
 Step 17: Add the ‘Run a flow built on Power Automate for Desktop’ action to trigger the previously created desktop flow. Note that this is a Premium action, so a Power Automate Premium licence is required to use it in the flow.
 Step 18: Configure the ‘Run a flow built on Power Automate for Desktop’ action. From the drop-down menu, select your desired desktop flow. Set the Run mode to ‘Unattended’. Create a connection using the credentials you use to log in to the VM.
 Step 19: Close your VM session and run the flow. It is important to note that the flow will fail if the session remains open. Ensure that the flow has completed before reopening the session. Once the flow executes successfully, reopen the machine and verify the actions performed by the RPA. Do not open the session while the flow is running, as this will cause it to fail.
Please see Considerations for unattended automation and Error code when running desktop flows for recommendations on resolving error codes encountered during the execution of unattended desktop flows.
Example use cases
When identifying processes suitable for automation, you should consider the following:
- Processes that are well-defined and free of exceptions. These processes should have clearly defined rules that specify the required actions, making them easily programmable.
- Processes that are repetitive and monotonous, which are generally unengaging to perform manually due to their consistent nature.
|
Process |
Function/Department |
Description |
| Pay Progression Reminders | HR | Bot receives employee data from Electronic Staff Record (ESR), sends individual reminder emails ahead of pay progression date containing necessary information and action to be taken. |
| Invoice Reminders | Operational | If supply orders are delayed, the automation contacts the supplier for an update. When the update arrives, the bot identifies the relevant department and forwards it on. |
| Last Reviewed Date | 08/10/2025 |